

I have loved embroidery for years but only recently started to learn how to embroider. I grabbed a few pre-printed kits to learn the basics but quickly found that the patterns you can purchase (and find for free!) online are limitless… there’s so many options! I want to embroider all. the. things. but the standard method of transferring a pattern (printing it and using tracing paper to place it on your fabric) is hard for a girl with bad wrists and little patience.
So instead I grabbed my Cricut Maker and a washable fabric marker… if the patterns are already on my computer surely I can just have my Cricut draw them directly on the fabric?!
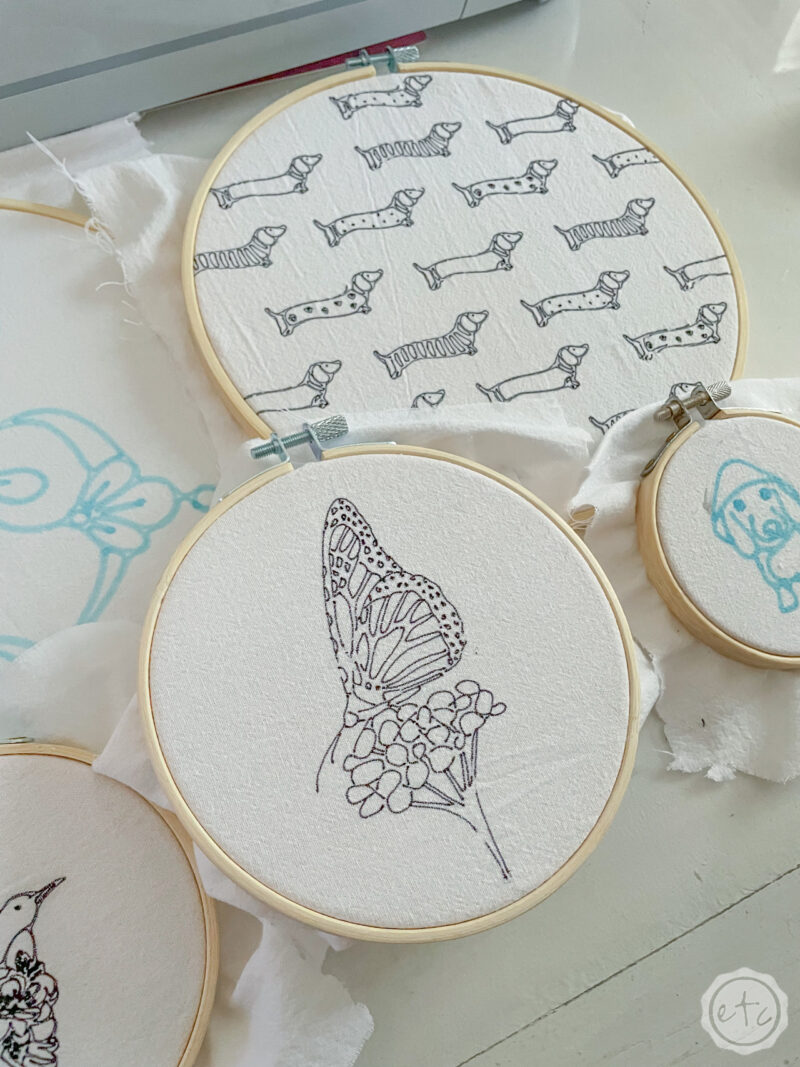
There are a few limitations: first you have to take the pdf pattern and convert it to a svg or png that Cricut Design Space can read and you’re limited to designs that will fit on a cutting mat (meaning anything larger than 12×12 will need a bit more work or a different method). BUT for most small designs that is not a problem. I even drew a large butterfly for a 12 inch hoop with my Cricut… which is pretty darn large.
SO let’s get started so that we can embroider a few of these fun designs! This method will work for any pattern you like (and I’ve included all 6 of the patterns I drew today down below) but the main pattern we’ll be using for this tutorial is the Free Dachshund Doggie in a Raincoat design that I received when I purchased the larger Dachshund Design from Get Stitch Done Designs.
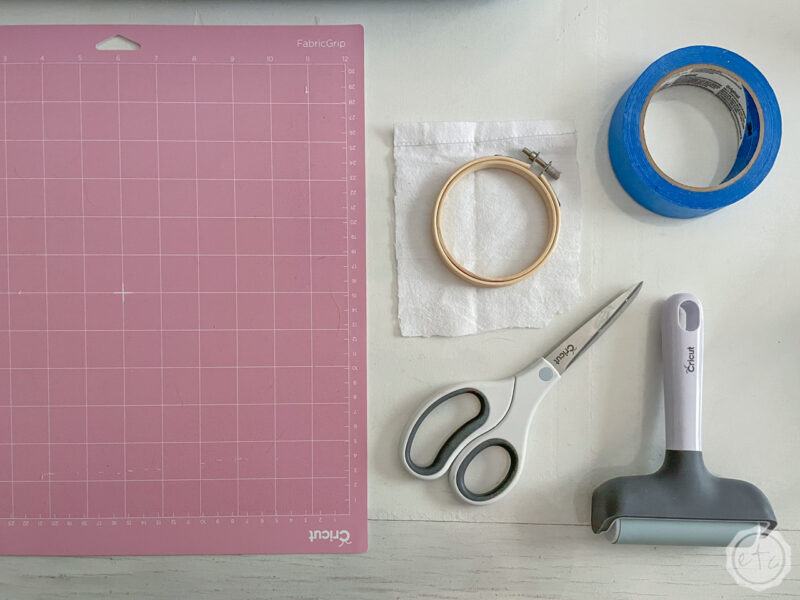
Supplies:
- Cricut Maker 3
- Cricut Fabric Grip Mat (that’s the one I use… it’s pink and holds everything)
- Brayer
- Painters Tape
- Embroidery Fabric
Pens
- Washable Fabric Pen (Cricut Brand)
- 0.4 Fine Point Pen (Cricut Brand)
- Heat Erasable Pen (Non-Cricut Brand… you’ll need a non-cricut pen holder for this one)
- Heat Gun for Erasing Heat Erasable Pen
Patterns
- Dachshund Pattern (repeating design, the Dachshund in a Raincoat design was a freebie that came with this order)
- Floral Initial Pattern (large floral letter E)
- Monarch Butterfly on Milkweed (One of the patterns in this fun Creative Embroidery and Beyond Book)
- Hummingbird Pattern
- Butterfly Pattern

Step 1: Upload your Pattern to Cricut Design Space
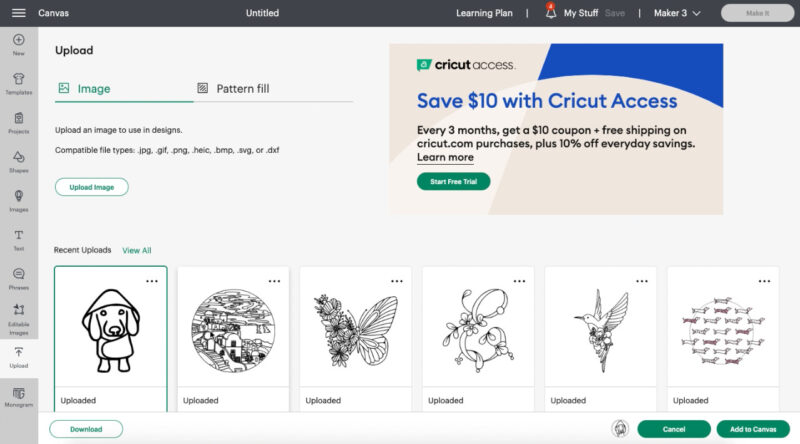
Ready to get started? Before we can draw our pattern we’ll have to upload it to Cricut Design Space. In this case I’ve already converted our pdf pattern to a png so we’re ready to go… isn’t he cute?!
Of course, the main problem here is that you can upload a SVG, PNG or JPG but most embroidery patterns (like this little dachshund pattern) are delivered as a PDF. I’ve already converted this little pattern but if you need help converting your pattern to a format that will upload then check out my post on How to Upload an Embroidery PDF Pattern to Cricut Design Space.
Once your SVG/PNG is uploaded you can give it a name and add it to your canvas… the more complex your pattern is the longer it will take. This little Dachshund in a Raincoat was pretty fast but the detailed thread painting pattern of Santorini I purchased for an upcoming cruise (… to Santorini)! It took a minute!
The larger dachshund pattern that this little guy came with? It also took a minute… that’s ok just let it do it’s thing and then add it to the canvas when it’s done.

Step 2: Prepare Pattern to Draw
Perfect!
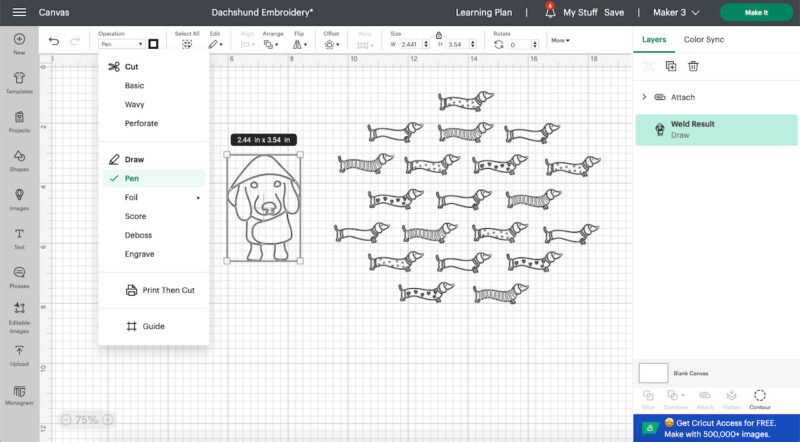
Now that we have our pattern on the canvas let’s get it ready for drawing. To be drawn? We want to draw this pattern on our fabric with our Cricut… let’s get it ready for that! Cricut loads all designs into the software as a cut file by default… so select your pattern and change the operation in the top drop down menu.
Instead of basic cut we want to scroll down and select the Draw: Pen option.
Easy peezy!
Now Cricut knows we want to draw this line with a pen instead of cut it with a blade.
From here we need to re-size our design… take a look at your hoop, your fabric, whatever you’re working on and decide how big you want the actual design to be drawn. In this case I want my little doggie in a raincoat to be quite small. He’s going on a 3 inch hoop so I’m going to set his height to 2.5 inches tall.
Then he’ll fit for sure!
Now he’s the right operation type and size so we can hit make it. This will pull up a mock-up of our cutting mat with our design on it… instead of leaving the design in the top left corner we’ll need to move it to the center of where our fabric will be.
In this case we’ll cut a 5×5 piece of fabric so our dachshund should be right around the 2.5×2.5 line… think battleship y’all. Line that puppy up so that he’ll be drawn right in the middle of our fabric on the real life cutting mat and not in the corner… we need space all around him to go through the embroidery hoop after all.
Now all that’s left is to select your fabric (I’m using cotton) and load your pen (I’m using a washable fabric pen for this design)… and you’re good to go. Our design is ready to roll in Cricut Design Space so let’s prep our actual materials on our cutting mat.


Step 3: Cut your Fabric
Ready for the fun part? For this little doggie we’re using a small 3 inch hoop so I laid the hoop on my larger piece of fabric and cut out a square that extended about an inch around each side of the hoop… so that you can pull and tighten the fabric without a lot of fuss.
In this case I’m designing pieces that will be displayed in their embroidery hoops for a larger display but think about that final display step now… do you need more fabric when you’re done or is the minimum going to work? You can always cut your design out of the hoop but you can’t easily add fabric so make sure you have enough now.
In this case I ended up with a piece of fabric that was about 5×5 inches which is quite small… nice.


Step 4: Load your Fabric onto your Cutting Mat
We are so close to drawing! Go ahead and take your piece of fabric and lay it on your cutting mat. Make sure it’s as straight as possible and press it firmly into place. As always start on one side and smooth it to the other side so that you get a clean surface.
With fabric it’s easiest to use your brayer to get a nice tight bond without any wrinkles or air pockets.
If your cutting mat is fresh the brayer should be more than adequate to hold the fabric in place but if you need a little more peace of mind you can use a bit of painters tape to make sure the fabric doesn’t shift. We want clean lines for our pattern after all!
Once everything’s loaded and set we’re good to go… load your favorite fabric pen, hit start and watch the magic happen!
Which fabric pen should I pick?
I have 3 pens that I prefer for these designs: a washable fabric pen (from Cricut so it’s easy to use with my machine… this one is a thicker pen and writes blue… I like that it’s washable but wish it came in a 0.4 tip), a 0.4 fine tip pen (also from Cricut so super easy to use with my machine and gives you super skinny lines for small detailed designs… but it’s permanent so if you don’t embroider it perfectly you may see the lines) and my favorite a heat erasable pen (it has a 0.5 tip so the lines are skinny and easy to see plus it’s heat erasable so you can hit it with your heat gun and the lines disappear… even once it’s embroidered which is awesome. BUT it’s not a Cricut brand pen so you have to use a 3rd party pen holder which isn’t my favorite).
Depending on the design I may use a different pen… but there’s the full run down of the 3 I reach for most often.


Fabric Pens and Troubleshooting
Once you hit go it’s a pretty good chance your design will draw perfectly and you’ll be on to the next step but what if it doesn’t? What happens if you have issues with your Fabric pen or your machine? When doing these 6 designs I ran into 2 problems so I thought I’d address them here.
3rd Party Pen Holder:
My heat erasable pen is my favorite but it doesn’t work as well in my machine as I’d like. I just ordered a new adjustable pen holder (linked up above) that a friend recommended and hopefully that will solve the problem but in this case my pen was too wobbley and the end design looked un-calibrated. In this case I simply used my heat gun to erase the design and re-drew it with my washable fabric pen from Cricut.
In any case if your design doesn’t draw perfectly (and it isn’t permanent ink) you can erase it, re-calibrate your machine (just in case) and try again. If it is permanent ink you’ll need to cut a new piece of fabric before you try again.
My Design Drew Off Center
This butterfly on the other hand drew just fine… just not in the right space. Because this was a larger design with more fabric the fabric messed with the roller wheels and the entire design ended up drawing 2 inches to the left. Which would be fine except it won’t fit in my embroidery hoop that way!
Since I used a washable pen for this piece I simply washed my fabric and then re-loaded it making sure to keep the fabric away from the roller wheels. To avoid this load your cutting mat into and out of your machine a few times before you hit go and make sure to watch the roller wheels. If they’re getting stuck or moving the fabric a ton it’s probably worth adjusting your mat to avoid this problem in the first place.
In my case the fabric itself was fine but the right side had a finished edge that was too thick to fit under the roller wheel… removing that finished edge let the roller wheel move freely and my butterfly drew right in the middle of the fabric the second time around.


Step 5: Get Ready to Embroider your Design!
Now we’re done! Hopefully your design drew just fine and didn’t need any trouble shooting… but like all projects this ones a bit of a learning curve. Fortunately once you have it down you’ll be able to draw all types of patterns so you can embroider all types of projects!
I’m working on an entire embroidery display project so I went ahead and drew 6 different designs in all different sizes… Now I have PLENTY to embroider over the next few months!
I’ll be adding individual videos to my YouTube channel as these are finished so make sure to follow along over there if you’d like to see these hoops completed. Or grab the pattern from the supply list above and work on it with me!