• House Tour
    • Reveals
  • About
    • Smith Life
    • Disclosure and Privacy Policy
      • Terms and Conditions
      • Store Affiliates
  • Contact Me
    • Want a Button?
  • Shop
    • Floral Printable Planners
    • Paint eBooks and Packages
    • Wedding Binders & Extra Printables!
    • Planner Bundles
    • Planner Accessories
    • Home Decor Printables!
    • Cart
    • Bloglovin
    • Facebook
    • Instagram
    • Pinterest
    • Twitter
    • YouTube

Happily Ever After, Etc.

Creating Our Own Fairytale

  • Happily Ever After, Etc.
  • Home
  • Home Decor
    • My Home
    • Paint
    • Before and After
    • Tablescapes
    • Mood Boards
    • Furniture
  • DIY & Crafts
    • New to Cricut – Start Here
    • Cricut Projects
    • Resin
    • Scrapbooking
  • Organization & Planning
    • Cricut
    • Organization
    • Planner
  • Wedding
    • Cricut Wedding Projects
    • Free Wedding Binder
    • Bride Bag- The Ultimate Wedding Planner

How to Turn a Globe into a Guest Book for your Wedding

Hey y'all

When I was planning my wedding I had fifty bazillion decisions to make (yes that’s a real number… I counted). What color napkins should I pick? What bridesmaids dresses would work for ALL of my girls… and be in budget? Could the best man wear converse (NO!)… It took a while to work through the staggering amount of fluff to decide every single little detail. If you are a bride (or have ever been a bride, holla!) then you know what I’m talking about! It’s enough to make you want to scream!

Mr. and Mrs. The Start of Happily Ever After | Happily Ever After, Etc.

Looking for a bunch of posts on DIY & Crafts? I’ve got you covered!
Click here to see all of my how to DIY & Craft posts in one place!

The one decision I didn’t have to work to hard on was my guest book. I knew that I didn’t want your typical paper bound book filled with signatures. I was afraid that it would get stuck on a shelf in the back of a closet somewhere, collecting dust… completely forgotten about. I didn’t want my memories to be dusty! I wanted something that would be seen everyday… out in the open… not just in plain sight but part of the decor!

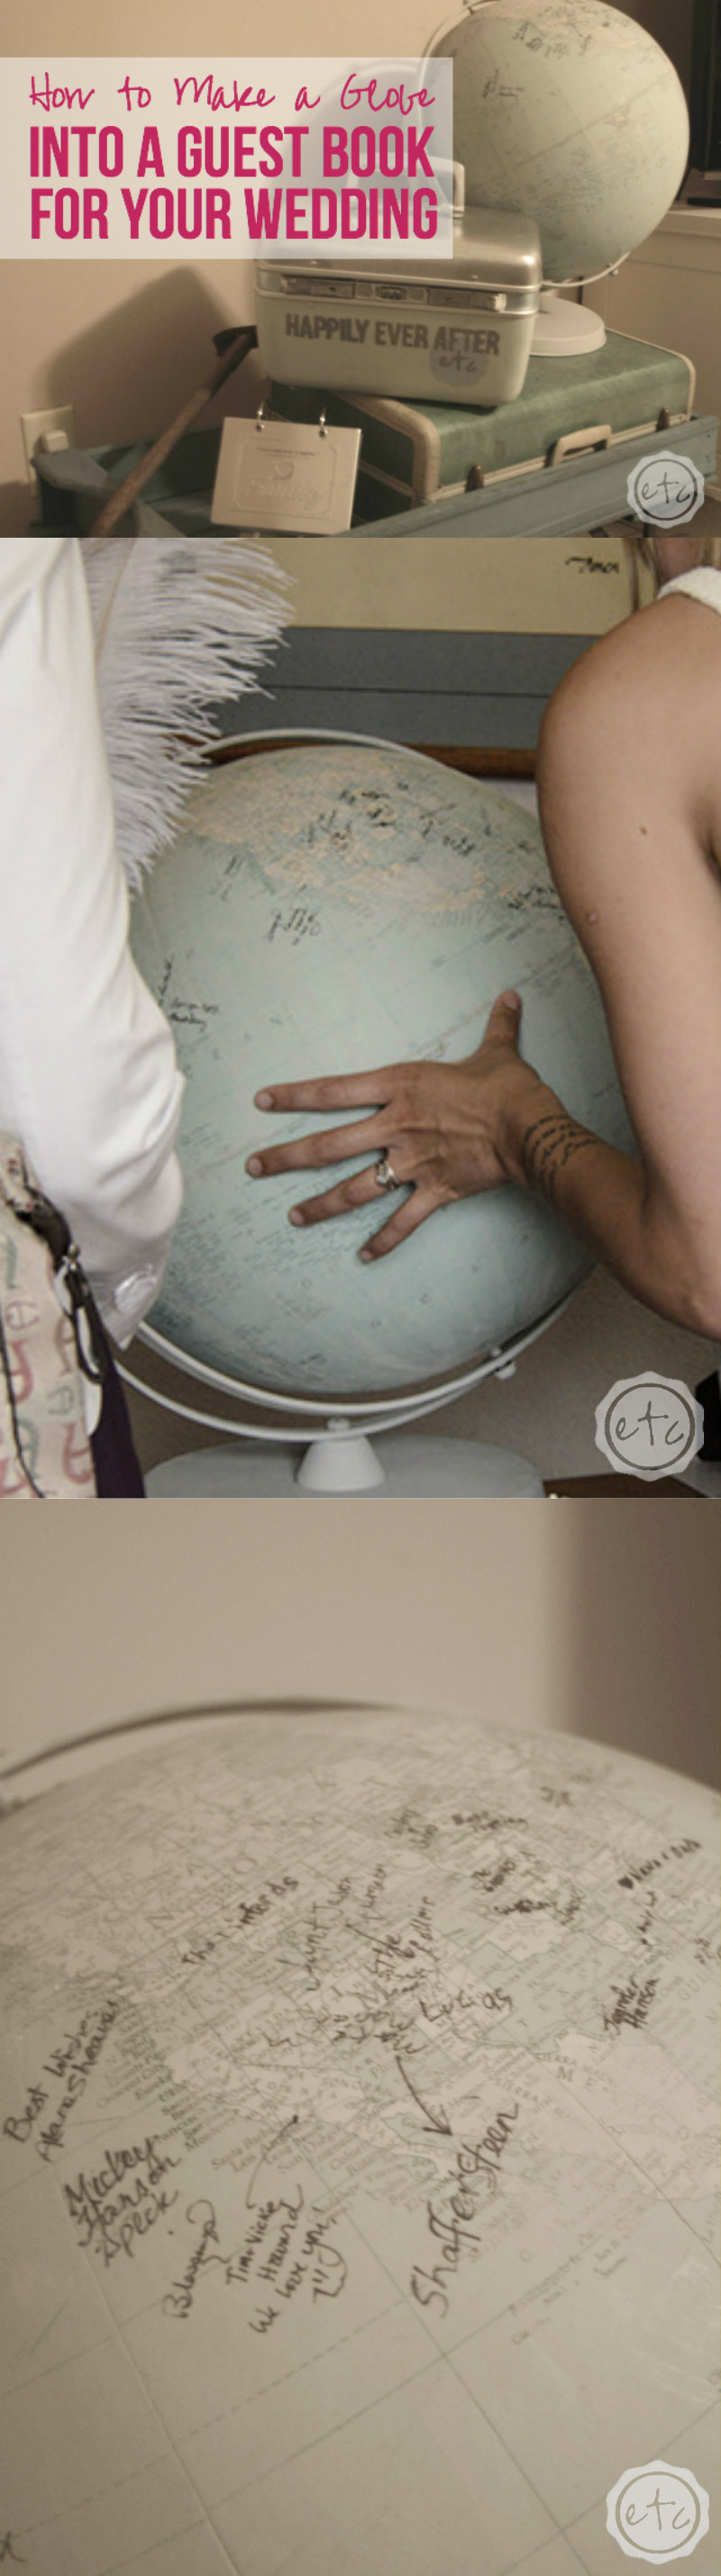
I love antiques, all things blue and traveling around the globe… so when I found the idea of using non-traditional items for a guest book I knew immediately what I wanted to use. A globe. A REALLY big globe. Not a teeny tiny globe that my guests would have to fight over real-estate on but a big honking one that would blend into my decor at home… while standing out. I didn’t want it to be forgotten!

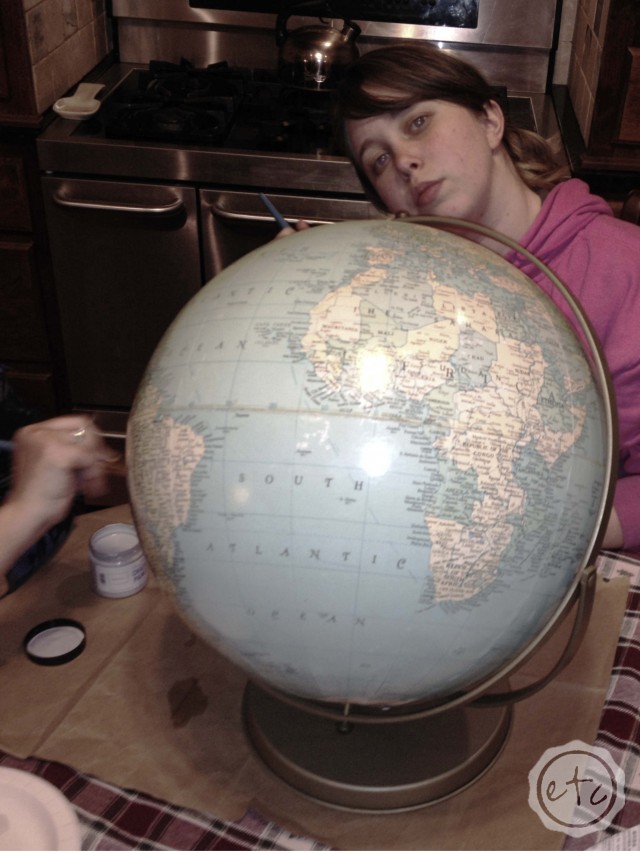
My mom and I looked around for a while trying to find the perfect globe… until one day I got this picture:

How to Turn a Globe into a Guest Book for your Wedding

It’s large (my mom had to have help to carry it out of the store), tealy blue (so it goes with my color scheme)(yes tealy is a word…) and the base isn’t make out of weird wood (read as: easily painted silver!). It seemed like the perfect globe! Mom took it home and the next time I made the trip to Alabama we fixed her up.

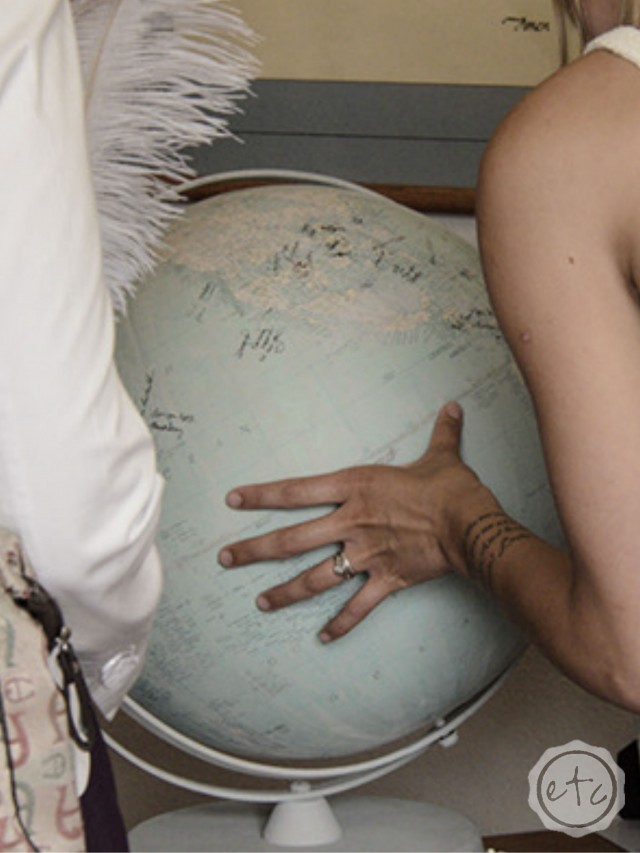
The only downside of using a globe as a guest book is that the surface is slick… read as: not good for signing. Plus the black writing for all of the countries and oceans would be hard to read peoples signatures over. So we decided to do what any rational bride and mother-of-the-bride would do… we painted it.

paintingHow to Turn a Globe into a Guest Book for your Wedding

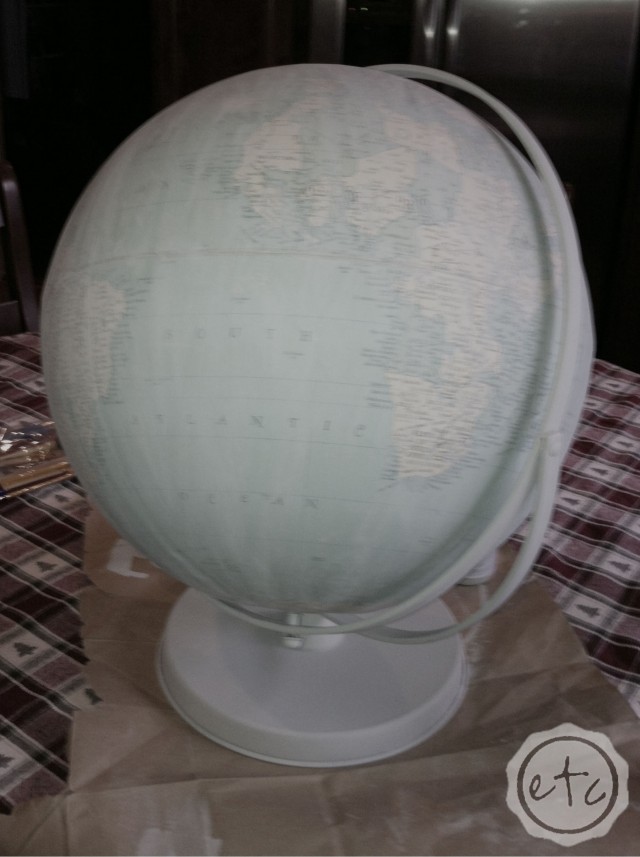
Using a bit of Annie Sloan Chalk Paint in Paris Grey we gave the entire globe a light wash. All this means is that we mixed a tiny bit of water with a tiny bit of paint and put on LIGHT layers. We wanted a slight grey sheen to the top of the globe so that the surface would be easier to write on… but we didn’t want a solid grey globe. The point of the globe was that it was a GLOBE… not a giant grey orb. We painted the base with a solid paris grey mixture.

I was worried about the whole painting the globe thing (it was so pretty! I didn’t want to screw it up!) but it turned out so good! Even my little brother looked at it when he got home that night, screwed up his face in that way boys get when they’re thinking and went “It looks good, I think this will be easier to sign then before”. Which was impressive since he knew nothing of my internal should-I-paint-my-globe-or-not-list-of-pros-and-cons-debate. He (of course) had been tuning out wedding talk for months at this point.

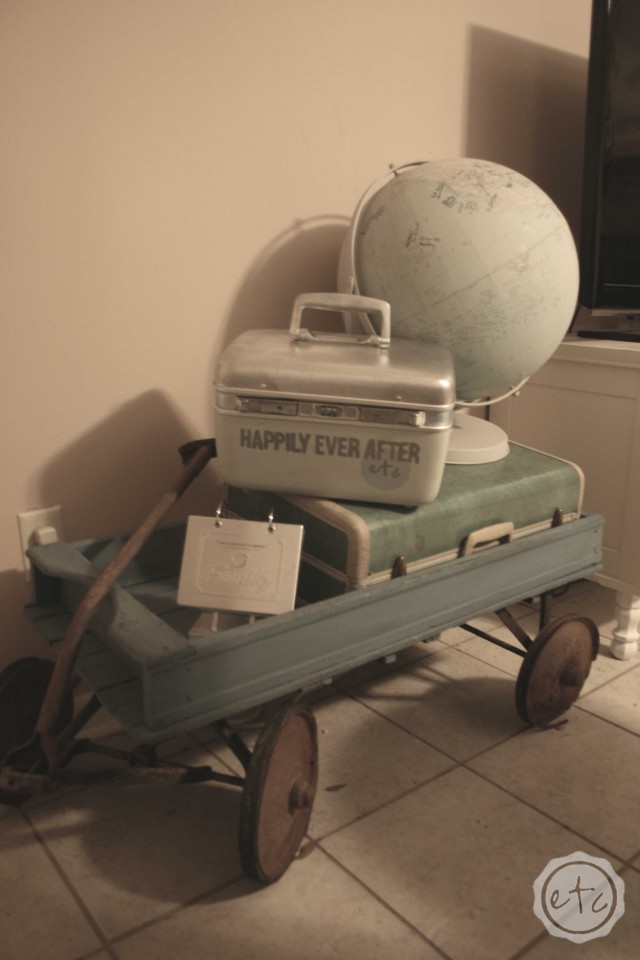
It looked amazing at the wedding! I am so glad that we went with a globe instead of a traditional guest book!

How to Turn a Globe into a Guest Book for your Wedding How to Turn a Globe into a Guest Book for your Wedding

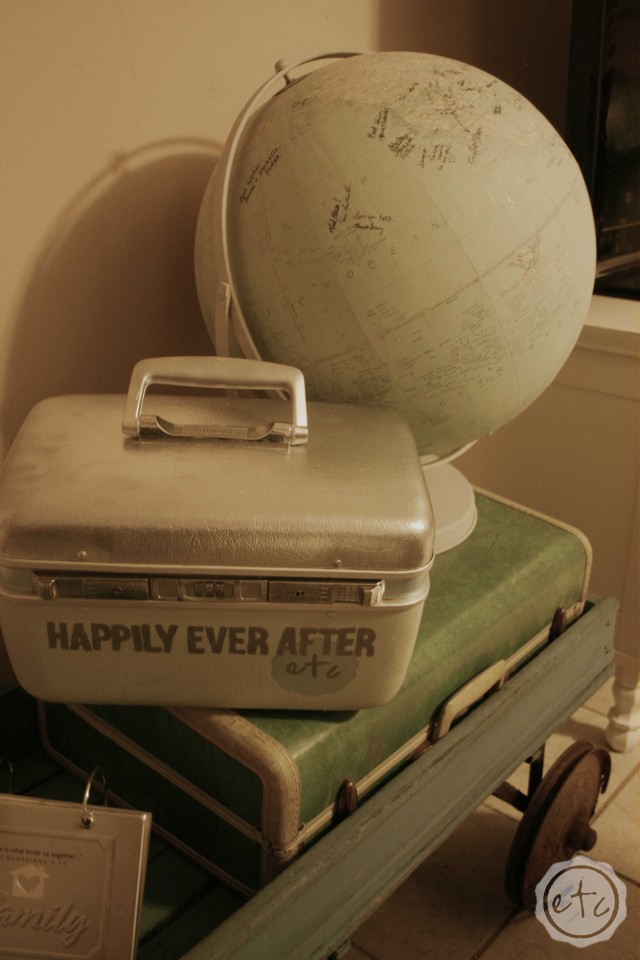
As good as it looked at the wedding? It looks even better in our living room! I love walking past it every day and seeing where people signed… I’m pretty sure my brother is Antarctica.

How to Turn a Globe into a Guest Book for your Wedding How to Turn a Globe into a Guest Book for your Wedding How to Turn a Globe into a Guest Book for your Wedding How to Turn a Globe into a Guest Book for your Wedding

How to Turn a Globe into a Guest Book for your Wedding with Happily Ever After, Etc.

Linking up with: Tatertots and Jello & To Travel and Beyond

Save

Get Your FREE Wedding Binder

Trying to plan your perfect wedding?

Here's 42 FREE printables to help you get organized!

Success! Now check your email to confirm your subscription.

There was an error submitting your subscription. Please try again.

Powered by ConvertKit
You made it through the entire post? That means you're one of my new favorite people! I'd love to be friends and see what else you would like to read about! Leave me a comment and then sign up for your very own FREE paint planner.... so that you can keep track of every single paint color with ease!
Welcome back! I'd love to be friends and see what else you would like to read about! Leave me a comment and then sign up for your very own FREE paint planner.... so that you can keep track of every single paint color with ease!

Show me some LOVE y'all:

  • Facebook
  • Pinterest
  • Twitter
  • Email

Related

«
»

DIY & Crafts, My Home, Smith Life, Wedding 38

Comments

  1. Shonda says

    May 8, 2015 at 2:13 pm

    This is so clever. We had guest from all over the globe. This would have been perfect.

    Reply
    • Happily Ever After, Etc. says

      May 9, 2015 at 8:56 am

      That would be fun… Then you could see where everyone traveled from! Thanks for stopping by Shonda!

      Reply
  2. Amanda Marie says

    May 8, 2015 at 2:31 pm

    Awsome idea! This is such a unique and outstanding idea! It is neat to look at the glob and try to find different signatures! Thanks for sharing! So cool!

    Reply
    • Happily Ever After, Etc. says

      May 9, 2015 at 9:00 am

      You’re so sweet! It’s a fun little treasure hunt to see where everyone signed… And who was adventurous to sign somewhere other than the U.S.!

      Reply
  3. Brandee says

    May 8, 2015 at 2:54 pm

    What a very cool idea! We had a picture frame at ours and people signed the matte around the picture. It hangs in our living room in a very prominent spot and I still smile every time I look at it. Even the kids’ signatures and scribbles that stressed me out at the time, heehee.

    Reply
    • Happily Ever After, Etc. says

      May 9, 2015 at 8:59 am

      I love that idea! Luckily we didn’t have any messy signatures or I would have been stressed too… It’s funny how what stresses us out at the time doesn’t matter years later!

      Reply
  4. Michele Bergh says

    May 8, 2015 at 4:14 pm

    What a great idea! It’s so original and a fun way to honor your guests and keep the memories alive.

    Reply
    • Happily Ever After, Etc. says

      May 9, 2015 at 9:02 am

      I agree Michele, I love looking at it and remembering! It’s such a fun piece of our living room!

      Reply
  5. Kayla says

    May 8, 2015 at 4:42 pm

    This is such a cool idea! I’m getting married in November and still trying to decide what to do for my guestbook. I’ll definitely keep this in mind! Thanks for sharing 🙂

    xoxoxo,

    Kayla

    Reply
    • Happily Ever After, Etc. says

      May 9, 2015 at 9:03 am

      Congrats Kayla! That’s such a fun (and stressful) time…mid you don’t love the globe think about what’s important to you and your fiancé! My idea is That anything can be a guest book!

      Reply
  6. Amanda Marie says

    May 8, 2015 at 4:44 pm

    NEAT! This is the coolest idea I have ever seen for a guest book! So creative and fun! It is going to be a great decoration and conversation piece! Thanks for sharing! Have an awesome weekend!

    Reply
    • Happily Ever After, Etc. says

      May 9, 2015 at 9:05 am

      Thanks Amanda! We think it’s pretty cool too! I love when people ask about it!

      Reply
  7. Tayler Morrell says

    May 8, 2015 at 9:59 pm

    What a unique idea!

    Reply
    • Happily Ever After, Etc. says

      May 9, 2015 at 9:05 am

      Thanks Tayler… We love it!

      Reply
  8. Marissa says

    May 9, 2015 at 12:09 pm

    I love this idea! Wish I would have thought of this before I married!

    Reply
    • Happily Ever After, Etc. says

      May 9, 2015 at 2:45 pm

      Haha! I feel like I will be saying that for the rest of my life… so many ideas! Every time I say “I wish I would have done that for our wedding” my hubby says “that’s what we’ll do for our golden wedding anniversary!” Haha!

      Reply
  9. Macy says

    May 13, 2015 at 8:52 pm

    This is an AMAZING idea!! I love the way the globe looks with the chalk paint over it, I may take this idea in the future for one of my clients.

    Thanks for linking up with us!

    Reply
    • Happily Ever After, Etc. says

      May 13, 2015 at 9:02 pm

      I’m glad you like it Macy! Any client to use this would be a lucky gal… Not that I’m biased or anything! Thanks for the fabulous wedding linky party!

      Reply
  10. Andrea says

    May 14, 2015 at 7:45 am

    This is a fantastic idea!! Very fun! Looks like it turned out perfectly!

    Reply
    • Happily Ever After, Etc. says

      May 14, 2015 at 8:00 am

      Thanks Andrea! It turned out exactly as I had hoped!

      Reply
  11. Meg Taylor says

    May 17, 2015 at 8:43 am

    That globe is an AMAZING idea for a guest book!! I definitely need to share that with one of my friends who just got engaged 🙂 Thanks for linking up with us this week!

    Reply
    • Happily Ever After, Etc. says

      May 24, 2015 at 10:46 am

      Thanks for hosting! I saw the globe idea somewhere (pinterest?) and LOVED it! Surprisingly I didn’t already have a globe in our home so I knew it would be the perfect addition! Hopefully your friend likes the idea… I’m working on taking over the wedding industry one globe at a time. 😉

      Reply
  12. Jenny says

    July 20, 2015 at 11:34 am

    Thank you for the rundown of how to make the globe “writeable.” I’m getting married on the other side of the country so trying not to haul a globe on the plane each way. My in-laws-to-be live in the place where we’re getting married so I can just have a globe shipped to them. I’m looking on Amazon and Wayfair at globes and they seem to only go up to 12″ diameter unless they are inflatable or insanely expensive. Any idea how giant your globe is? Just trying to make sure there’s plenty of space to write!

    Thanks!

    Reply
    • Happily Ever After, Etc. says

      July 20, 2015 at 9:13 pm

      Hi Jenny! I had the exact same problems you are currently having… my mom bought my globe and had to have it shipped to Colorado for the wedding! I’m not sure how big my globe is exactly (and it’s packed in the move or I would measure it for you!) but it’s defenitely bigger then 12″… I would guess 20″? If I tried to give it a big bear hug my arms would just barely fit all the way around it. My mom found it at an antique store for about $50… I was worried about having plenty of space to write but in the end I had way more space then I needed! I had about 100 guests so that gives you an idea. If you have any more questions feel free to ask! P.S. you should send me a picture of your globe when it’s done… I’d love to see!

      Betsy

      Reply
  13. Michelle says

    January 21, 2017 at 9:23 am

    Love this idea! Looking at doing this for my wedding in may. What size globe did you use? I want to make sure everyone has room to sign

    Reply
    • Happily Ever After, Etc. says

      January 21, 2017 at 8:53 pm

      It’s about 1.5 to 2 feet from one pole to the other… it’s a big globe and I had tons of places for people to sign left over! Good luck!

      Reply
      • Michelle says

        January 24, 2017 at 11:33 am

        Thank you!

        Reply
  14. Lori says

    October 14, 2017 at 8:04 am

    Love this! I’m going to do this but I have one concern. What kind of pen did you use so that smearing didn’t happen? I stress about smearing. I know so silly.

    Reply
    • Happily Ever After, Etc. says

      October 14, 2017 at 7:10 pm

      Lori, We used thin sharpies… didn’t have any problem! I actually have a post on how I made them! https://happilyeverafteretc.com/how-to-make-a-fancy-feather-pen/

      Reply
  15. Rachel Wilson says

    October 11, 2019 at 2:39 pm

    I think this is a great idea. We are acutally using a globe as our wedding guest book and hace been going crazy as to what we can do so it is easy to write on and wont smear. Im still a little nervous about trying this out. Maybe you can help ease my mind as globes are not cheap and I dont want to mess our up.

    Reply
    • Happily Ever After, Etc. says

      March 5, 2020 at 6:49 pm

      Hey Rachel, congrats on your upcoming wedding! We used a light wash of chalk paint over the globe to give it a chalky texture, then we wrote with sharpies. It worked like a charm! Of course, if you don’t want to put chalk paint over your globe it really depends on the texture of your globe to begin with. Good luck!

      Reply
  16. Susan says

    December 29, 2019 at 3:32 pm

    I made this for my sons wedding and they love it. My first craft project ever! Thanks for the inspiration! Any suggestions on how and what to coat it with after it’s signed to keep it from getting too dirty. Like a wax or coating that’s not to shiny. They want to preserve the cool vintage chalky look.

    Reply
    • Happily Ever After, Etc. says

      March 5, 2020 at 6:46 pm

      Hi Susan! I’m so glad your son loved it! If it’s already been written on (and I wouldn’t suggest sealing it before that as it may be hard to write on afterwards) I would use a clear spray sealer like a polyurethane. A clear wax that would leave a chalky look may smear the pen ink/sharpie. A spray should go over top and preserve the entire piece.

      Reply

Trackbacks

  1. May Round-Up - Happily Ever After, Etc. says:
    May 27, 2015 at 5:01 am

    […] How to Make a Globe into a Guest Book for your Wedding! The one decision I didn’t have to work to hard on was my guest book. I knew that I didn’t want your typical paper bound book filled with signatures. I was afraid that it would get stuck on a shelf in the back of a closet somewhere, collecting dust… completely forgotten about. I didn’t want my memories to be dusty! I wanted something that would be seen everyday… out in the open… not just in plain sight but part of the decor… read more! […]

    Reply
  2. Living Room Reveal... Our Second Home! - Happily Ever After, Etc. says:
    February 12, 2016 at 5:03 am

    […] the guest book from our […]

    Reply
  3. 5 Moving Tips from an Army Brat - Happily Ever After, Etc. says:
    November 14, 2016 at 5:00 am

    […] not sure if he thought it was a trick question or Mom had been sniffing the markers but it was my large guestbook… globe. Imagine […]

    Reply
  4. Guest Book Ideas That Highlight Your Nerdy Side - My Nerdy Wedding says:
    July 26, 2017 at 12:27 am

    […] travel a huge part of your life? Buy a globe and have guests sign that. Or a large wall map that you can later have framed and hang in your […]

    Reply
  5. Creative Wedding Guest Book Alternatives You Can Make Yourself | The Budget Savvy Bride says:
    November 29, 2018 at 7:01 am

    […] make this, purchase an old globe and use a light wash of chalk paint to lighten the surface and make it easier to […]

    Reply

Leave a Reply Cancel reply

Your email address will not be published. Required fields are marked *

sidebar betsy I'm Betsy, Home Decor Enthusiast, Yorkie Mama, Crafter, Blogger, Picky Eater, Chief Mess Maker, Antique Hoarder and Graphic Designer. You can generally find me working on (attacking with a paintbrush) the 3 bed, 2 bath home we are currently renting! Our home might not be perfect but it is ours & if you hang out long enough you'll see that what we lack in know-how we make up for in passion!
Shop My Craft Room

Shop My Home

Featured Articles

15 Fabulous Ideas to Organize your Laundry Room
25 FREE Printables For Your Home!
What to do with EXTRA Paint with Happily Ever After Etc
10 Ways to Make Your Bed EXTRA Comfy with Happily Ever After Etc.
Ready to Pick your Perfect Paint Color? We'll help you with our 6 Day FREE E-Course

Hey y’all,

Profile

I'm Betsy, Home Decor Enthusiast, Yorkie Mama, Picky Eater, Chief Mess Maker, & Graphic Designer...

A Little Note!

Many of the links on Happily Ever After, Etc. are affiliate links. If you purchase a product after clicking an affiliate link, I receive a small percentage of the sale for referring you, at zero cost to you! How awesome is that? Purchasing through affiliate links is an easy, painless way to help out your favorite bloggers. Thank you so much for your continued love and support! Read the full disclosure here!

Instagram

The number one question people ask when they watch The number one question people ask when they watch my new home tour on YouTube? Why is there so much clutter... um excuse me I like stuff! The second question? How did you frost the doors? Don’t worry... I wrote out the whole process, check out the step by step tutorial on the blog!
With Christmas fast approaching I’m having secon With Christmas fast approaching I’m having second thoughts... about taking down my holiday decorations! I absolutely love all the blush and rose gold this year and think I might have to add more pink to my every day decor. Until then maybe it will just stay Christmas at the Smith house! Tutorials for both the “Merry Christmas” resin sign and the “Dear Santa” Cricut sign are in my profile! #pinkchristmas #pinkchristmastree #pinkchristmasdecor
Well y’all Christmas is coming up quick... which Well y’all Christmas is coming up quick... which means I need to get a move on with all that wrapping! I got a jump start this morning after whipping up a few little resin light bulbs! Check out the full tutorial over on the blog if you’d like to wrap your presents with a few resin goodies this year... and tell me in the comments below. Are you finished wrapping or (like me) are you still getting started? #pinkchristmas #pinkchristmasdecor #resinchristmas #giftwrappingideas
Ready for another fun and easy resin project? Thes Ready for another fun and easy resin project? These little Christmas trees are the perfect beginner level project so if you’ve never done resin before don’t let it intimidate you!! Grab your heat gun and jump in... I’ll walk you through it! Check out the full blog post for these little guys on the blog (link in profile!)
If you haven’t joined Michelle at @weekendcraft If you haven’t joined Michelle at @weekendcraft SVG membership then WHAT ARE YOU WAITING FOR?! I am obsessed with all the cute svg’s and y’all she is doing a live craft night every month to walk you through making one of her designs... and the first craft night is tomorrow! She’ll be making this “Merry everything and Happy always” SVG and it’s so cute! You don’t want to miss it! See you there! 

(Also who noticed the sneak peek at my new kitchen?!)

#cricutsvgfiles #christmassvg #cricutsled
Well y’all I’m getting this close to unpacked Well y’all I’m getting this close to unpacked in my new house!! And since I’m a blogger Christmas is going up! So here’s the question... do you want a 1 month house update or do you want to wait for the Christmas tour? #lulamaefarmhouse #rosegoldchristmastree #newhouse
Well it’s still a work in progress but I finally Well it’s still a work in progress but I finally have a house!! They have to put it together and do all the detailing before I get keys... but we’re in the end game now! Check out my stories for a sneak peek at the moving process... full YouTube video coming soon!
#ad how amazing did these little fall coasters tur #ad how amazing did these little fall coasters turn out?! Plus I absolutely love the matching tray! The best part? This is such a quick and easy resin project... a silicone mold, a little resin and your trusty heat gun and I promise you can make this baby!! Link in profile for the tutorial!! #fallresin #resinforbeginners #cheetahprint
Okay... is it bad if you just want to make coaster Okay... is it bad if you just want to make coasters in the same mold with the same technique but different colors?? They turn out soo differently! Just a sneak peek of my fall coasters and the blush ones I made last year!
Happy #nationaldogday to the fur babies that are ( Happy #nationaldogday to the fur babies that are (literally) behind (beside... or underneath!) all Of my projects! These sweet little cuddle muffins make everything better 😊🐶😘
GIVEAWAY CLOSED Our winner is @kamikvega Check you GIVEAWAY CLOSED
Our winner is @kamikvega Check your inbox girl, this little machine is headed your way! Thanks to everyone who participated... I can’t wait to see where we go from here!

🥳📦🥳 GIVEAWAY🥳📦🥳
If you have loved all of the Cricut projects I make here is your chance to win a Cricut Joy of your very own! If you’re ready for a little craftiness (maybe a little time to relax) then this giveaway is for you! I’m teaming up with a few of my cavities crafty bloggers so that one of you can win your very own mini crafting machine. Good Luck!!!!

TO ENTER GIVEAWAY:
1.) Follow
@creativeramblings 
@weekendcraft 
@craftylumberjacks 
@this.is.tisa 
@justcallmehomegirl 
@happilyeverafteretc
@lovebird_heartworks 
2.) Like this post
3.) Tag a friend in the comments.
.
.
.
Hurry! Giveaway ends Saturday 8/29/20 at 11:59PM PST. Winner will be notified via Direct Message. Share or tag a friend who'd love to win a Cricut. .
.
.
This contest is in no way affiliated with or sponsored by Instagram or Cricut. To enter you must have a U.S shipping address.
A little peek into the fun summery Tablescape I pu A little peek into the fun summery Tablescape I put together for a little garden party! Want to check out the full table? Wondering where to find all the pieces... click the link in my profile for all the details!
#ad Did you know you can put infusible ink onto al #ad Did you know you can put infusible ink onto aluminum? It's sooooo simple... honestly it's one of the easiest projects I've ever done. Even if you've never used your Cricut before you. can. do. this. I'll show you how every step of the way! Follow along with the full tutorial video over on YouTube! The best part? These little aluminum signs look amazing as part of a larger project! Check out how I added mine to a larger resin wave project on the last slide! @officialcricut #cricutcreated https://lnk2.io/wvMllZf
Okay so It’s no secret that I’ve been obsessed Okay so It’s no secret that I’ve been obsessed with resin for a while now but this week I’ve been playing around with resin waves! Including this tiny resin sea shell! Check out the link in my profile for the full tutorial!
After a lot of struggle, loss and frustration I am After a lot of struggle, loss and frustration I am finally dotting the i’s and crossing the t’s on my next chapter. Yesterday I went and signed the million and one papers to close on my new house! I cannot wait to share the moving (and decorating) process with all of you... next step: keys! #firsttimehomebuyer #newhouse
Load More... Follow on Instagram

Copyright © 2021 · Darling theme by Restored 316

Copyright © 2021 · Darling Theme on Genesis Framework · WordPress · Log in · Privacy Policy

loading Cancel
Post was not sent - check your email addresses!
Email check failed, please try again
Sorry, your blog cannot share posts by email.