

Did you miss me on Monday?! I missed y’all! I absolutely hated not being here but my super awesome plan of writing a blog post on my anniversary weekend fell through. We had an amazing weekend filled with IKEA, Wicked and even a Carnival! Plus we had plenty of time to relax! The plan was to hit up a Panera Bread with wifi on Sunday after we checked out of our hotel and use the wifi to write a blog post… but we were sidetracked. Luckily I’m back today! Thanks so much for waiting for me!
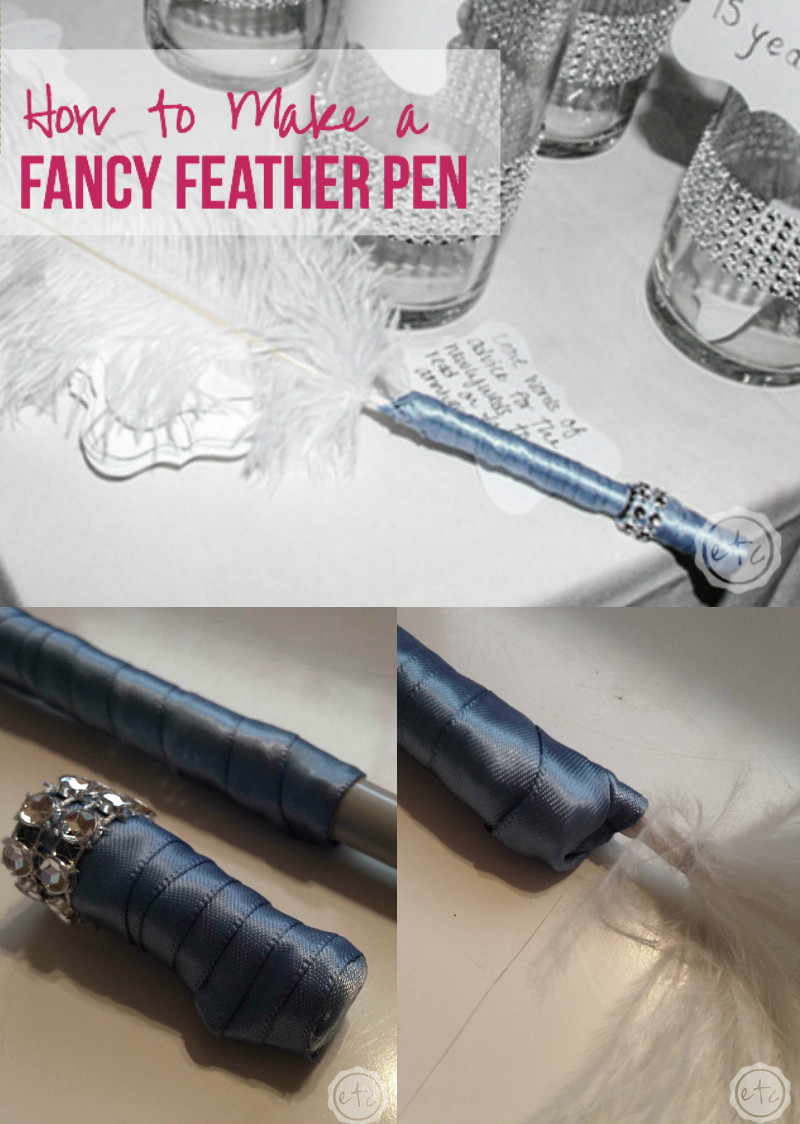
For the first installment in my Mr. and Mrs. series I will be sharing how to make an adorable FANCY feather pen! Why have your guests sign your guest book with a normal pen when you can have a super fancy one? That’s right… absolutely no reason, fancy is always better!
Plus these pens are so easy to make!
Looking for a bunch of posts on DIY & Crafts? I’ve got you covered!
Click here to see all of my how to DIY & Craft posts in one place!

Here’s what you need:
Pens, Markers, Pencils… whatever will sign your book, globe, wood slices or other completely original guest book. Your original pen does not to be fancy… we will be covering the original pen with fanciness!
Ribbon of your choice it can be as small or wide as you like but make sure it has no wire! Floppy, bendable ribbon is the easiest to use! Bonus points for matching your ribbon color to your wedding colors!
Hot glue… for gluing purposes! Obviously!
Extra embellishments! I bought one roll of this fabulous rhinestone mesh and used it on almost every single wedding project! For these fancy feather pens I used it to accent the top of the marker cap however it’s users choice!
The last ingredient is the most important… a large fancy feather!!! I picked ours up at Hobby Lobby where there were several different colors available… pick whatever tickles your fancy!
Making these pens is sooooo easy! My mother-in-law helped me make these for my wedding during one of our giant crafting days, they were so much fun!
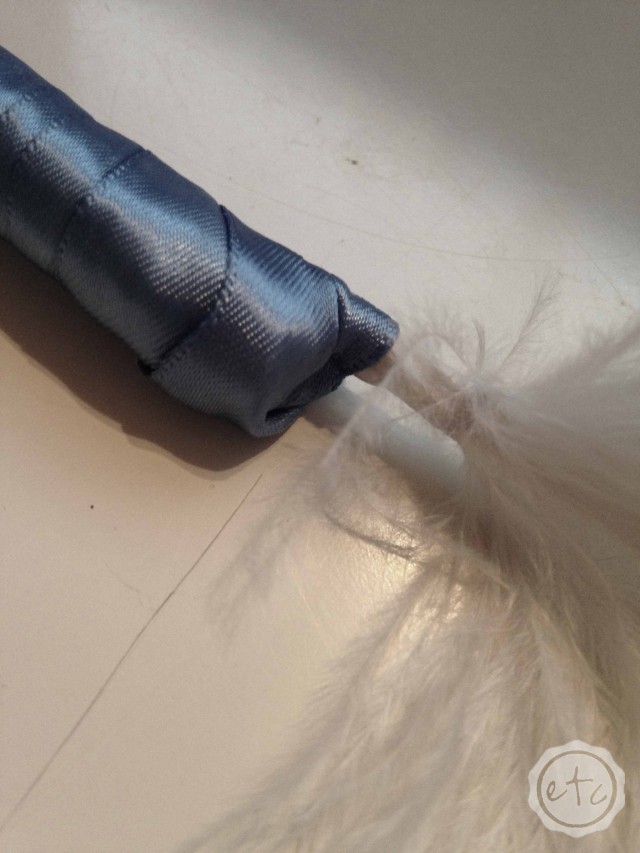
We bought fine tip sharpies for our pens… they would write on our globe (aka guest book) and would work for our advice cards. It was a win win! The first step is too glue your feather directly to your pen! Easy right?
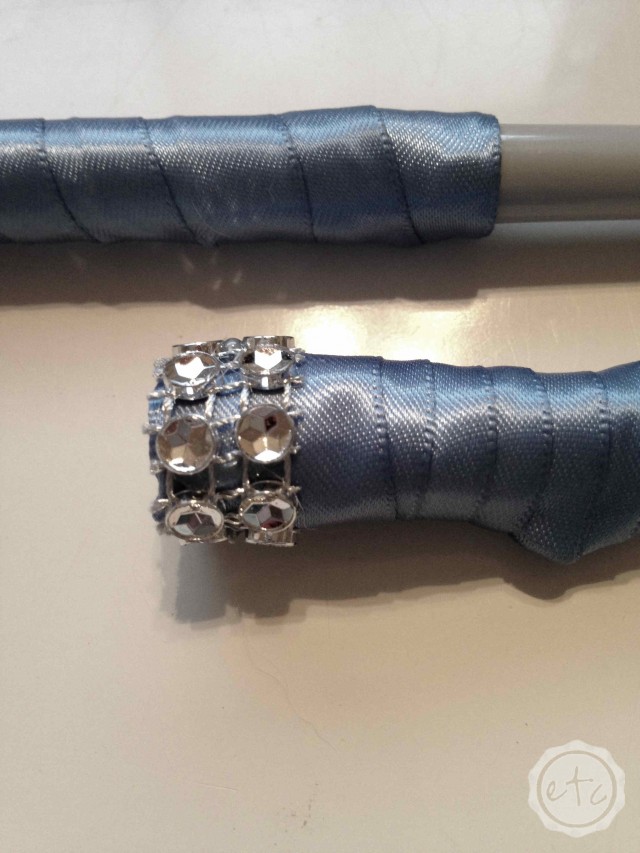
Once your feather is secured you are going to start wrapping your ribbon! Start at the top making sure to cover the end completely with ribbon before moving your way down the pen. Once you get to the bottom of the pen simply glue your ribbon in place directly above the pen cap. Make sure not to wrap OVER the pen cap… then you won’t be able to open your pen! (This may or may not have almost happened to us… I’m not telling).
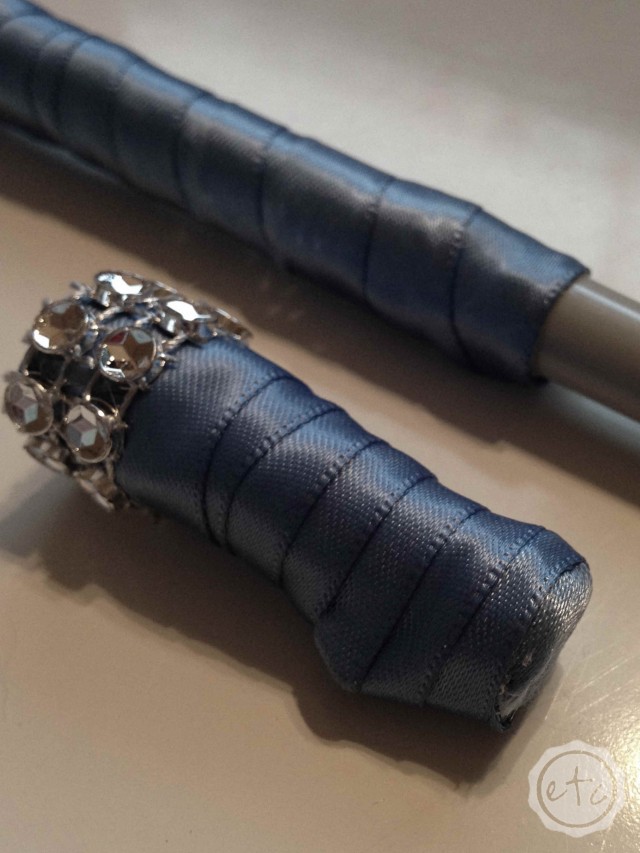
Next go ahead and wrap the pen cap itself… once again make sure to completely cover the end before moving down the pen cap. It shouldn’t take too much ribbon! Once the entire pen cap is wrapped glue the end securely at the opening! Easy, right?
The final step is to embellish your pen… they are already SUPER FANCY so tons of embellishment is not needed! Be careful with the bling here ladies… we wouldn’t want to go over board! We decided to wrap a small bit of rhinestone mesh around the top of the pen cap. This defined the pen from the cap and added a little sparkle without going over board!
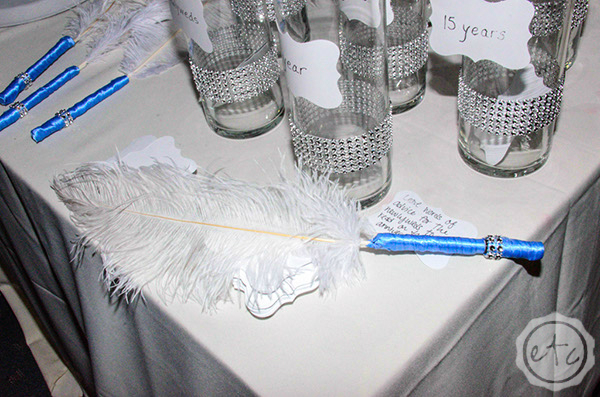
I absolutely love how they turned out! Plus now they look adorable on my desk!


IKEA and Wicked all in one weekend?! Sounds like a blast! Happy Anniversary!!
Yup… he pretty much rocked this first anniversary so hard it’s going to be hard to ever pass up. Plus he took me for massages… my three favorite things: massages, musicals and shopping!
L o v e!
Thanks Faith! You’re the sweetest!
So beautiful and creative! Will have to share with my soon to be bride friend. 🙂
Thank you! I know it’s a little thing but the details are so important! Plus I loved including items in the wedding that I could use in everyday life later on (these pens currently reside on my desk!) That way the wedding is never far off!
These are SO fun! Great craft idea lady!!
Aren’t they though? Now I’m always trying to come up with excuses to use a giant feather pen… I find my hubby using them for homework sometimes! There’s a man after my own heart <3 ! Thanks for stopping by!
What a fun pen! I can’t wait to see what you have next in the series.
Isn’t it the best? They’re so much fun to write with! My next post will go live next week… check it out 😉
You’re so crafty, lol love it!
Thanks Megan! I saw these pens somewhere… for a bazillion dollars a piece and thought… I could totally make that way cheaper! Isn’t that where the root of all craftiness is? Thanks for stopping by!
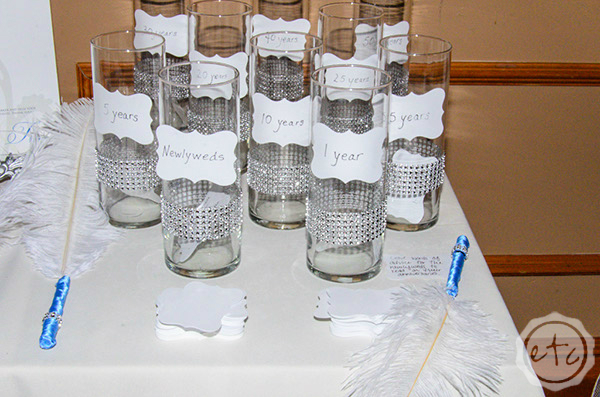
We did something very similar to this for our ‘guest book’ at our wedding, now we have to wait until 2018 to open the next jar for our 5th year 🙂
Ohh the wait must be torture! I made jars for “right now” and “first year” so we get to open a jar this year… And then it’s a five year wait!! Brutal!!! We hang our little advice reminders on the fridge… I love reading them! Thanks for stopping by Kayty!
I need to make several of these so I can always use one no matter where I am! Yes I will bring it out at Wal-mart while grocery shopping just because i’m that Fancy LoL
That is pretty much the best response ever… I definitely need to start bringing these everywhere with me! Great idea! I hope you do it!