


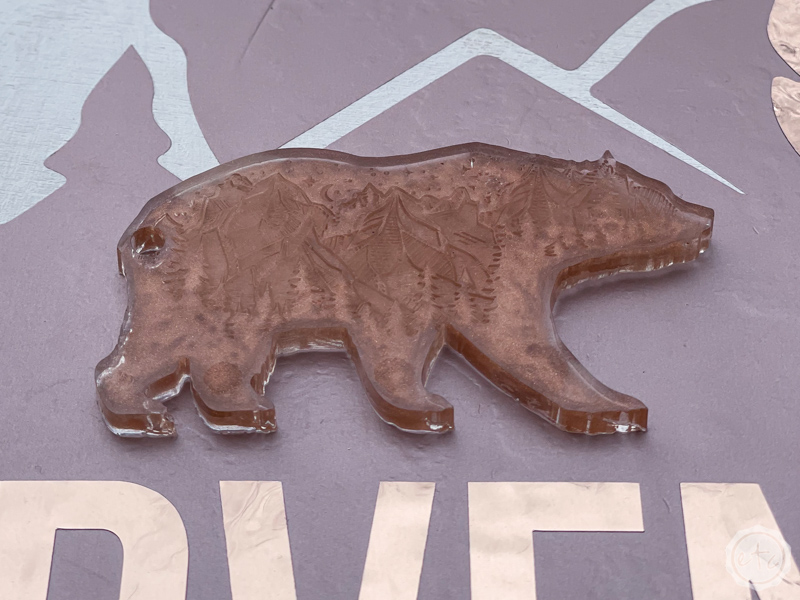
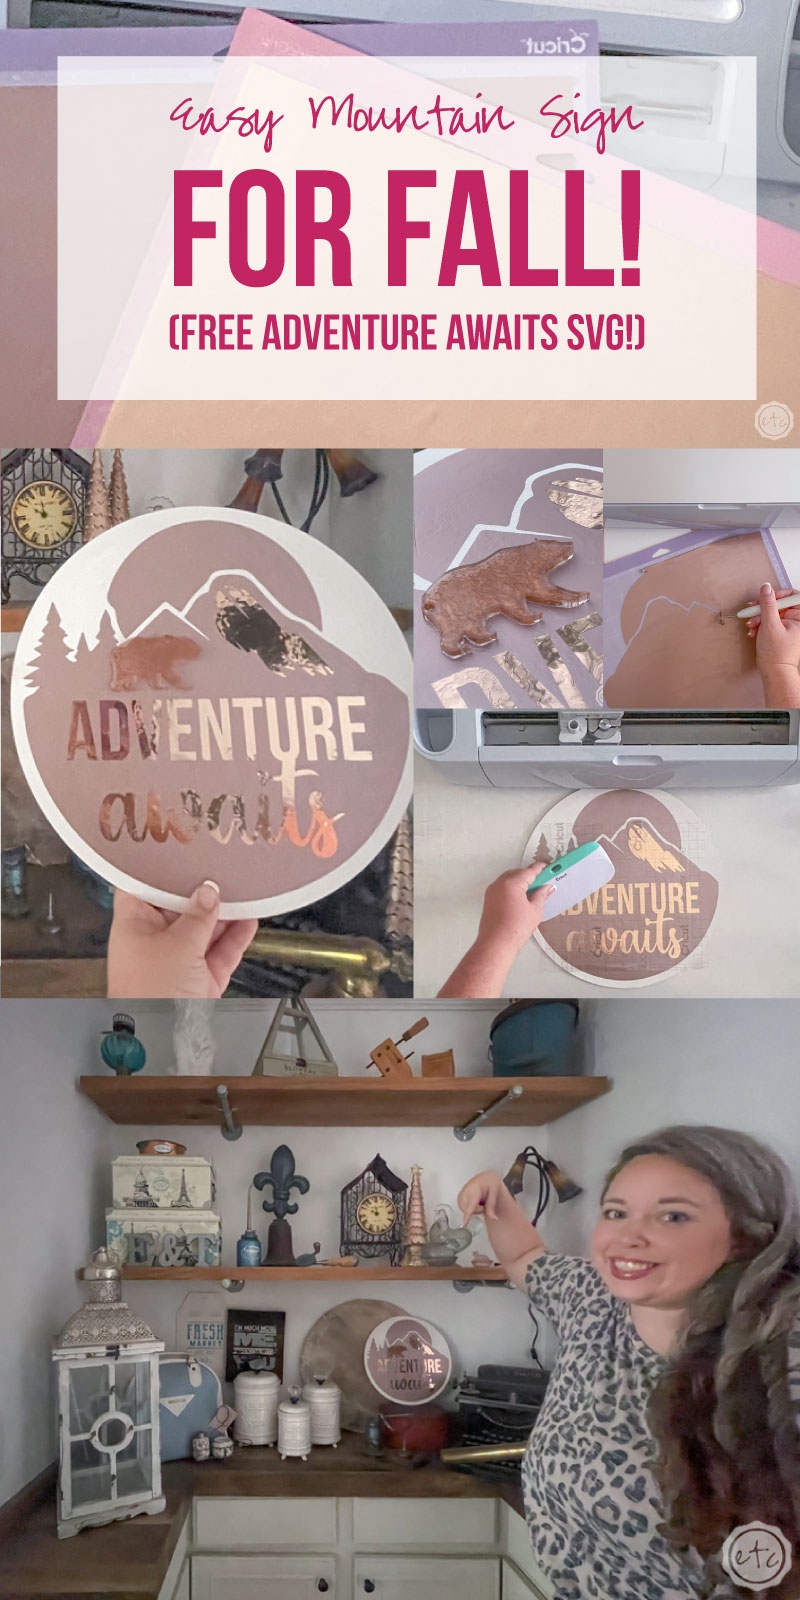
Last week I whipped out the resin to make an adorable little resin bear… the silicone mold I used gave him a mountain range overlay (complete with little trees, little clouds and even a little moon). He is soooo cute and while I bought him to make my Dad a keychain for his birthday I thought this little bear would be the perfect addition to a cute Cricut sign to decorate my home for fall.
I don’t know why but mountains, trees and bears always make me think of fall… maybe because I went to high school in Colorado where they had a very distinct fall. And we lived on the side of a mountain with the beautiful colored leaves and lots. of. bears. Whatever the reason fall and bears are connected in my brain! So I grabbed one of my little resin bears and sat down to make a little fall SVG I could cut with my Cricut.
I ended up with 3 (which you can grab for free at the bottom of this post) and thought the Adventure Awaits SVG was the perfect one for this project. I’m going to cut the bottom layer out of iron-on and the top layer out of adhesive foil so that my little copper bear fits right in… let’s get started!
Supplies:
- Cricut Maker 3
- Fine-Point Cutting Blade
- Cricut Cutting Mat (I like to use the fabric grip mat but the standard grip mat works fine for either material)
- Easy Press 9×9
- Easy Press Mini
- Easy Press Mat
- Rose Gold Adhesive Foil
- Transfer Tape
- Sportsflex Iron-On
- Freezer Paper
- Brayer
- XL Scraping Tool
- Weeding Tool
- Wood Circle Blank for Crafts (this is the base of our sign)
- Resin Bear (Follow this tutorial!)
- Super Glue
- Mountain SVG’s (FREE at the bottom of this post)
VIDEO: DIY Mountain Sign with FREE Adventure Awaits SVG and Resin Keychain

Step 1: Cut Out the Design
Alright… first things first go ahead and download your free SVG’s from the bottom of this post and upload them to Cricut Design Space. If you’re not sure how you can follow my tutorial for uploading SVG’s here!
Then we’ll get started cutting our design!
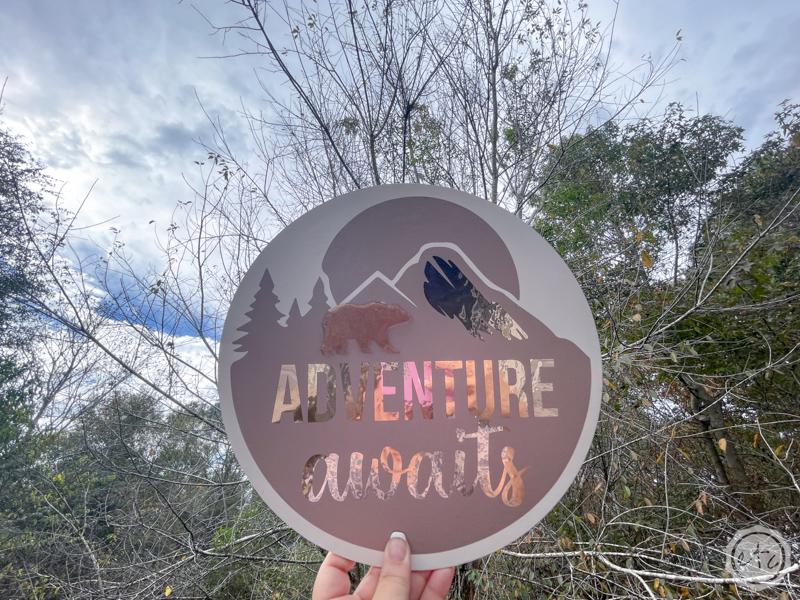
There are 3 designs to pick from and today I’m working with the first one… I wanted a clear mountain scene for my little resin bear to walk through.
This SVG has 2 layers: a background layer which consists of mountains and trees and a front layer that reads “adventure awaits” along with a little highlight for our mountain range.
We’re going to cut the background layer out of iron-on since that will bond beautifully to our sign and the front layer out of adhesive foil since that will bond beautifully to our iron-on! If you’re using the same sign blank as I am you’ll want to size your SVG group to 11 inches across and then hit go.
Cricut Design Space will remind you to mirror your design for the iron-on layer and to place the iron-on shiny side down. We want to cut backwards into the back layer of our iron-on… otherwise we’ll have a mess. Luckily the adhesive foil is easy… don’t mirror and load it onto your cutting mat shiny side up.
Easy peezy!

Step 2: Weed your Design
Now that everything is cut we can go ahead and weed our design! This step is always fun… not always easy. Luckily both foil and iron-on weed like a dream… just grab your weeding tool and carefully remove all of the material we won’t need for our project.
The outside of the design, the inside of the o’s, the section around the dot on the i.
Alllll the negative space has got to go!
Once you have the extra material taken off we’re good to go… we’ll move on to adding our iron-on directly to our sign.
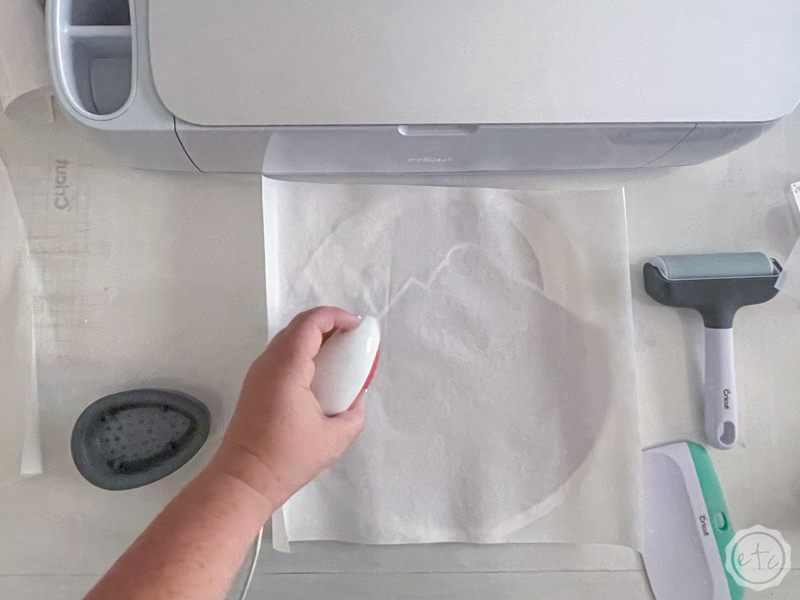
Step 3: Use your Easy Press to add your Iron-On to your Wooden Sign
So here’s the thing… iron-on works perfectly on wood. It bonds beautifully, it stays long term, it’s quick and easy.
Painless!
BUT I didn’t want to use my little wooden sign blank… well blank. So I painted it white before adding my iron-on and iron-on doesn’t always play nicely with painted surfaces.
Iron-on likes wood… it doesn’t really like painted wood. But don’t worry we won’t let that stop us. Go ahead and pre-heat your east press 2 to 315 degrees and 15 seconds. Once it’s ready to go you can press your design.
In my case I had to press it twice because my design is bigger than my easy press.
That’s not the hard part.

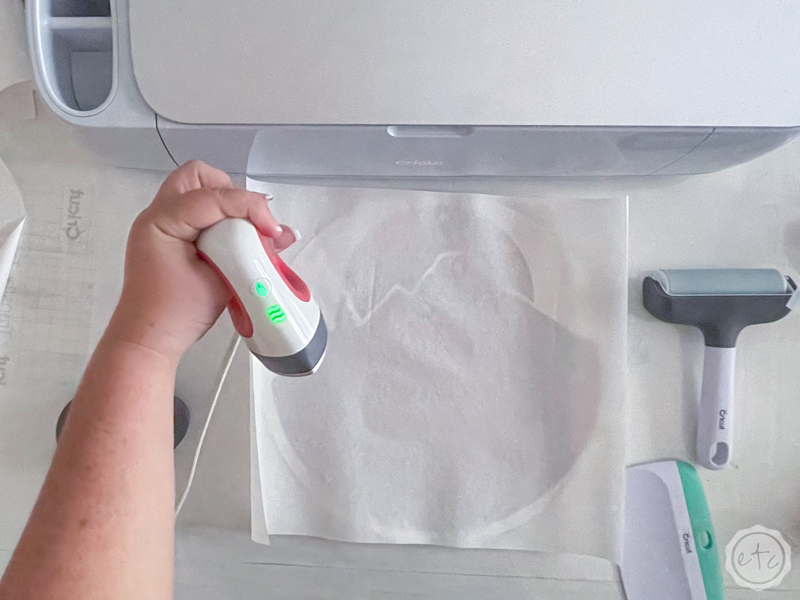
Once you’ve heated your iron-on go ahead and immediately remove the carrier sheet making sure to go slowly and carefully. In most places my iron-on bonded… but not everywhere. So instead of giving up I covered the iron-on with a sheet of freezer paper and heated up my mini easy press to go in and re-bond those hard to bond places.
Remember you never want to hit iron-on directly with your easy press… you always want to have a layer of something in between the two.
Freezer paper works perfectly.
Re-heat anything that’s not bonding and then remove the freezer paper and carefully smooth over everything with your scraping tool. The pressure really helps to bond the iron-on to the painted surface as it cools.
Beautiful, darling!
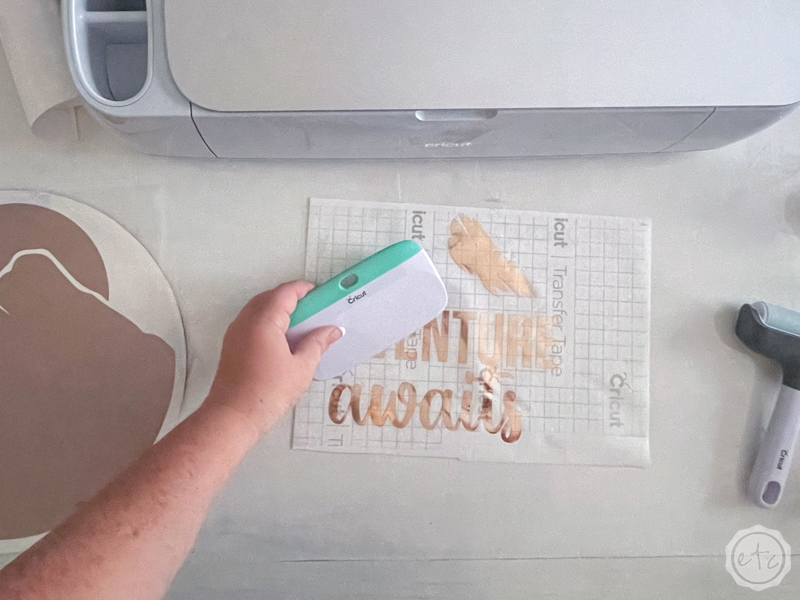
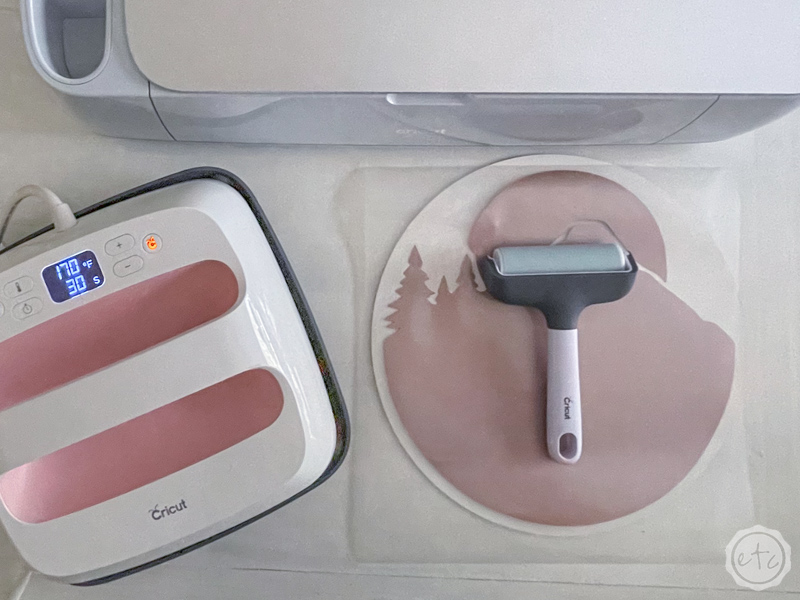
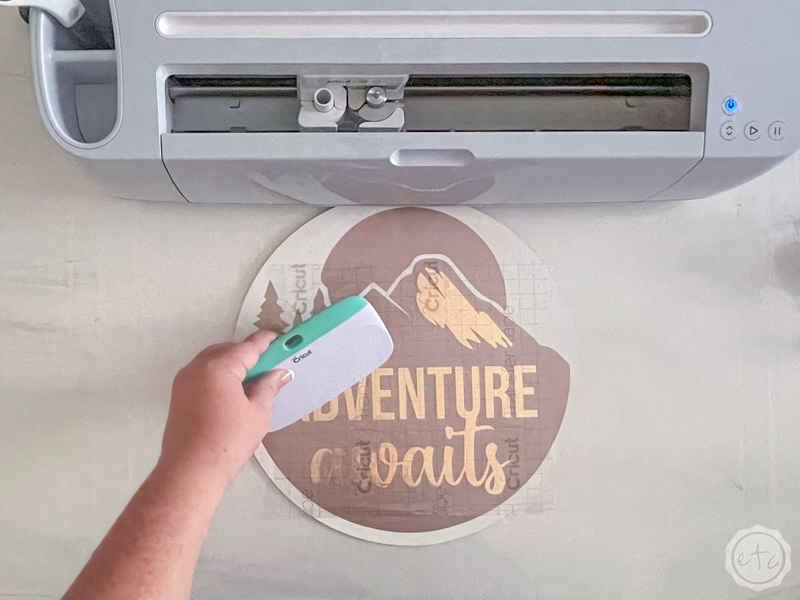
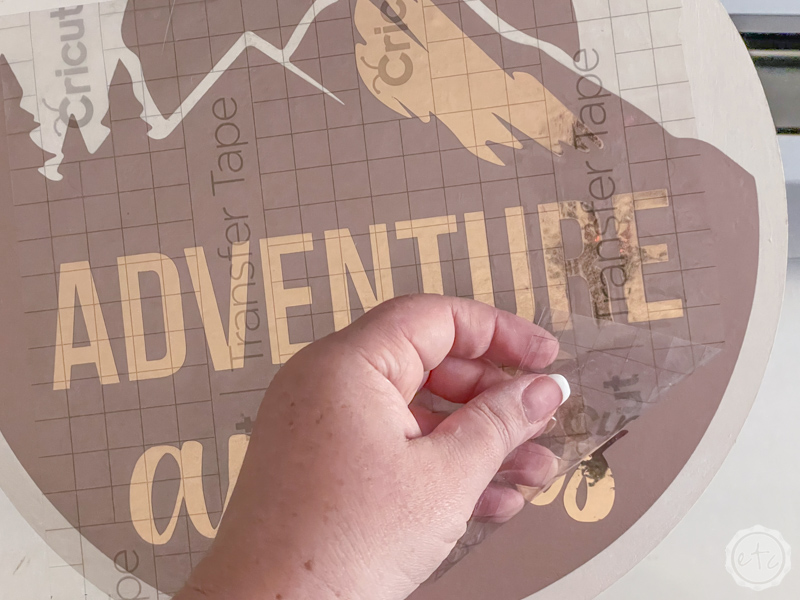
Step 4: Use Transfer Tape to Add your Adhesive Foil
Now that we have our background finished let’s add our words! Grab a piece of transfer tape and smooth it onto your letters making sure to press down firmly with your scraping tool.
Then carefully remove the transfer tape from the carrier sheet… the adhesive foil should stay bonded to your transfer sheet and leave the white carrier sheet behind.
At this point you have a clear sticky piece of transfer sheet with your pretty adhesive foil letters on it… carefully line it up on your background and then press it into place.
I always smooth the design on from the center outward to make sure there are no bubbles or ridges stuck in my design. Then you can peel back the transfer tape and your letters will stay behind! I know it’s nothing new but transfer tape amazes me every single time.
Never gets old!
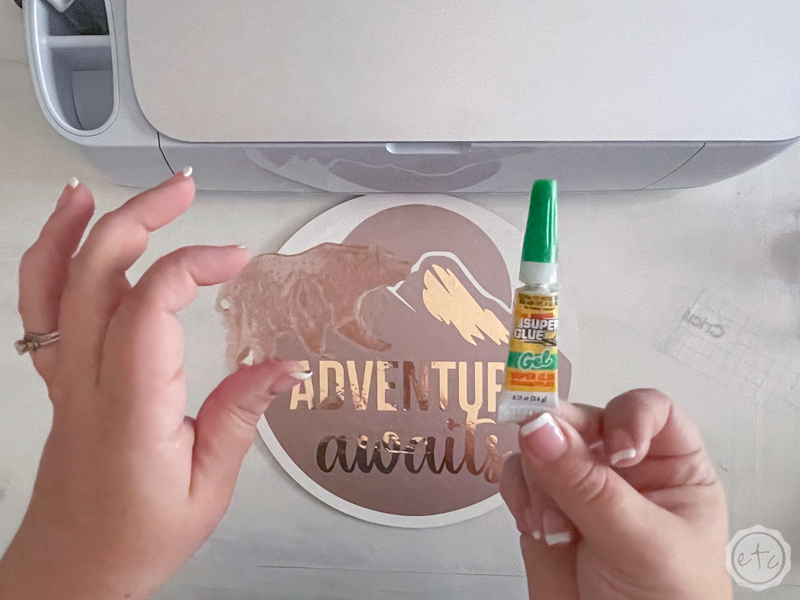
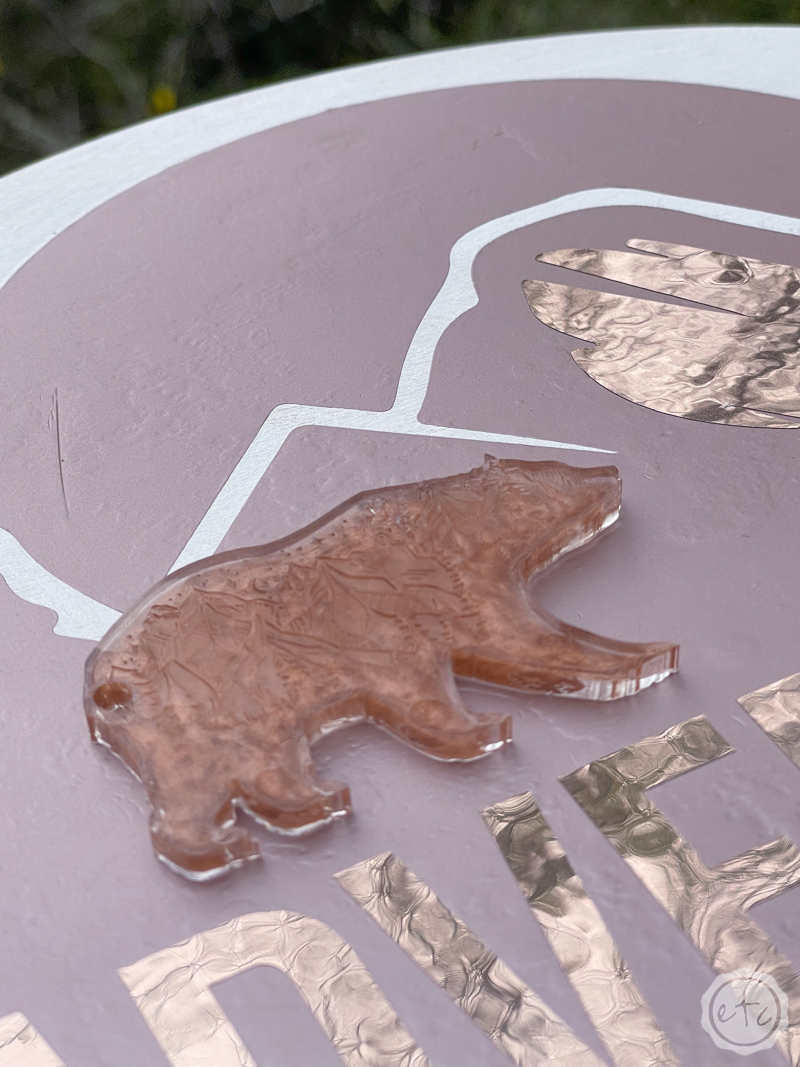
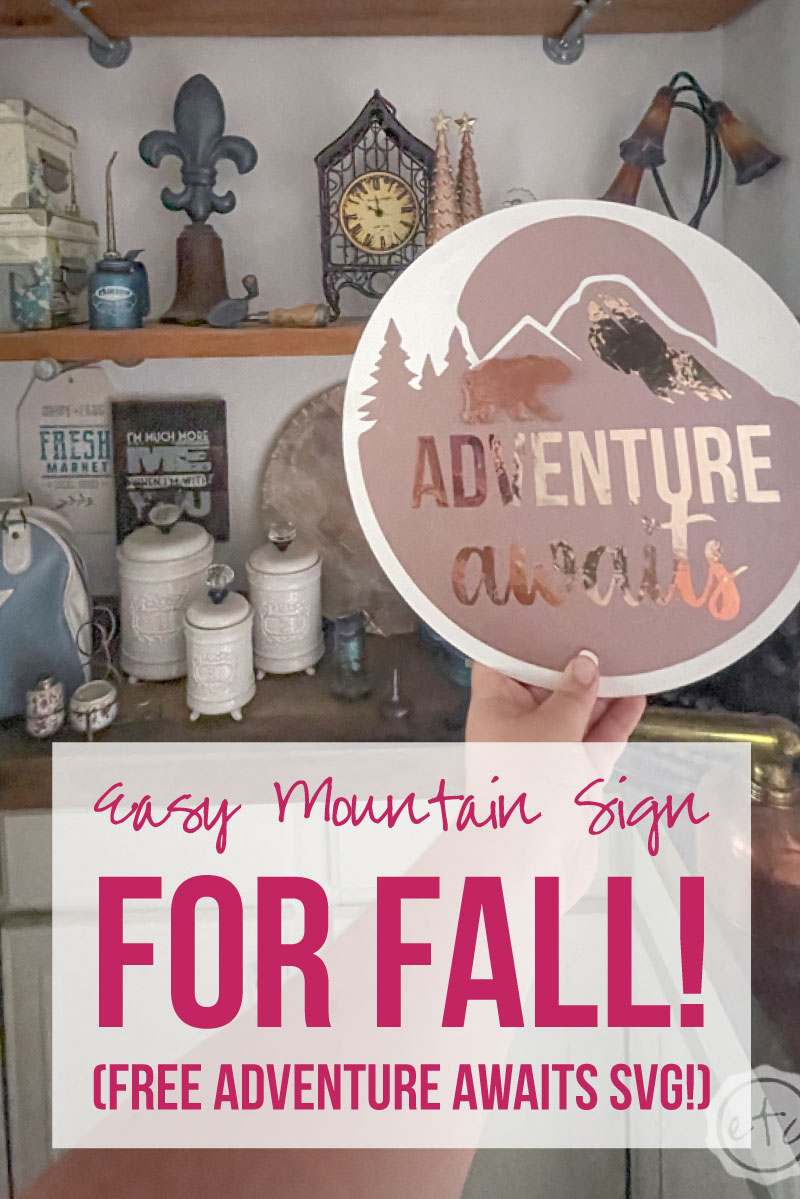
Step 5: Add your Resin Bear!
At this point you could be 100% finished… hang your sign, give it to your bestie, move on with your life. Whatever floats your boat… but I want to add my little resin bear!
I thought through a bunch of different ways to do this but at the end of the day I decided on good old fashioned super glue… a little on the back of my bear and pressure for 15 seconds and we’re good to go.
Let’s hang this guy up!


Leave a Reply