• House Tour
    • Reveals
  • About
    • Smith Life
    • Disclosure and Privacy Policy
      • Terms and Conditions
      • Store Affiliates
  • Contact Me
    • Want a Button?
  • Shop
    • Floral Printable Planners
    • Paint eBooks and Packages
    • Wedding Binders & Extra Printables!
    • Planner Bundles
    • Planner Accessories
    • Home Decor Printables!
    • Cart
    • Bloglovin
    • Facebook
    • Instagram
    • Pinterest
    • Twitter
    • YouTube

Happily Ever After, Etc.

Creating Our Own Fairytale

  • Happily Ever After, Etc.
  • Home
  • Home Decor
    • My Home
    • Paint
    • Before and After
    • Tablescapes
    • Mood Boards
    • Furniture
  • DIY & Crafts
    • New to Cricut – Start Here
    • Cricut Projects
    • Resin
    • Scrapbooking
  • Organization & Planning
    • Cricut
    • Organization
    • Planner
  • Wedding
    • Cricut Wedding Projects
    • Free Wedding Binder
    • Bride Bag- The Ultimate Wedding Planner

DIY Menu Chalk Board from an Old Crib

With the start of the new year organization is the name of the game. Which for me is all about planning! You know how much I love my planners which is why I jumped at the chance to help my Mom put together this fun DIY Menu Board.

She found an old crib on the side of the road (which is how all good projects start!) and the idea for a fun menu chalk board was born.

Of course, if you’re looking for the step by step instructions I have you covered… but there’s no reason to stop there! I’ve joined together with a few blog friends to bring you an entire group of fun organization projects. Just scroll to the bottom of the page to check them out!

Supplies

Plywood
Trim Board
Baby Crib
Dremel Saw Max
Mouse Sander
Screw Driver
Sharpie
Chalkboard Paint
White Chalk Paint
Nail/Brad Gun
Brads
Cricut Maker
Cricut Cut Files
White Vinyl
Transfer Tape

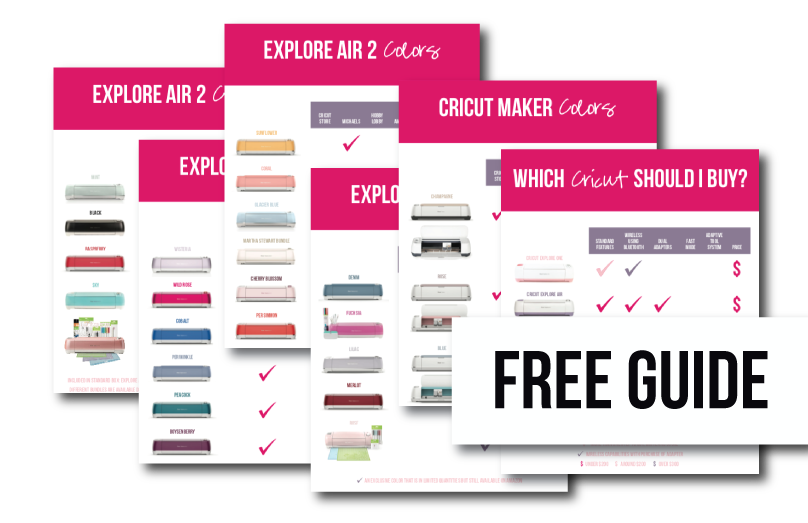
Need help picking your perfect machine? I’ve got you covered!


Step 1: Cut Your Plywood

This first step is alllll jumbled together in a mix of measuring and cutting! We picked up a large piece of plywood from the local hardware store… the full sheet is 4 feet by 8 feet so we definitely have more than we need. Luckily our crib rail is four feet long so the first step is easy… place your crib rail on top of the plywood and use your sharpie to mark the edge.

You know the next step… cut along that line! I love using my Dremel Saw Max for small projects like this. It’s super easy to control and cuts through plywood like butter.

Step 2: Cut Your Crib Rails

Now we need to decide exactly what we want our crib rail to look like… I decided I wanted 9 spots. 1 for each day of the week, 1 at the top for the “title” and one at the bottom for notes. PLUS I can never leave well enough alone so instead of just cutting off the top and bottom I decided to cut off two of the rails so that the top spot would be larger than the rest… and the bottom spot would also be larger.

SO first I left the top rail and cut out the rail directly below it. Then I counted 8 rails before cutting out another rail for a larger space at the bottom. A pictures worth a thousand words so if this is confusing the heck out of you take a look at the finished crib rail… it should make more sense.

Once I had cut both spare rails out of my crib frame I cut the long side rails flush with the top rail and the bottom rail. Our crib rails still had hardware on the ends from where the crib went together so we took those off first so that the dremel could cut down the long rails as flush as possible.

Now your little crib rails should have a total of 10 rails with a larger area under the top rail and above the bottom rail. Boom. The dremel saw max cut the rails down pretty flush but we hit them with our mouse sander just to be sure everything was even.

Step 3: Cut Your Plywood (One Last Time!)

Alright now that our crib rail is cut down and sanded flush we need to cut our plywood one more time. Taking the 3 bottom rails off our little menu made our plywood piece too long. So we’re back to step one… place your newly cut crib rail on top of the plywood piece you already cut and mark the top. Then cut off the top with the dremel.

Now your plywood piece and your crib rail should be the same size.

Score!

Step 4: Paint!

Now we’re onto the fun part… painting! I decided to use a chalk board spray paint to turn our plywood backing into a fun chalk board for our menu. I used my handy little spray paint handle to put 3 coats of paint on the plywood.

I swear I won’t even touch spray paint without this little handle anymore. It makes such a difference when it comes to how much my hand hurts afterwards!

When it comes to chalk board paint you want to do at least 2 layers or the paint won’t work properly but I’ll be honest… this paint was even thinner than other versions I have used. So far it’s worked just fine but I ended up doing 3 (maybe 4) coats which is more than I planned on.

Of course, once I had put a layer of the chalk board paint on the plywood it was easy enough to move across the yard and put a layer of white chalk paint on our crib rails. 3 coats later and we were ready to put the whole thing together!

Step 5: Attach Your Plywood to the Crib Rails

This is where things start to get fun! Mainly because the whole menu board starts to come together. We used our little Craftsman brad nailer to secure the plywood to the outside rails of our little crib rail.

Honestly this was one of the easiest steps!

Just make sure that your brads are short enough that they won’t come through the front of your crib rails. Tat would be unfortunate.

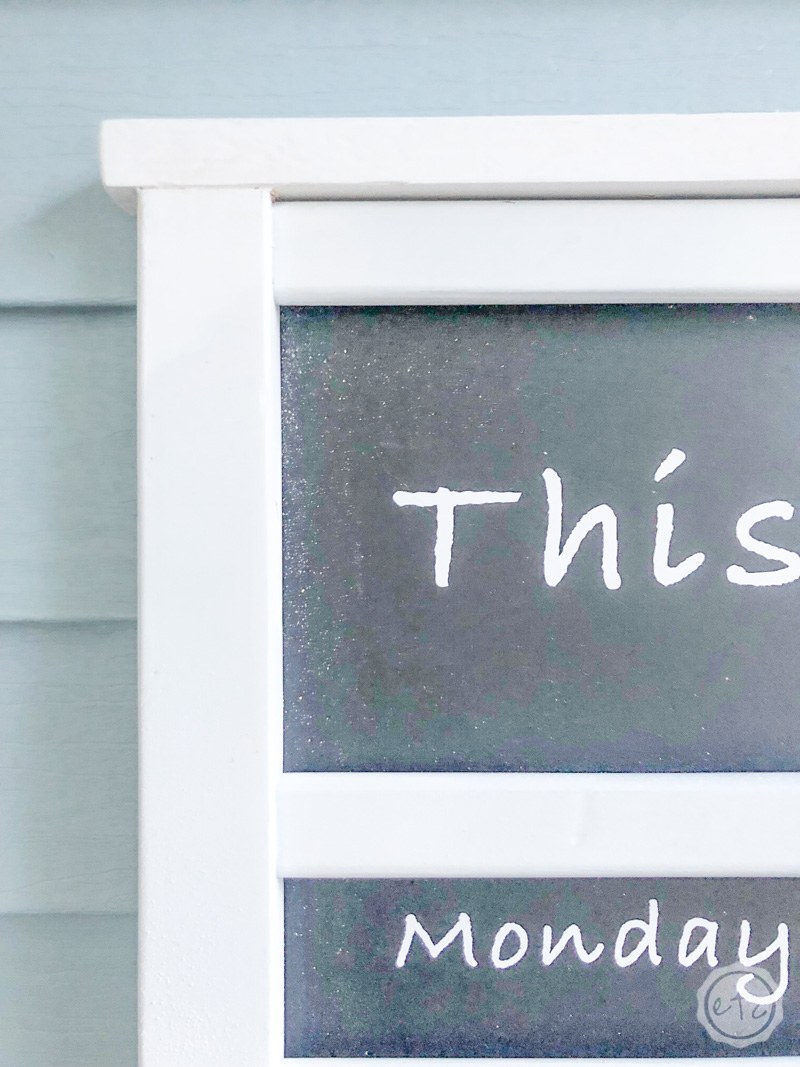
Step 6: Add a Piece of White Trim to the Top and Bottom

At this point I took a look at how the project was coming together and decided to add a bit of trim board to the top and bottom of the menu. I made the trim just a little longer than the actual menu so that it would book end the menu nicely and finish the entire piece off.

I’m planning to hang this menu on the wall but if you wanted to stand it on a counter you could easily add a larger board to the bottom to form a little stand.

Step 7: Add Wood Filler to Any Gaps

We are so close to done! Once the entire piece is nailed together you’ll notice a few gaps… mainly at the top and bottom where the trim and the crib rails meet. I used a bit of wood filler to fill in these gaps… then it’s just a matter of letting it dry so that you can sand it smooth and paint it white!

(Do you see our latest arrival in the background? Our 8 week old long haired miniature dachshund puppy Sugar was determined to help put this menu together!)

Step 8: Use Your Cricut to Add the Days of the Week!

We are in the home stretch y’all. I decided that instead of writing out the days of the week in chalk every week I would use a bit of white vinyl to add the letters. Easy peezy lemon squeezy.

Of course, the best part is you can get the cut files for this project right here. Just download and make your very own menu board.

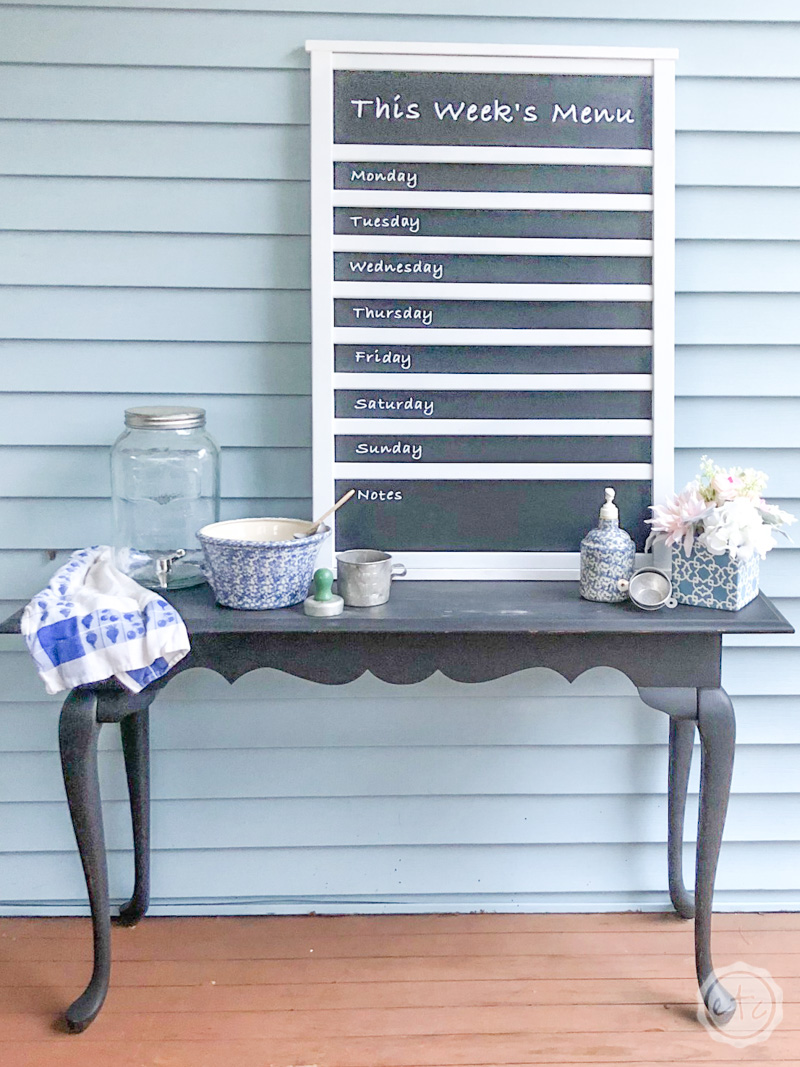
Ready to see the finished product?

I’m kind of in love with how the entire project turned out! I may have to steal this one from Mom…

Looking for a few more fun organizational projects? We’ve got you covered! Check out all of these fun projects from my bloggy friends and enjoy.

Let me know if which one is your favorite down below!

1905 Farmhouse, Abbots at Home, Bitterroot DIY, By Brittany Goldwyn, Creative Ramblings, Cribbs Style, Delicious & DIY, DIY Beautify, DIY Danielle, Dukes and Duchesses, Girl, Just DIY, Happily Ever After, Etc, Health, Home & Heart, House by the Bay Design, House on Longwood Lane, Just Measuring Up, Kenya Rae, Little Bits of Home, Living Letter Home, My Kitchen My Craft, Pinspired to DIY, Red Cottage Chronicles, Refashionably Late, Renovating Mapleson Manor, Savvy Apron, Shine Your Light, Shrimp Salad Circus, Songbird Blog, Southern Revivals, T.Moore Home, The DIY Dreamer, The DIY Village, The Frugal Homemaker, The Handyman’s Daughter, Two Feet First, What Meegan Makes, Zucchini Sisters


This link party is powered by Link Party Animal

Want to take a look at the rest of the Cricut line up?

Inlinkz Link Party

Don’t forget to pin!

Get Your FREE PDF Guide!

Don't forget to snag your free PDF Guide to buying your first Cricut!

Success! Now check your email to confirm your subscription.

There was an error submitting your subscription. Please try again.

Powered by ConvertKit
You made it through the entire post? That means you're one of my new favorite people! I'd love to be friends and see what else you would like to read about! Leave me a comment and then sign up for your very own FREE paint planner.... so that you can keep track of every single paint color with ease!
Welcome back! I'd love to be friends and see what else you would like to read about! Leave me a comment and then sign up for your very own FREE paint planner.... so that you can keep track of every single paint color with ease!

Show me some LOVE y'all:

  • Facebook
  • Pinterest
  • Twitter
  • Email

Related

«
»

Cricut, DIY & Crafts, Home Decor 20

Comments

  1. Carmen says

    February 16, 2019 at 9:51 am

    I LOVE this idea SO much!!! happy to be on this blog hop with you 🙂

    Reply
  2. sherry says

    February 16, 2019 at 12:30 pm

    Great way to repurpose and it looks great!

    Reply
  3. Megan says

    February 16, 2019 at 2:41 pm

    What a creative way to reuse a crib!! Nice work and thanks for sharing!

    Reply
  4. meegan says

    February 16, 2019 at 8:59 pm

    Seriously! You are amazing. I never would have thought of using an old crib like this. I love it!

    Reply
  5. Cindy says

    February 17, 2019 at 8:30 am

    This is adorable! Great recycle project!

    Reply
  6. Marianne Songbird says

    February 18, 2019 at 4:59 am

    What a lovely project. I am betting it looks great in your kitchen.

    Reply
  7. Jacque says

    February 18, 2019 at 1:57 pm

    What a great use of an old crib. It turned out awesome!

    Reply
  8. Christine Cook says

    February 19, 2019 at 8:04 am

    What??? You used a crib to make that?! So cool!!! Looks absolutely wonderful! Fabulous job!

    Reply
  9. Anam says

    February 19, 2019 at 10:10 am

    What a great way to repurpose. I absolutely love it!

    Reply
  10. Danielle Pientka says

    February 19, 2019 at 7:52 pm

    Gorgeous! It’s nice to see cute projects to inspire people so those old cribs won’t end up in a landfill… 🙂

    Reply
  11. Jamie @ Southern Revivals says

    February 20, 2019 at 8:07 pm

    Such a great idea! And so pretty!

    Reply
  12. Lisa says

    February 26, 2019 at 5:57 pm

    This is such a great upcycle of a crib Betsy!! Love it!

    Reply
  13. Vineta says

    February 27, 2019 at 11:19 am

    What a great upcycle! This makes me wish I had kept our son’s crib!

    Reply
  14. Christine says

    February 28, 2019 at 10:39 am

    So unique and creative! What a clever way to upcycle this crib piece. Nicely done- and know they’ll know whats for dinner! – “Go look at the chalk board!” 🙂

    Reply
  15. Benita says

    March 4, 2019 at 10:14 am

    What a creative idea! I love it…it turned out great!! We would love to have your share your project at Celebrate Your Story this evening. The link party starts at 7:00 p.m. CST. Have a great day! Hugs!

    Reply

Trackbacks

  1. 15 DIY Build to Organize projects says:
    February 28, 2019 at 5:22 pm

    […] Love this menu board that Happily Ever After Etc. created from an old crib! […]

    Reply
  2. 17 DIY Organization Ideas for Your Home - Happily Ever After, Etc. says:
    February 28, 2019 at 8:31 pm

    […] DIY Menu Board […]

    Reply
  3. What is a Cricut... & What Can I do with it? - Happily Ever After, Etc. says:
    March 5, 2019 at 5:00 pm

    […] Menu Board […]

    Reply
  4. How to use the Cricut Fine-Point Blade (Plus Cricut Access Project!) - Happily Ever After, Etc. says:
    March 9, 2019 at 5:51 pm

    […] Menu Chalk Board […]

    Reply
  5. Upcycle Projects YOU Can Do - Happily Ever After, Etc. says:
    March 30, 2019 at 8:40 pm

    […] View the Project! […]

    Reply

Leave a Reply Cancel reply

Your email address will not be published. Required fields are marked *

sidebar betsy I'm Betsy, Home Decor Enthusiast, Yorkie Mama, Crafter, Blogger, Picky Eater, Chief Mess Maker, Antique Hoarder and Graphic Designer. You can generally find me working on (attacking with a paintbrush) the 3 bed, 2 bath home we are currently renting! Our home might not be perfect but it is ours & if you hang out long enough you'll see that what we lack in know-how we make up for in passion!
Shop My Craft Room

Shop My Home

Featured Articles

15 Fabulous Ideas to Organize your Laundry Room
25 FREE Printables For Your Home!
What to do with EXTRA Paint with Happily Ever After Etc
10 Ways to Make Your Bed EXTRA Comfy with Happily Ever After Etc.
Ready to Pick your Perfect Paint Color? We'll help you with our 6 Day FREE E-Course

Hey y’all,

Profile

I'm Betsy, Home Decor Enthusiast, Yorkie Mama, Picky Eater, Chief Mess Maker, & Graphic Designer...

A Little Note!

Many of the links on Happily Ever After, Etc. are affiliate links. If you purchase a product after clicking an affiliate link, I receive a small percentage of the sale for referring you, at zero cost to you! How awesome is that? Purchasing through affiliate links is an easy, painless way to help out your favorite bloggers. Thank you so much for your continued love and support! Read the full disclosure here!

Instagram

The number one question people ask when they watch The number one question people ask when they watch my new home tour on YouTube? Why is there so much clutter... um excuse me I like stuff! The second question? How did you frost the doors? Don’t worry... I wrote out the whole process, check out the step by step tutorial on the blog!
With Christmas fast approaching I’m having secon With Christmas fast approaching I’m having second thoughts... about taking down my holiday decorations! I absolutely love all the blush and rose gold this year and think I might have to add more pink to my every day decor. Until then maybe it will just stay Christmas at the Smith house! Tutorials for both the “Merry Christmas” resin sign and the “Dear Santa” Cricut sign are in my profile! #pinkchristmas #pinkchristmastree #pinkchristmasdecor
Well y’all Christmas is coming up quick... which Well y’all Christmas is coming up quick... which means I need to get a move on with all that wrapping! I got a jump start this morning after whipping up a few little resin light bulbs! Check out the full tutorial over on the blog if you’d like to wrap your presents with a few resin goodies this year... and tell me in the comments below. Are you finished wrapping or (like me) are you still getting started? #pinkchristmas #pinkchristmasdecor #resinchristmas #giftwrappingideas
Ready for another fun and easy resin project? Thes Ready for another fun and easy resin project? These little Christmas trees are the perfect beginner level project so if you’ve never done resin before don’t let it intimidate you!! Grab your heat gun and jump in... I’ll walk you through it! Check out the full blog post for these little guys on the blog (link in profile!)
If you haven’t joined Michelle at @weekendcraft If you haven’t joined Michelle at @weekendcraft SVG membership then WHAT ARE YOU WAITING FOR?! I am obsessed with all the cute svg’s and y’all she is doing a live craft night every month to walk you through making one of her designs... and the first craft night is tomorrow! She’ll be making this “Merry everything and Happy always” SVG and it’s so cute! You don’t want to miss it! See you there! 

(Also who noticed the sneak peek at my new kitchen?!)

#cricutsvgfiles #christmassvg #cricutsled
Well y’all I’m getting this close to unpacked Well y’all I’m getting this close to unpacked in my new house!! And since I’m a blogger Christmas is going up! So here’s the question... do you want a 1 month house update or do you want to wait for the Christmas tour? #lulamaefarmhouse #rosegoldchristmastree #newhouse
Well it’s still a work in progress but I finally Well it’s still a work in progress but I finally have a house!! They have to put it together and do all the detailing before I get keys... but we’re in the end game now! Check out my stories for a sneak peek at the moving process... full YouTube video coming soon!
#ad how amazing did these little fall coasters tur #ad how amazing did these little fall coasters turn out?! Plus I absolutely love the matching tray! The best part? This is such a quick and easy resin project... a silicone mold, a little resin and your trusty heat gun and I promise you can make this baby!! Link in profile for the tutorial!! #fallresin #resinforbeginners #cheetahprint
Okay... is it bad if you just want to make coaster Okay... is it bad if you just want to make coasters in the same mold with the same technique but different colors?? They turn out soo differently! Just a sneak peek of my fall coasters and the blush ones I made last year!
Happy #nationaldogday to the fur babies that are ( Happy #nationaldogday to the fur babies that are (literally) behind (beside... or underneath!) all Of my projects! These sweet little cuddle muffins make everything better 😊🐶😘
GIVEAWAY CLOSED Our winner is @kamikvega Check you GIVEAWAY CLOSED
Our winner is @kamikvega Check your inbox girl, this little machine is headed your way! Thanks to everyone who participated... I can’t wait to see where we go from here!

🥳📦🥳 GIVEAWAY🥳📦🥳
If you have loved all of the Cricut projects I make here is your chance to win a Cricut Joy of your very own! If you’re ready for a little craftiness (maybe a little time to relax) then this giveaway is for you! I’m teaming up with a few of my cavities crafty bloggers so that one of you can win your very own mini crafting machine. Good Luck!!!!

TO ENTER GIVEAWAY:
1.) Follow
@creativeramblings 
@weekendcraft 
@craftylumberjacks 
@this.is.tisa 
@justcallmehomegirl 
@happilyeverafteretc
@lovebird_heartworks 
2.) Like this post
3.) Tag a friend in the comments.
.
.
.
Hurry! Giveaway ends Saturday 8/29/20 at 11:59PM PST. Winner will be notified via Direct Message. Share or tag a friend who'd love to win a Cricut. .
.
.
This contest is in no way affiliated with or sponsored by Instagram or Cricut. To enter you must have a U.S shipping address.
A little peek into the fun summery Tablescape I pu A little peek into the fun summery Tablescape I put together for a little garden party! Want to check out the full table? Wondering where to find all the pieces... click the link in my profile for all the details!
#ad Did you know you can put infusible ink onto al #ad Did you know you can put infusible ink onto aluminum? It's sooooo simple... honestly it's one of the easiest projects I've ever done. Even if you've never used your Cricut before you. can. do. this. I'll show you how every step of the way! Follow along with the full tutorial video over on YouTube! The best part? These little aluminum signs look amazing as part of a larger project! Check out how I added mine to a larger resin wave project on the last slide! @officialcricut #cricutcreated https://lnk2.io/wvMllZf
Okay so It’s no secret that I’ve been obsessed Okay so It’s no secret that I’ve been obsessed with resin for a while now but this week I’ve been playing around with resin waves! Including this tiny resin sea shell! Check out the link in my profile for the full tutorial!
After a lot of struggle, loss and frustration I am After a lot of struggle, loss and frustration I am finally dotting the i’s and crossing the t’s on my next chapter. Yesterday I went and signed the million and one papers to close on my new house! I cannot wait to share the moving (and decorating) process with all of you... next step: keys! #firsttimehomebuyer #newhouse
Load More... Follow on Instagram

Copyright © 2021 · Darling theme by Restored 316

Copyright © 2021 · Darling Theme on Genesis Framework · WordPress · Log in · Privacy Policy

loading Cancel
Post was not sent - check your email addresses!
Email check failed, please try again
Sorry, your blog cannot share posts by email.