


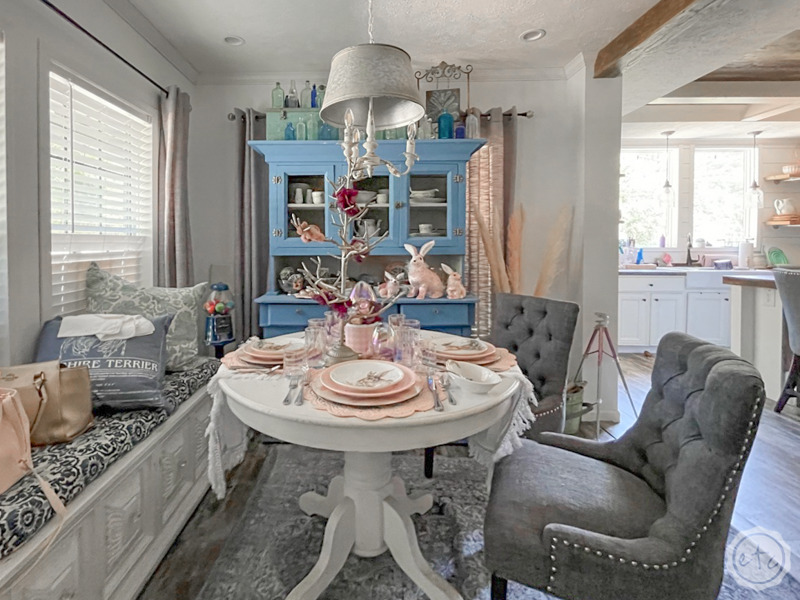
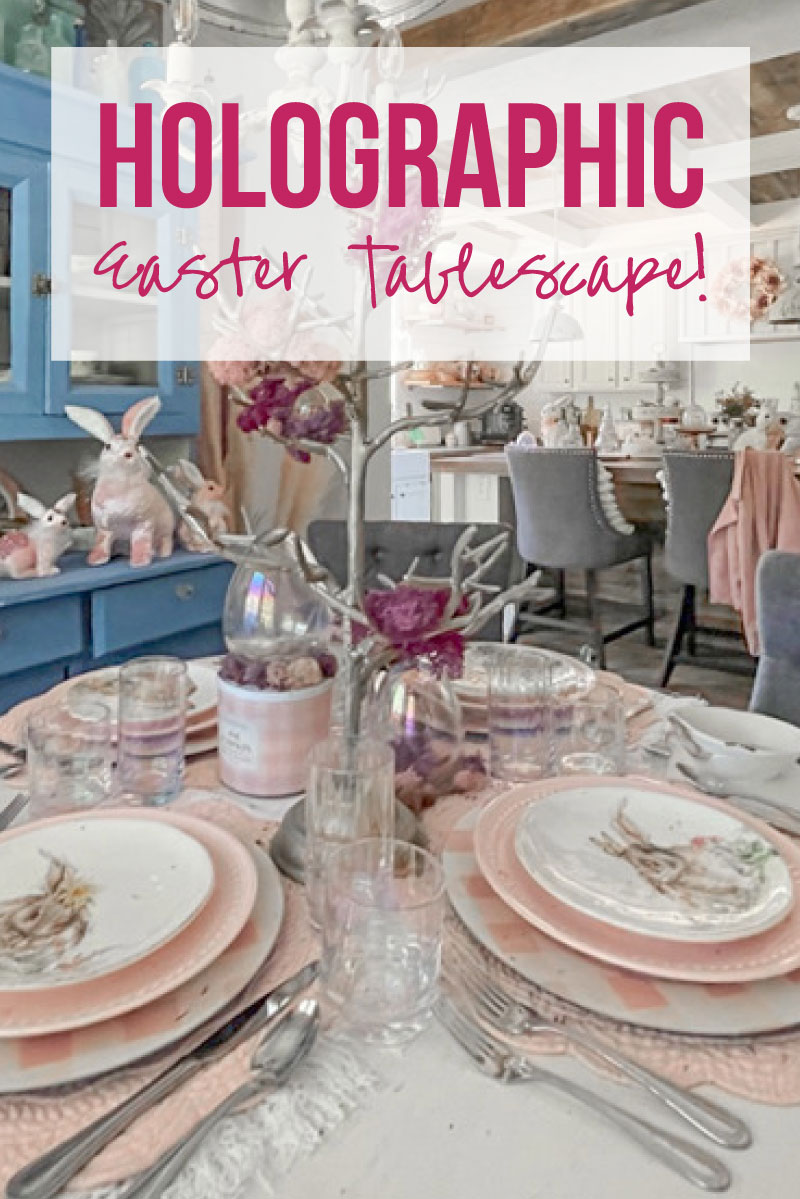
A few years ago I put together a sweet little Easter tablescape with adorable bunny plates and holographic eggs. It was a garden party and I loved how it turned out. BUT later that year when I found these holographic drinking glasses later that year… and this colorful moss… well I knew I could make my original table so much better.
So let’s start with a similar base (pink plates and adorable bunny salad plates) and expand our table just a bit. To play up the clear resin eggs and larger holographic eggs we’re already working with.
Ready to get started?
Supply List:
- Matceramica Blush Pink Dinner Plates
- Southern Living Easter Bunny Salad Plates
- Pink Buffalo Check Chargers
- Pink Scalloped Placemats
- Holographic Highball Glasses
- White Table Runner
- Pink Deviled Egg Plate (purchased in store, sold out online. I’ve seen similar plates here)
- Large Copper Tree (Found on Marketplace but here is a similar one)
- Oneida Countess Flatware
- Holographic Eggs (I found mine at Homegoods)
- Resin Eggs
- Colorful Moss (pink and purple)
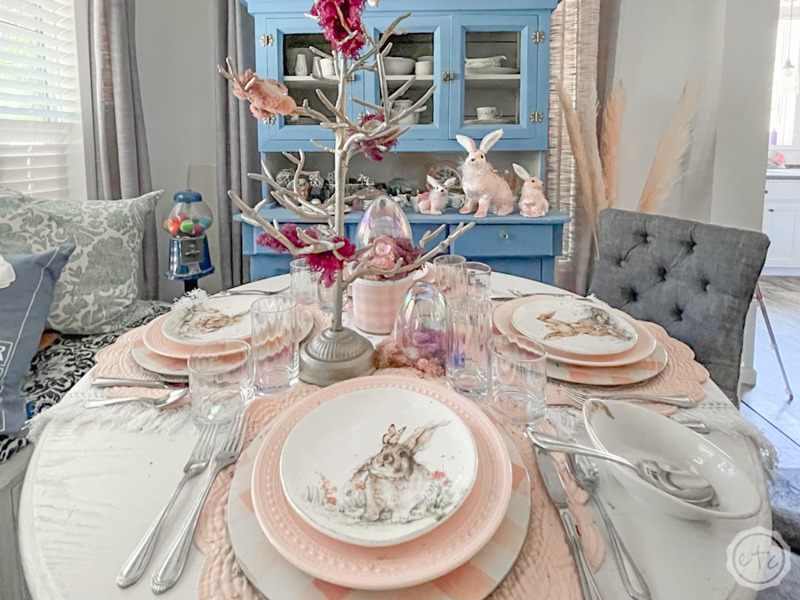
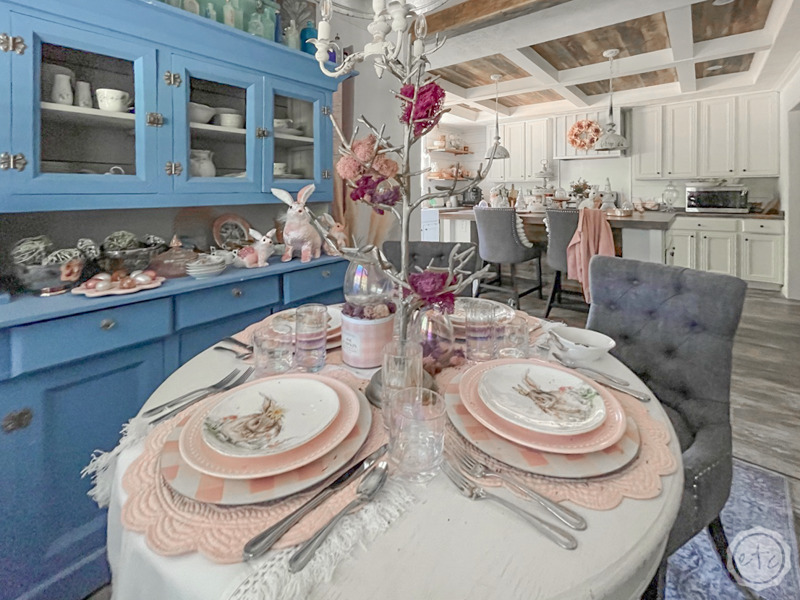
Step 1: Start with your Base Layers
This could be different for every single table… but you typically have one or two pieces that you know you want to use. The inspiration behind the entire table, a seasonal piece (like these bunny plates!) or maybe a sentimental piece (like your grandmother’s china!).
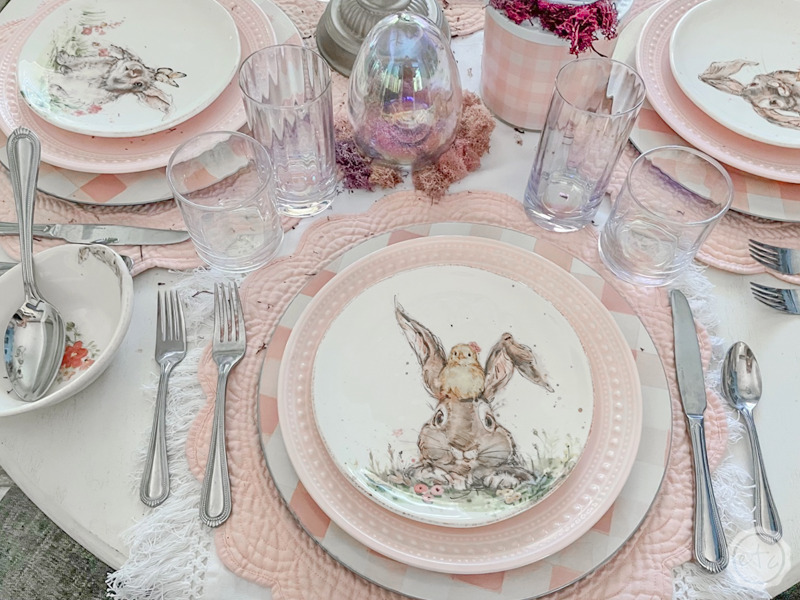
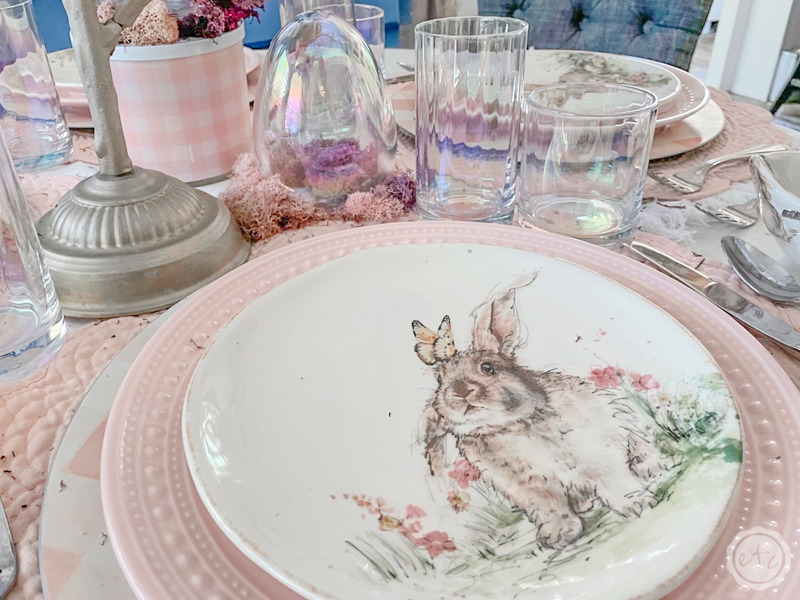
Either way start by putting your base layers on the table… and then work your way out from there. In this case we’ll start by adding our cute little bunny salad plates to the table along with our iridescent glasses.
Since we already know those will be included!
Step 2: Add Neutrals that let your Base Layer Shine
Now that we have our two important pieces set we’ll start to build around them. For our plates that means adding a dinner plate and chargers that coordinate.
We could go lots of different ways with this: whites that don’t draw your attention, yellow, blue or green for spring… a few different colors!
When we’re working with neutrals we don’t necessarily mean beige or browns we mean colors that don’t draw attention… in this case we could go with any of the pastel colors in our bunny plate. And since I have quite the pink collection, pink it is.
A monochromatic color palette (pink on pink on pink) will still let the different colors of the bunny shine through. The pink (by comparison) will fade into the background. Although we’ll keep it interesting by using pinks in slightly different hues and with slightly different patterns and textures.
Patterns and textures are the key to injecting a little movement into a monochromatic color scheme. They’re not just pink plates… they have raised dots around the edges. They’re not just pink chargers they pink gingham chargers.
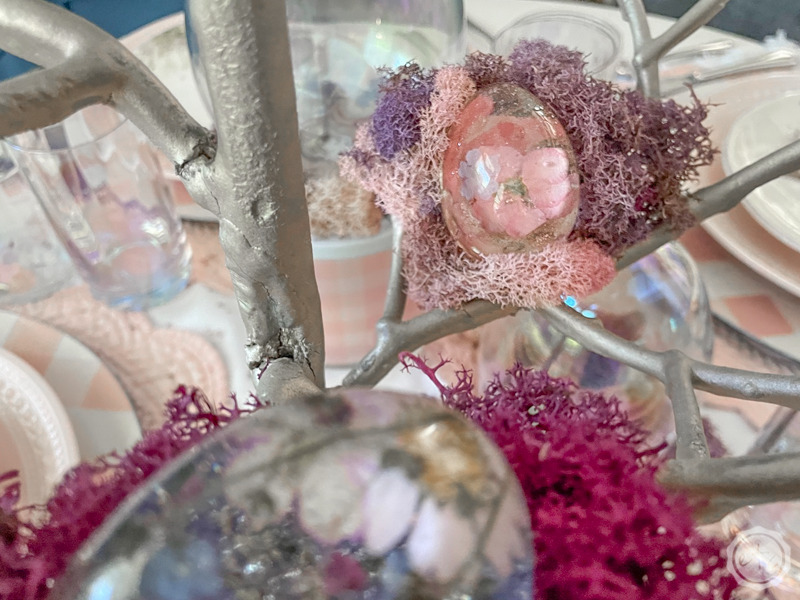
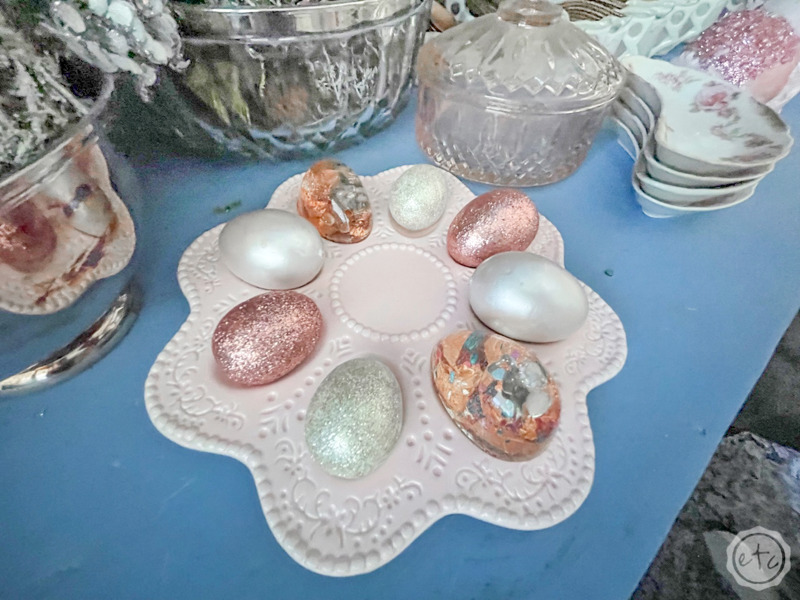
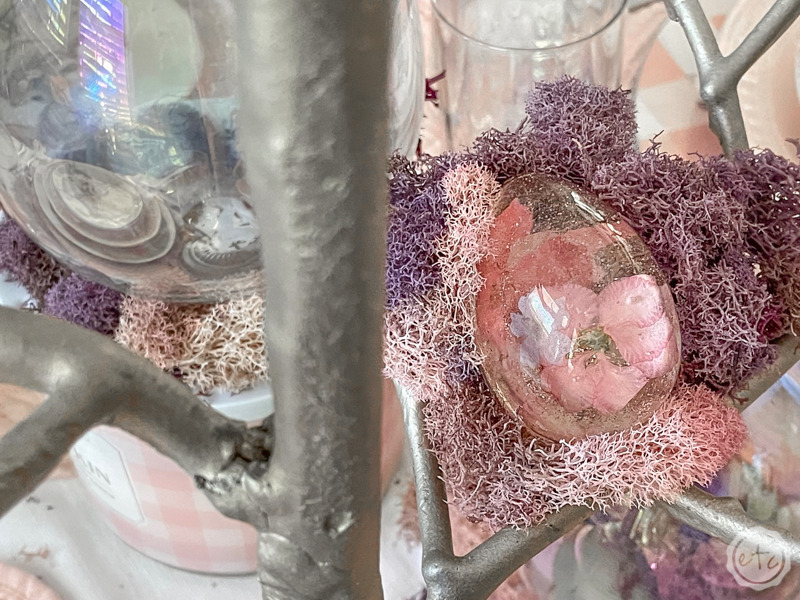
RESIN EGGS WITH COLORFUL MOSS
Step 3: Bring it all together with the Centerpiece!
Speaking of texture… let’s keep building with our centerpiece! We have a large champagne colored tree for our cute little resin Easter Eggs. I loved how these looked on my previous table but I wanted a bit more of that pink color… so a smidge of pink moss is the perfect answer.
And we can use the same moss for our larger holographic Easter Eggs down below!
Score!
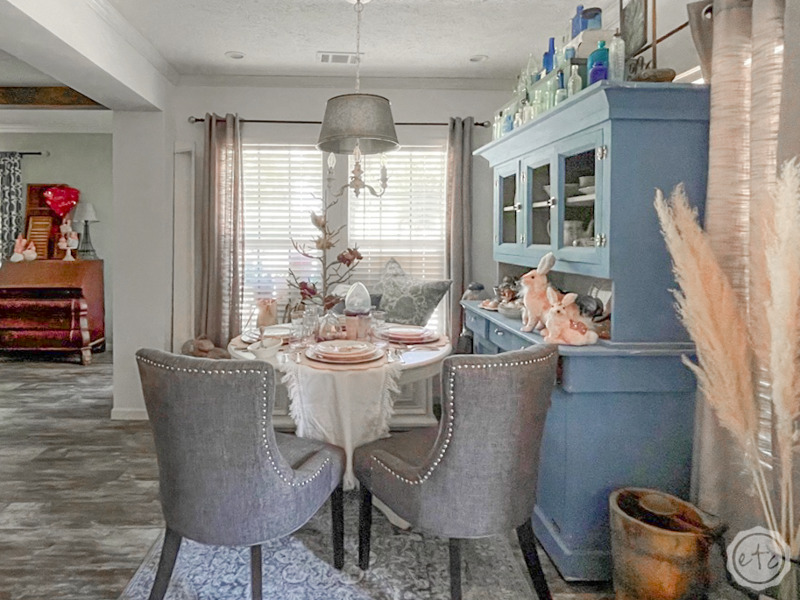
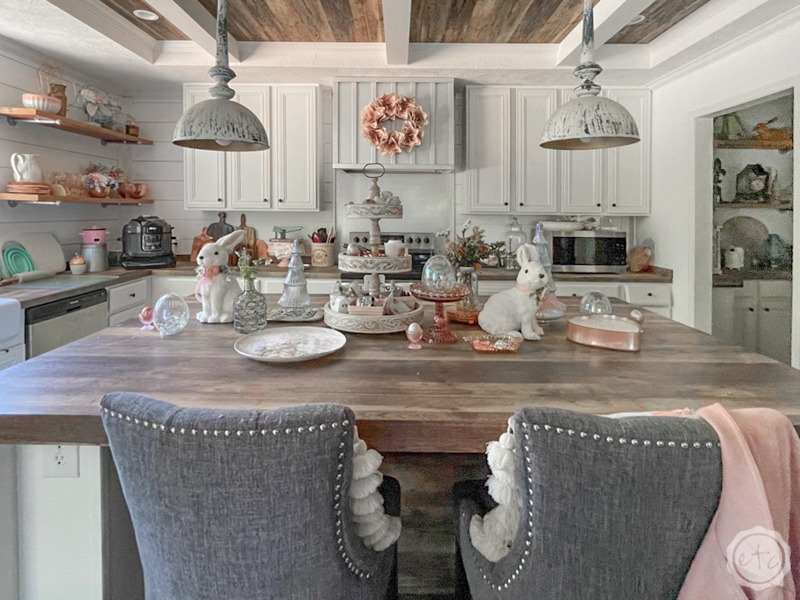
At this point our little table is perfect! Any more decoration and we won’t have room to see each other around the eggs! But we do still need a bit of space for food so let’s add in similar vibes on the kitchen island.
A few holographic eggs, a matching bunny platter… and a few adorably, fluffy white bunnies with flower collars! We are definitely ready for the food now!


Leave a Reply