


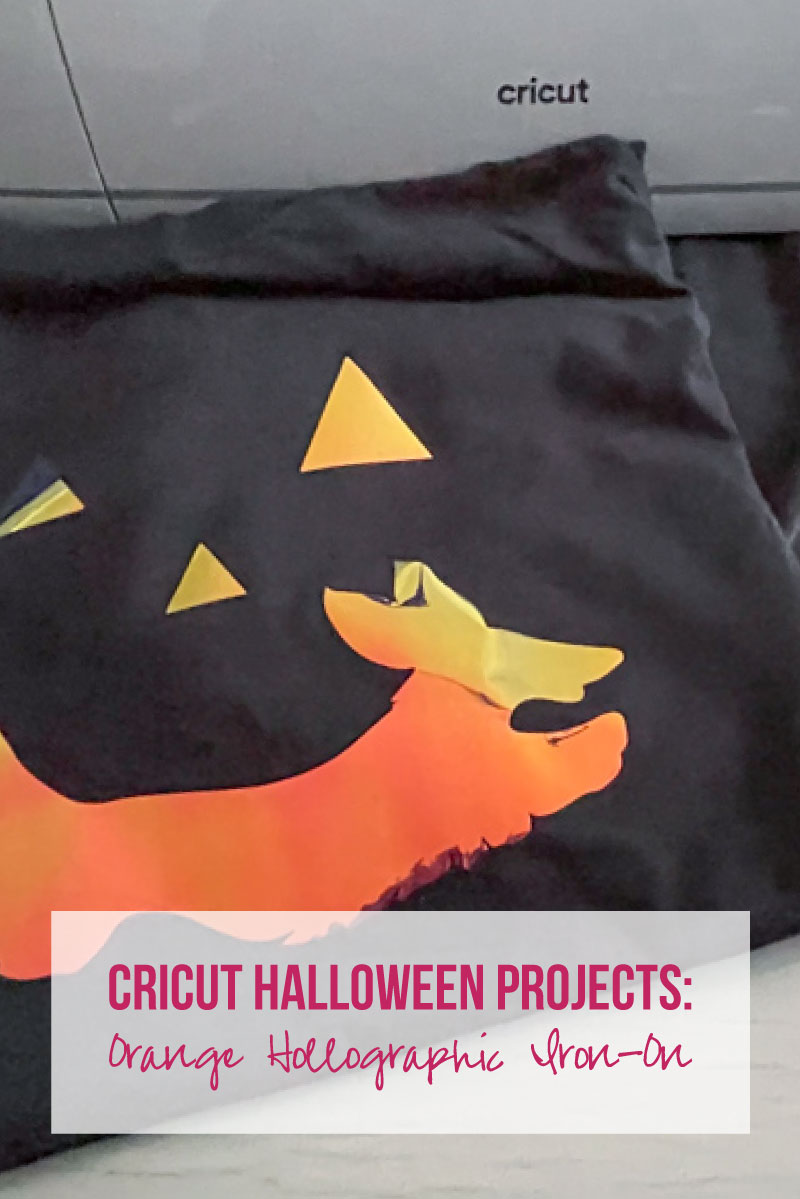
I made a Halloween shirt! It is super cute (if I do say so myself) with a cute little leaping puppy on it… and it uses Cricut’s Blue Holographic Iron-On. I know, I KNOW the title of the post says orange iron-on but here’s the thing. When added to a black background Cricut’s Blue Holographic appears Orange/Red and Cricut’s Pink Iron-On appears blue/green.
Isn’t it amazing how light works?
Of course, you can add this blue holographic iron-on to any black surface to show off the red/orange light shift. But today we’re making a spooky Jack-o-lantern dachshund shirt.
Ready to jump in?
Supplies:
- Cricut SVG Files (FREE at the bottom of this post)
- Cricut Maker
- Fine-Point Cutting Blade
- Standard Cutting Mat (that’s the green one! Even though I used the fabric mat for this project)
- Easy Press 9×9
- Easy Press Mat
- Weeding Tool
- Blue Holographic Iron-On
- Black T-Shirt
I am LOVING this blue holographic iron-on turning to red/orange on a black background tip! It’s one I got from Michelle over at Weekend Craft… she figured it out during one of her Craft Night Lives. Basically she has a super cool Cricut membership where you get 5-10 SVG’s every month, access to a fun facebook community of cricut people AND (the best part) a Craft Night Live every month where she shows you how to do a new project with one of her SVG’s. You can check it out here if you want to be part of next month’s craft night!

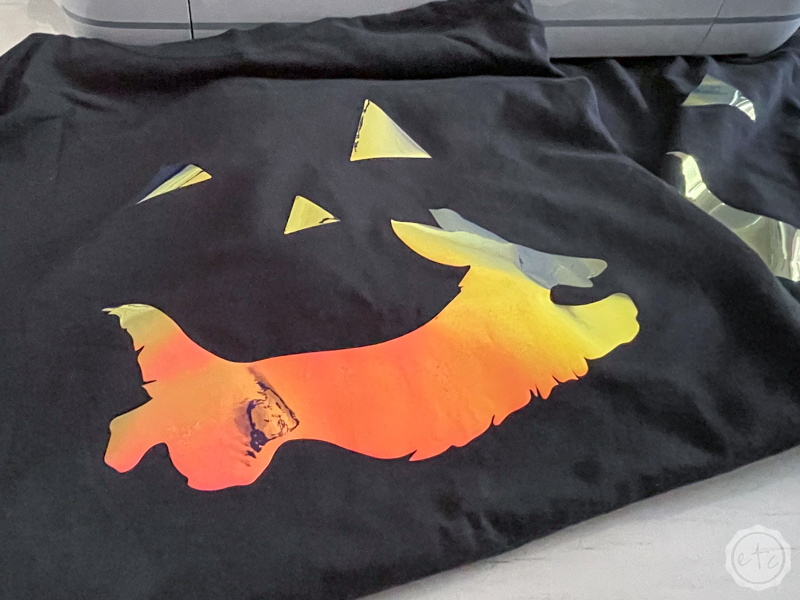
Step 1: Cut Out the Design
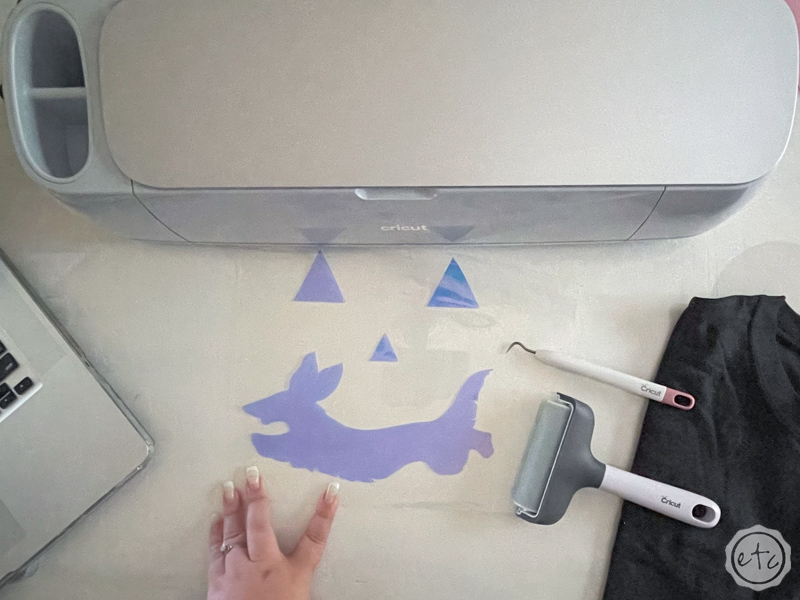
Go ahead and download your SVG’s from the bottom of this post and then upload them to cricut design space. There are two different design files (the one I’ve used and a second SVG with a pointed dachshund… so if you have a black and cream pup you can use a second iron-on for the points!).
Both design files are super cut and I bet the pointed dachshund would be amazing with this orange glitter iron-on (or this gold/champagne!). Either way the designs are fairly simple so cutting these babies out should be super quick!
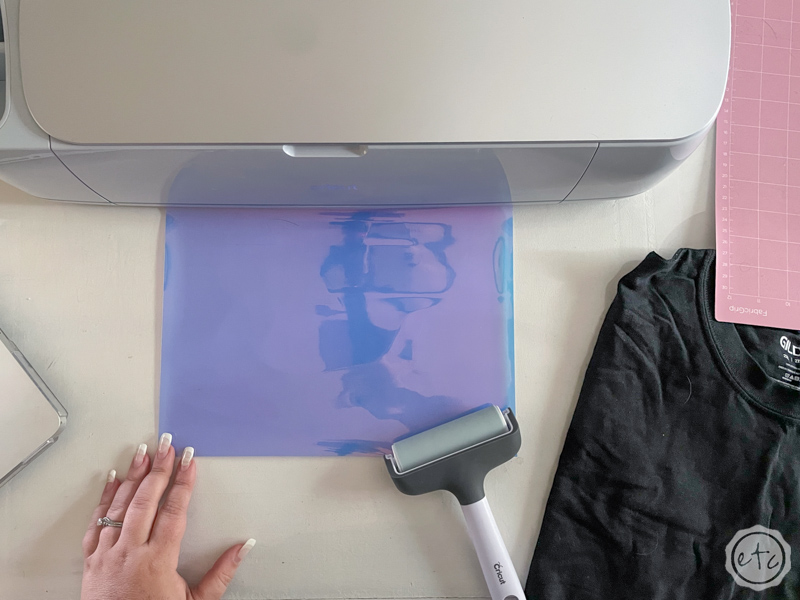
Make sure to mirror your design so that the design cuts out properly, pop your iron-on onto a standard grip mat (shiny side down!) and then cut the entire design out with a standard cutting blade.
The entire design took about 3 minutes to cut out total! That’s pretty darn fast!
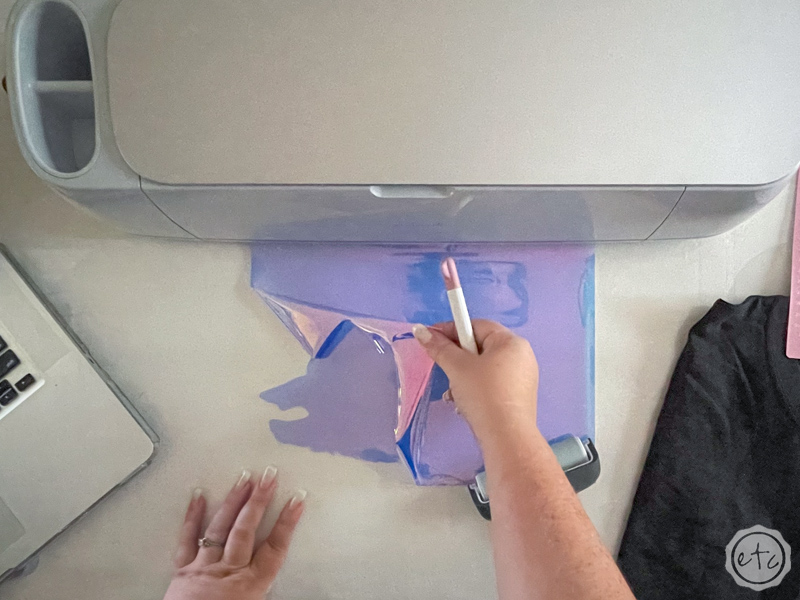
Step 2: Weed the Iron On Vinyl
Ready for weeding? Use your little weeding tool to remove all of the negative space around the design. In this case the excess iron-on will remove really easily… use the weeding tool to grab a corner and then carefully pull it up and off the carrier sheet.
You’ll want to be a bit more careful around the triangle eyes and nose (as it wants to rip here) and you’ll be good to go.
This step should be pretty easy since there aren’t any letters that need extra special attention… in fact you should be able to pull most of the outside vinyl off in one fell swoop.
Easy peezy.

Step 3: Iron On Your Design!
Ready to put this baby together?! Now that everything is weeded and ready to go we can put it on our t-shirt!
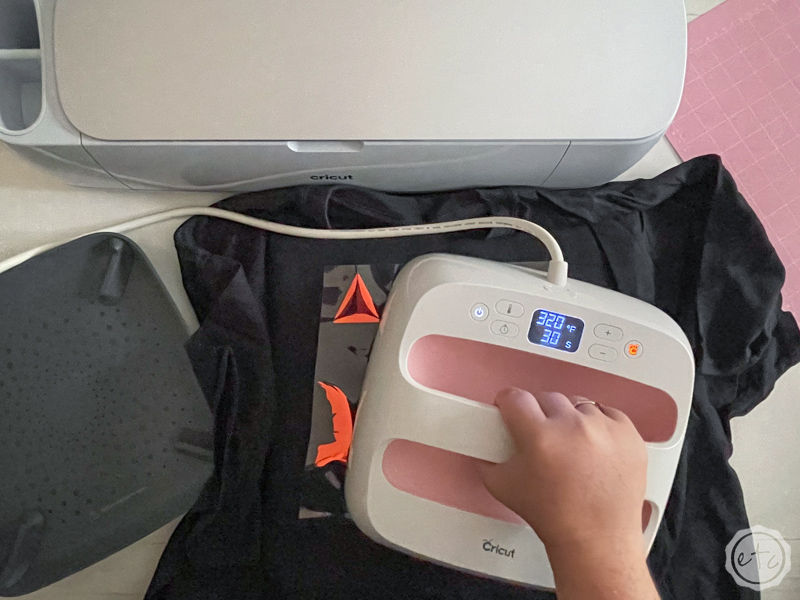
Go ahead and lay out your t-shirt on your easy press mat. Make sure that it’s super straight to the mat so that when you lay out your design it’s not askew. Now it’s time to heat up that easy press… set it to 330 degrees and 30 seconds and set it aside to heat up.
In the meantime you can take your design and lay it out on your shirt. I like to center it on the shirt and then make sure the design is a minimum of 4 finger lengths down from the t-shirt neck. Honestly… that’s the best way I know to keep everything consistent!
Once it’s in place you can smooth it down to stick on your shirt… and then use your easy press to bond everything together. Simply place the easy press on your design and hit the GO button. You’ll want to place even pressure on the easy press the entire time… and if your iron can’t cover the entire design in one go then once it’s done with the first 30 seconds pick it up and re-set it over the other half of the design.
Then flip the entire shirt and heat the back of the design (through the t-shirt) for 15 seconds. This really helps that iron-on to glue properly and not to pull up at the edges after a few washes.
Then set everything aside to cool.

You can turn your easy press off at this point and eat a quick sandwhich. Your decal will only take a few minutes to cool down.
Once it’s cool to the touch you can start to peel back the carrier sheet leaving the iron on behind!
Work your way around the entire sign making sure all of the edges are bonded. They should be… this blue holographic iron-on is usually easy peezy to work with!

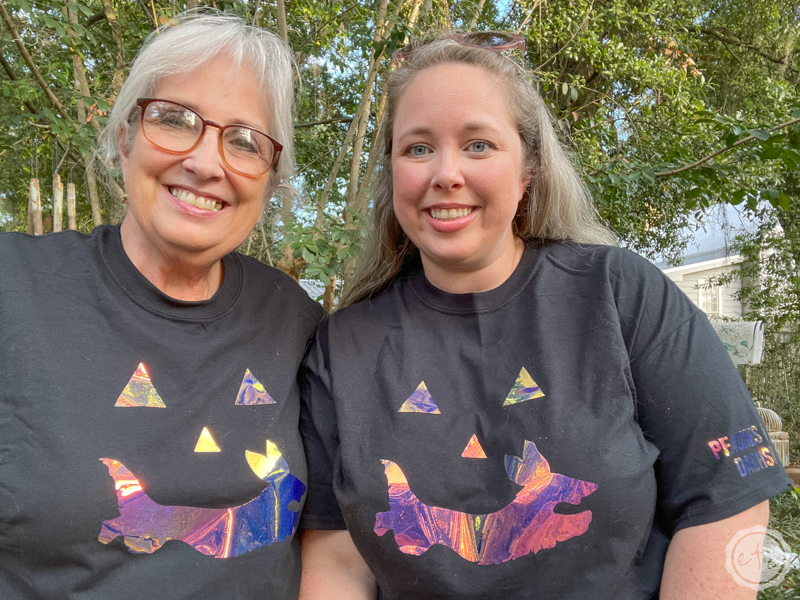
Now you’re done! You can put your shirt on and go show it off to your Mama.
Just be warned… my Mom liked mine so much she asked me to make one for her! We put them on and took a few photos with a few of our favorite puppy models!
Cookie and Adele!
Check out the end of the video if you want to see even more adorable puppies (in action!).


Darling shirts and loved seeing you and your mama with your puppies! 💗