


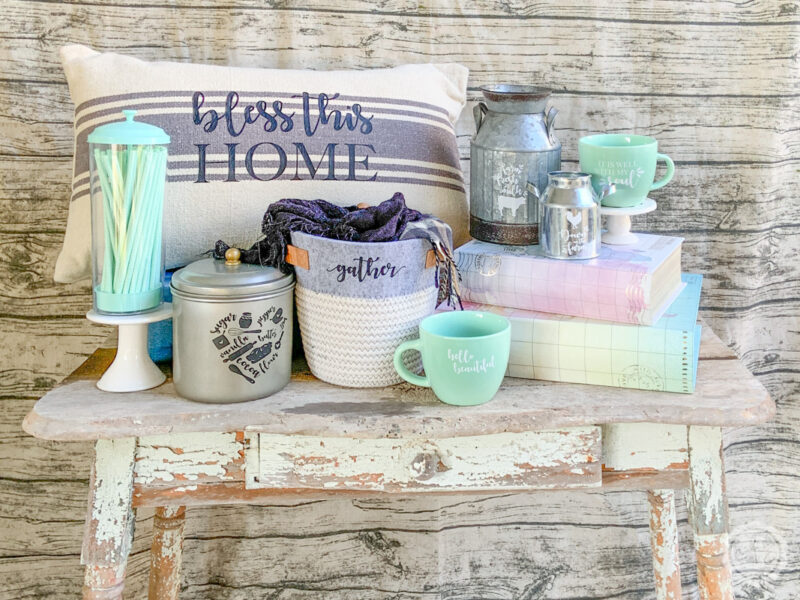
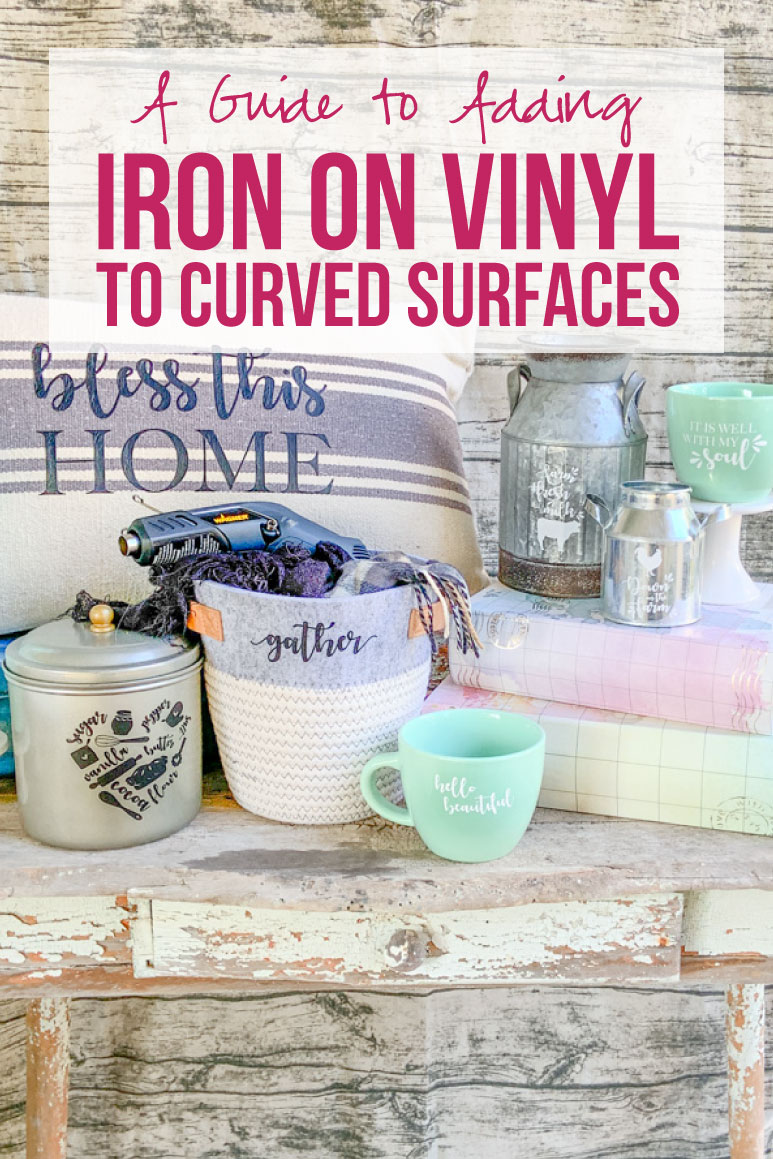
If you’ve ever tried to add vinyl to a mug or a sticker to a canister you know that adding a cute quote to your favorite mug is a little harder than it sounds. My favorite trick? Forget the premium vinyl and use iron on vinyl to add any design you like to your curved surface.
Of course, iron on vinyl has one major hiccup: it requires heat. Which isn’t a problem when you’re adding iron on to a t-shirt, whipping up a sweet little onesie or breaking out your easy press to work on a flat project. Flat being the key word!
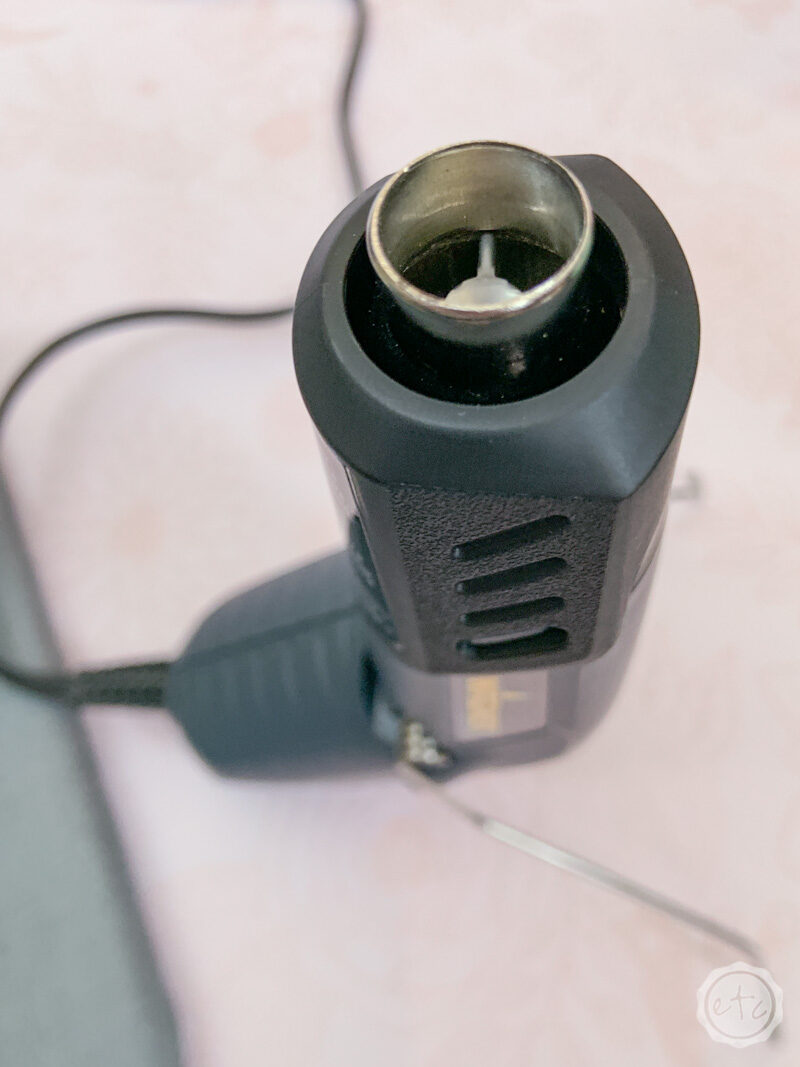
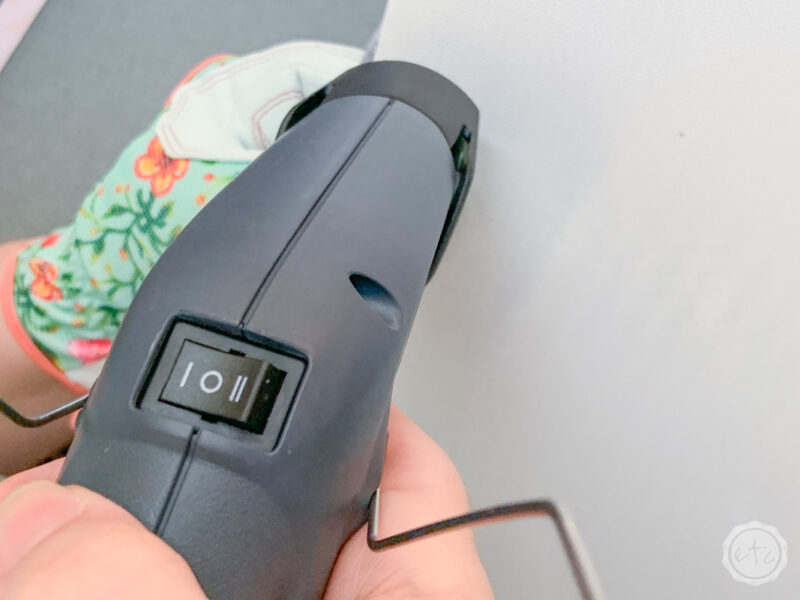
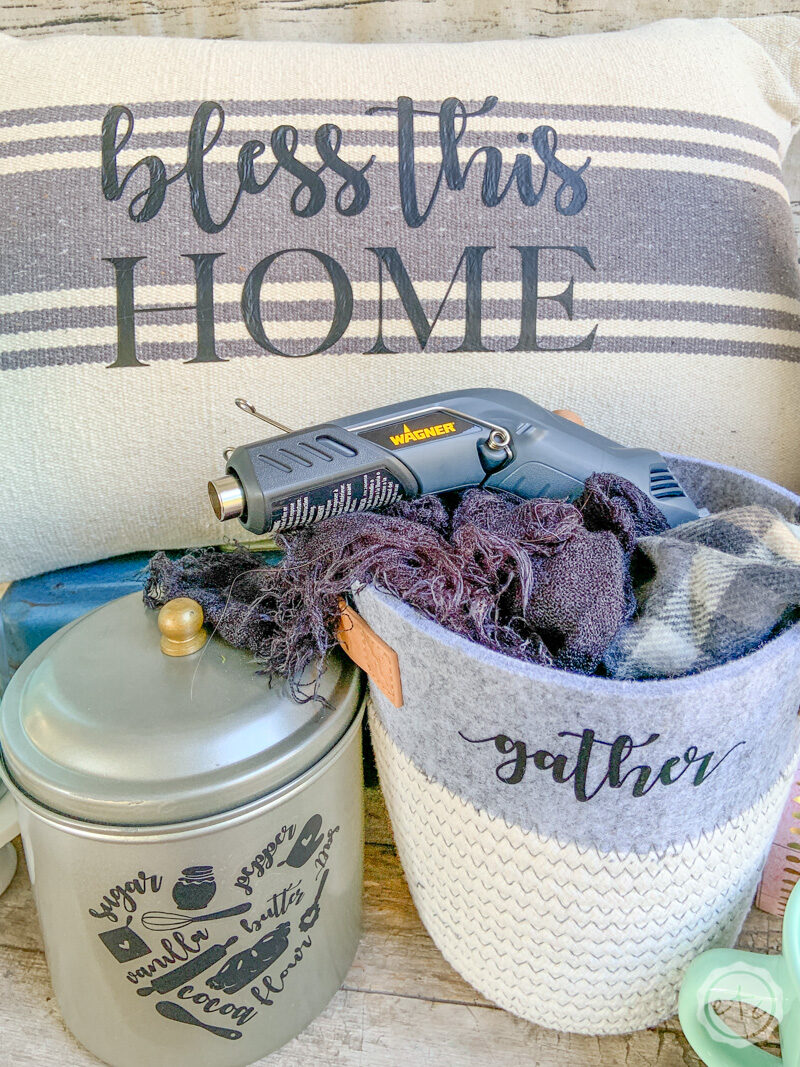
Which is why one of my absolute favorite heat gun uses of all time is adding iron on vinyl to a curved surface. That’s right… I use a heat gun. Specifically this little Wagner heat gun that is tiny, mighty and perfect for crafting!
It has two settings: low temperature at 450°F and high temperature at 680°F so it’s perfect for adding iron on vinyl to just about any project. Not convinced? Take a look!
Adding Iron On Vinyl to Curved Surfaces

Adding Iron on Vinyl to Curved Surfaces
I have tried to make mugs in the past (and actually did make a few wine glasses) but adding vinyl to the curved surface was (excuse my french) a pain in the butt. Iron on goes on smoothly and this small craft heat gun helps the design to lay smoothly over bumps and dips in the materials surface.
Of course, depending on your project you may need to set your heat gun to low heat (or high heat) or even ditch the protective covering. I’m going to walk you through using this little craft heat gun to add iron on vinyl to felt, canvas, aluminum, stainless steel and stoneware so that you’re prepared for just about any situation that comes your way.
Supplies:
- Iron On Vinyl (I used sportsflex vinyl in white and black for this project)
- Wagner Heat Gun (this is the one I have!)
- Cutting Machine (I used my Cricut Maker)
- Cut Files (find the ones I used in this post for FREE below)
- Leather Work (or Gardening) Gloves
- Wash Cloth
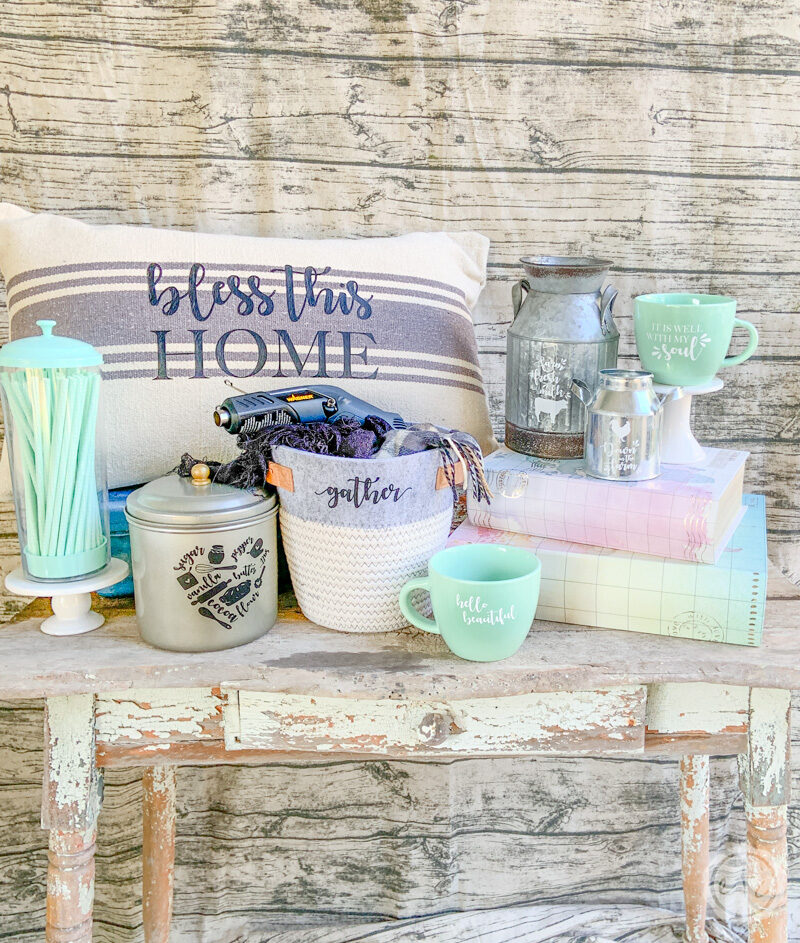
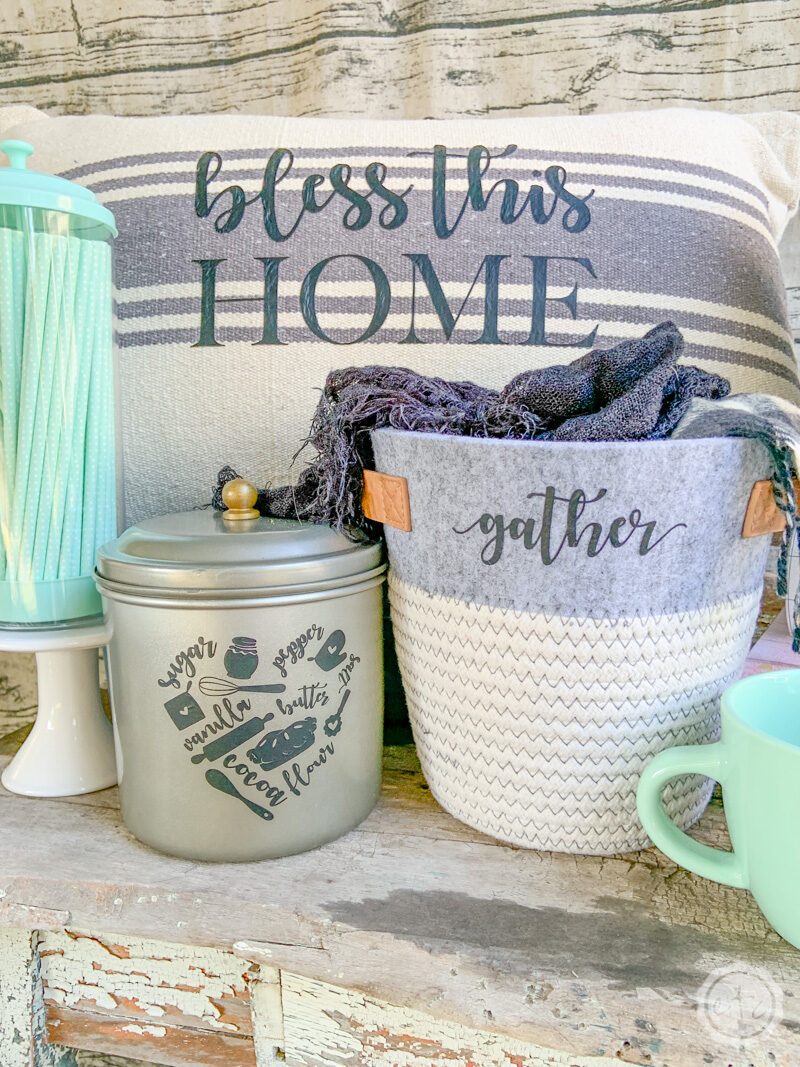
- Item to add your iron on to! Mugs, fabric baskets, pillows, milk jugs, kitchen canisters etc.
Iron On Vinyl Settings for Different Surfaces:
Depending on your project the settings may change a little bit so I thought we’d cover the full spectrum of curved surfaces.
If you have a curved surface you’d love to try and it’s not on this list leave a comment down below so I can give it a try for you. I love tackling new projects!
For the purposes of this project I’m going to start after your iron on design has already been cut and weeded. Don’t forget to grab your FREE cricut cut files at the bottom of this post. If you need help with your Cricut Maker you can visit my “Start Here for Help with your Cricut” page and then come back to this post!

A QUICK TIP: When working with a heat gun always be safe. I used a leather palmed garden work glove to hold my iron on vinyl in place and to press down the iron on when the heat gun was on the low heat setting. When the heat gun was set to the high setting the surface of your material can get very hot… set your heat gun aside before using the wash cloth to press down your iron on so that your fingers don’t overheat.
Let’s get started!
Heat Gun Settings for Stoneware
- Project Blanks: Aqua Mugs
- Heat Gun Setting: High 680°F
- Protective Cover: Plastic Coating that comes on your Iron On Vinyl
- Difficulty Level: Medium
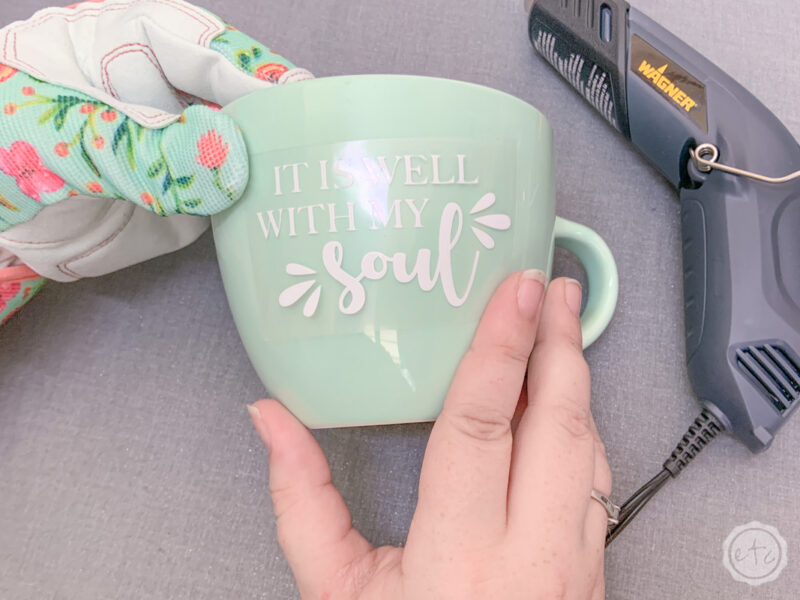
Ready to get started? I think the project I’m most asked about is “how do I add quotes to mugs?” Well y’all… this is the absolute easiest way to add a vinyl decal to a mug.
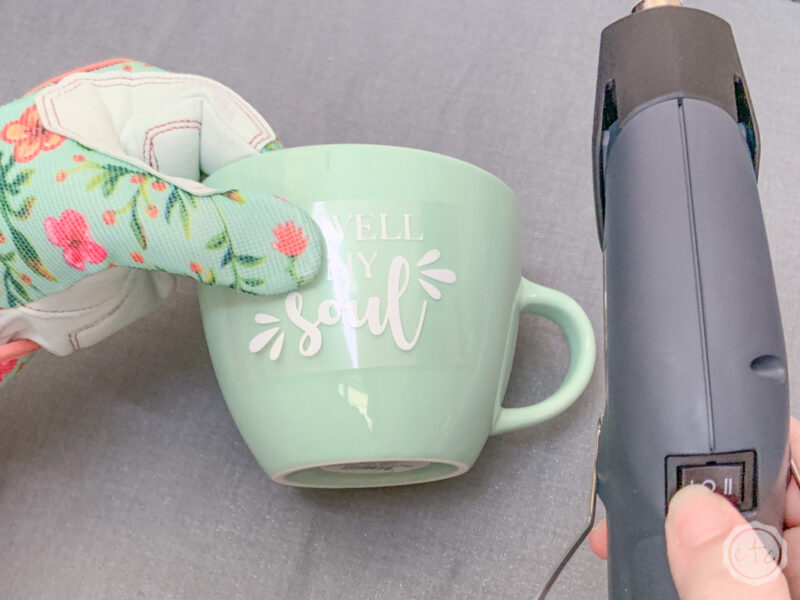
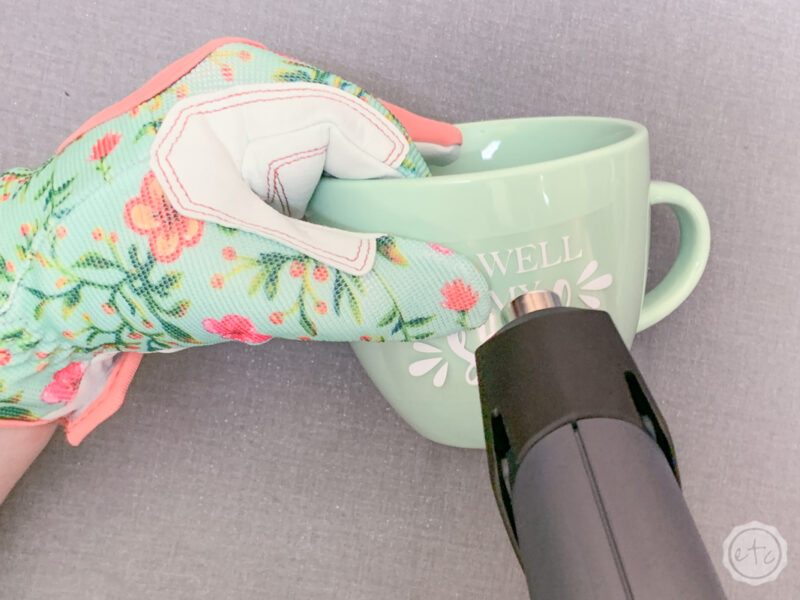
Start by placing your iron on vinyl in the center of your little coffee cup. Then set your heat gun to it’s high setting! Start off on one side of your design by heating the far-most letters for about 10 seconds with high heat. Then use your wash cloth to firmly press those letters down and into the mugs surface.
Repeat this process and you should see the protective covering start to peel away from the letters… leaving the letters firmly bonded to the mug. As the protective covering separates from the iron on vinyl move your way across the surface of the mug… heating up letters of the design and then pressing them down.
Just make sure to always keep that protective covering (even once it’s curled up and is not touching the actual iron on anymore) between your heat gun and your iron on. It’ll protect the iron on letters from getting too much heat and warping!
Once you’ve moved alllllll the way across the design and the protective covering is all the way off you’re finished! Enjoy your mug!

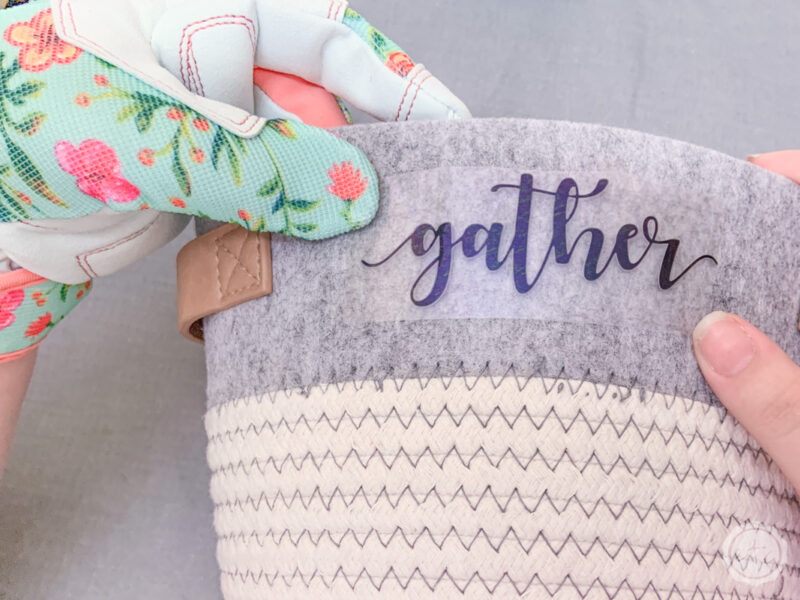
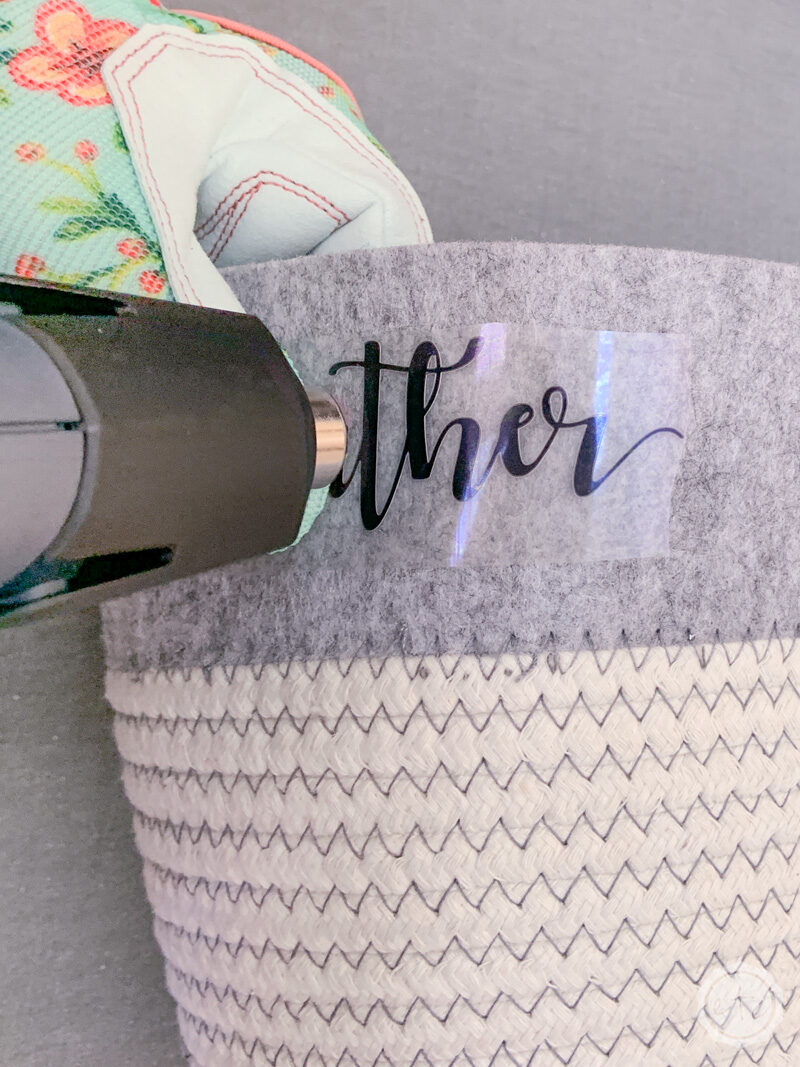
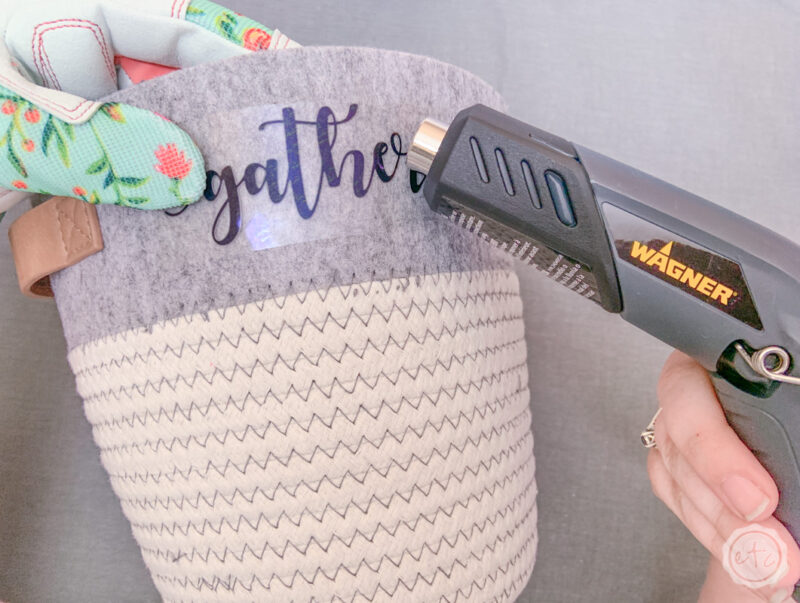
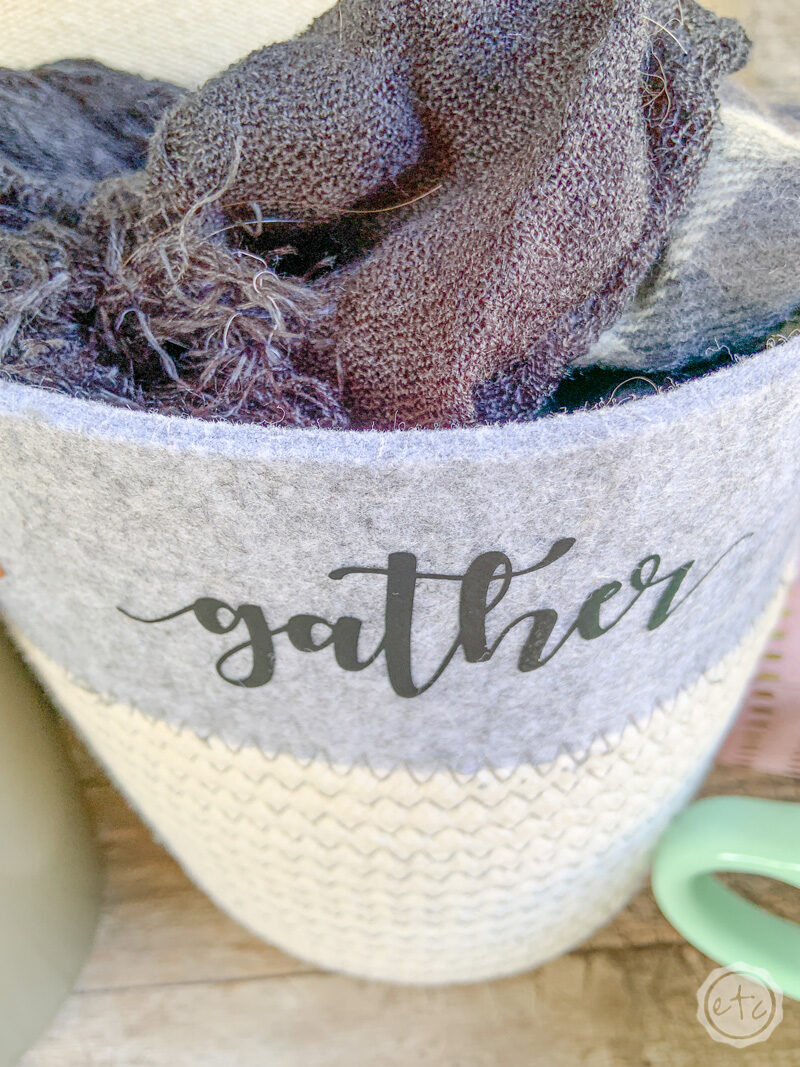
Heat Gun Settings for Felt
- Project Blank: Small Storage Tote
- Heat Gun Setting: Low 450°F
- Protective Cover: Plastic Coating that comes on your Iron On Vinyl
- Difficulty Level: Easy
Adding iron on to this little basket was soooo simple… iron on was designed to bond to fabric after all.
Simply set your heat gun to low, place your iron on in the right spot on your basket, then start in the middle by heating up the middle few letters and then using your wash cloth to smooth them down.
Work your way out on either side until you’ve done the entire quote… then peel off the protective backing and enjoy!
The whole process took about 30 seconds… which is a record for easiest project ever.

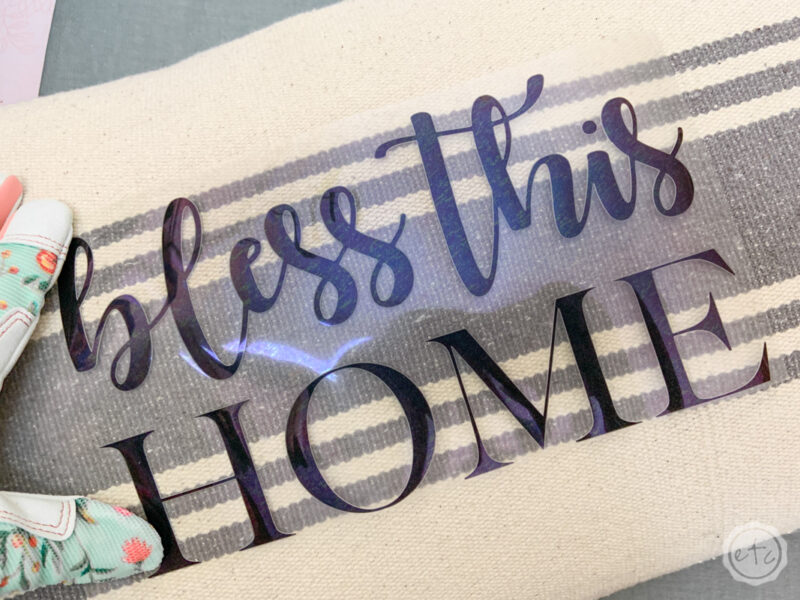
Settings for Fabric & Canvas
- Project Blank: Farmhouse Lumbar Pillow
- Heat Gun Setting: Low 450°F
- Protective Cover: Plastic Coating that comes on your Iron On Vinyl
- Difficulty Level: Easy
I almost didn’t include this section… because let’s face it fabric is flat y’all. 9 times out of 10 if you want to add iron on to fabric you can simply lay it out on your work table and use your easy press.
But what if you can’t? What if your fabric (or in this case heavy canvas fabric) was already made into a pillow… without a zipper? Instead of cutting the pillow open, adding my quote and then stitching the whole thing back up I simply whipped out my heat gun and added a quote directly to the front of this little pillow… no unstuffing necessary.
GAME CHANGER!
This is a really simple process: simply set your heat gun to low, place your iron on in the right spot on your pillow, then start in the middle by heating up the middle few letters and then using your wash cloth to smooth them down.
Work your way out on either side until you’ve done the entire quote… then peel off the protective backing and enjoy!

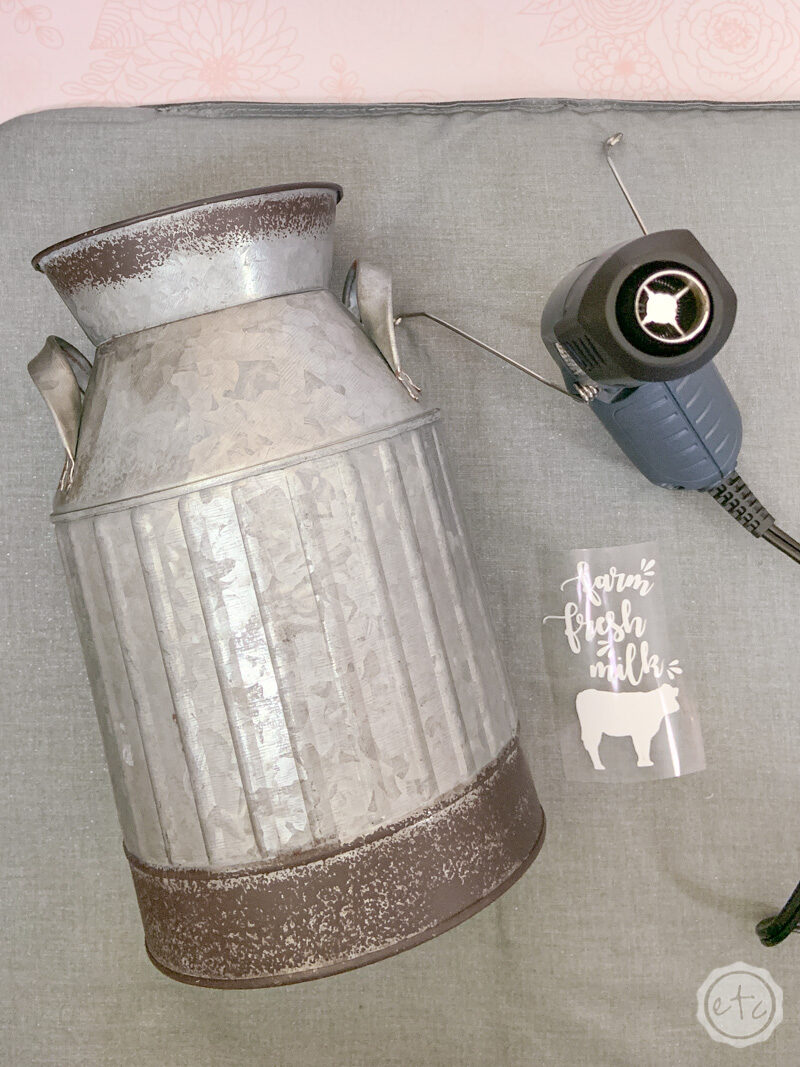
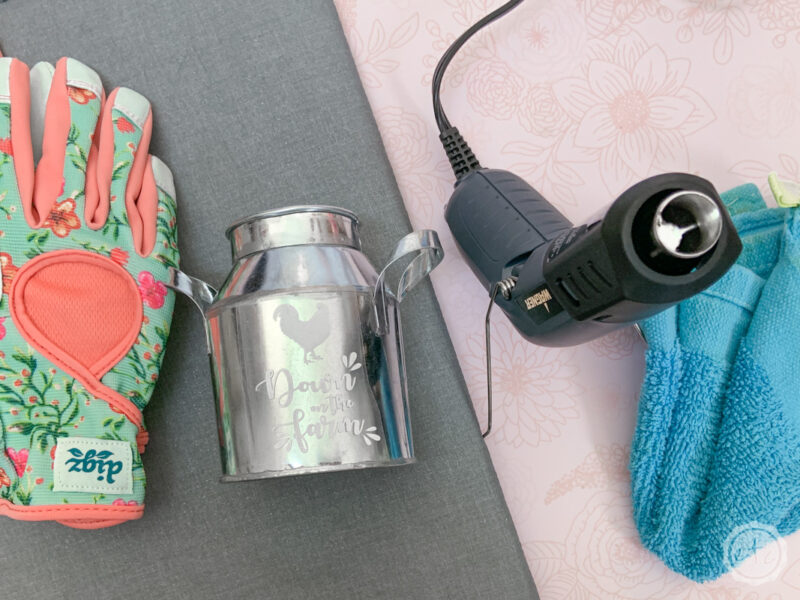
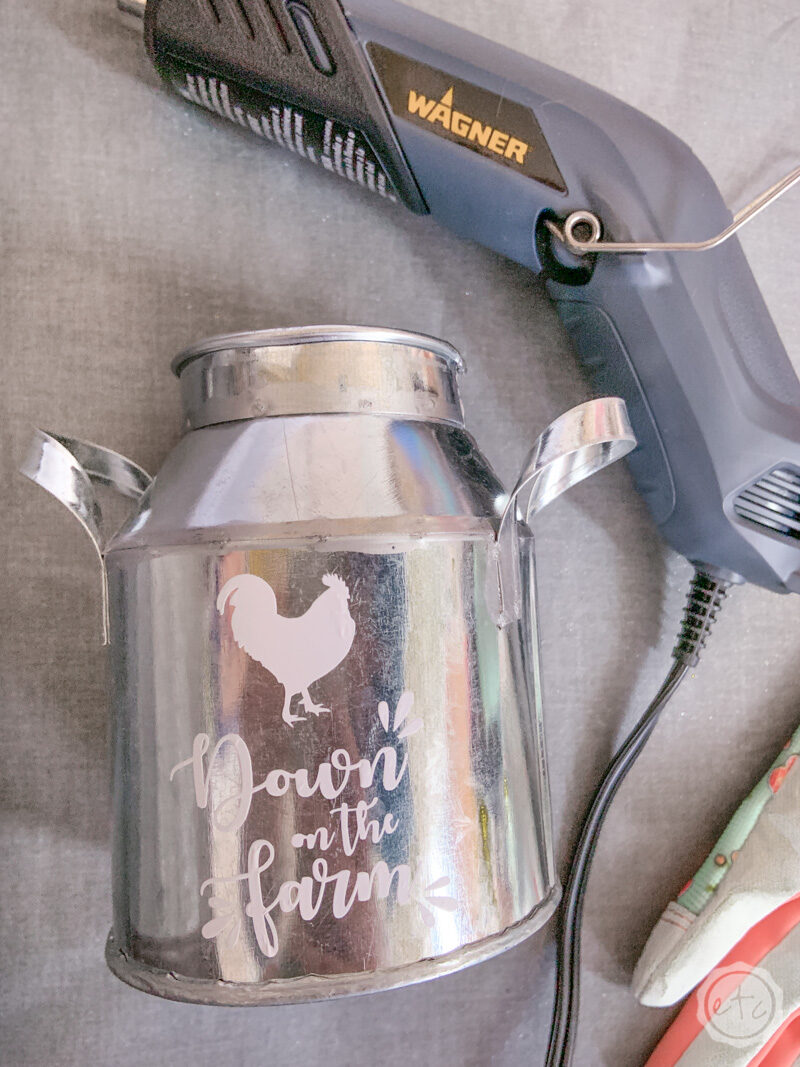
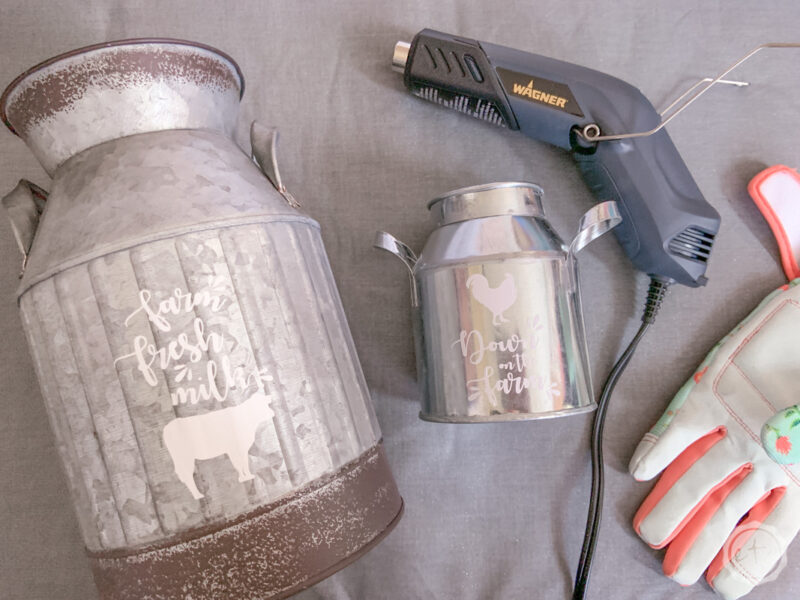
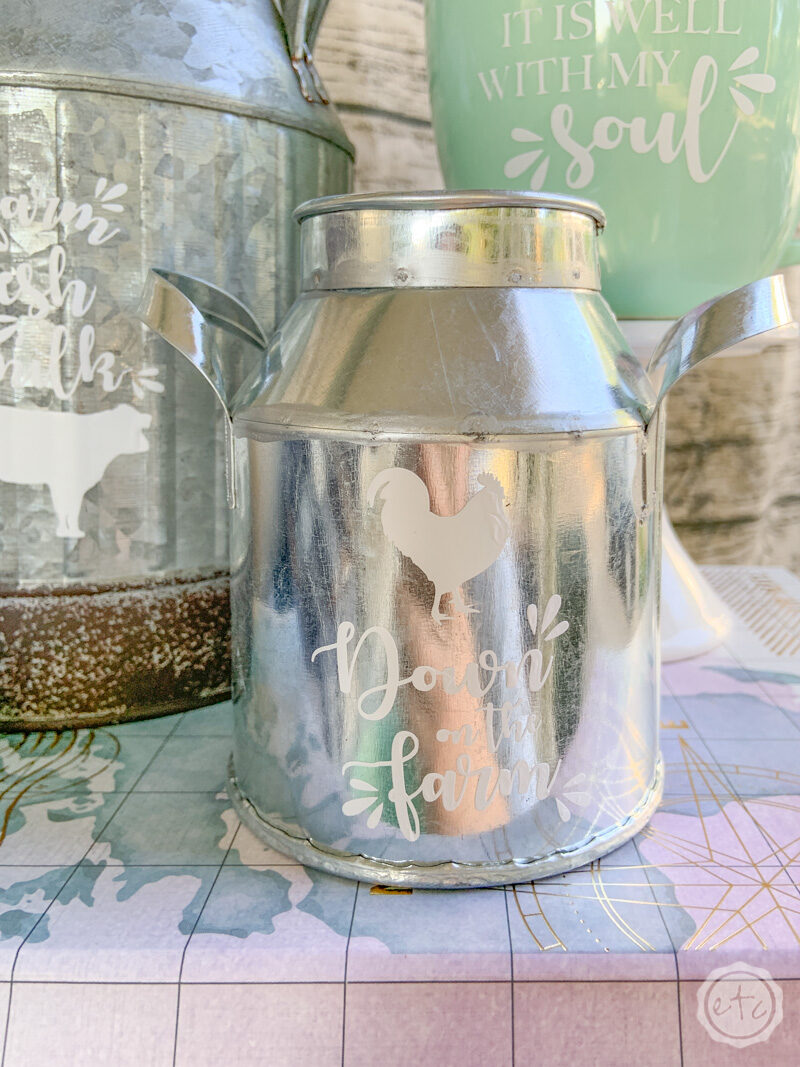
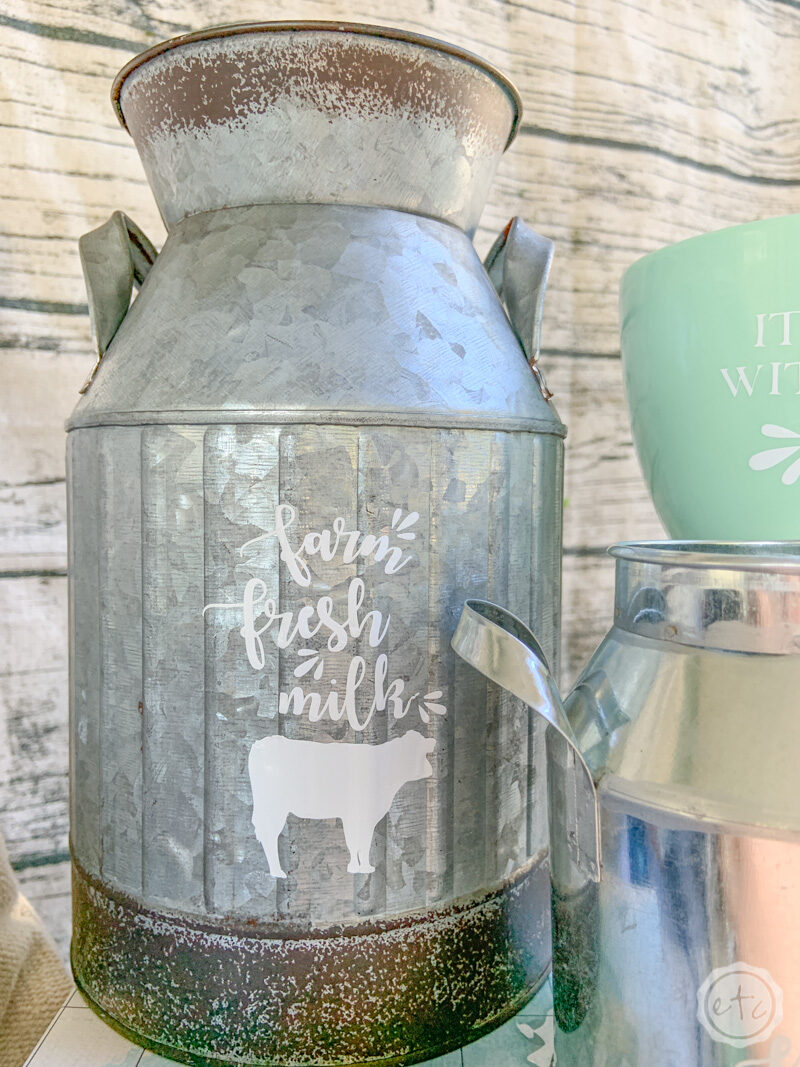
Settings for Aluminum, Tin and Lighter Metal
- Project Blank: Metal Milk Can
- Heat Gun Setting: Low 450°F
- Protective Cover: Plastic Coating that comes on your Iron On Vinyl
- Difficulty Level: Easy
This little milk jug set was by far the easiest of all the materials to work with… because aluminum holds head like a boss y’all.
Like a boss.
Simply place your little iron on vinyl design in the middle of your little aluminum container and set your heat gun to low. As always start by heating the middle section of the iron on for about 6 seconds then remove the heat and press down the iron on firmly with your gloved fingers.
Keep doing this (6 seconds of heat and then smooth down the iron on) until you’ve done the entire iron on design. Aluminum holds heat ridiculously well so the entire container will be warm but since your little heat gun is set to low it shouldn’t be too warm.
All that means is that you may have to make a pass of two over the entire design before the iron on is firmly bonded to the metal. That’s ok… two or three passes over the iron on design is better than warped, melted plastic and iron on!
Slow and steady y’all… and then when the iron on is firmly bonded you’ll have a fun little milk jug to enjoy!
The best part? The heat gun bonded the iron on vinyl smoothly around each ridge and line in the surface of this milk jug perfectly… that would have been difficult to achieve with premium vinyl.

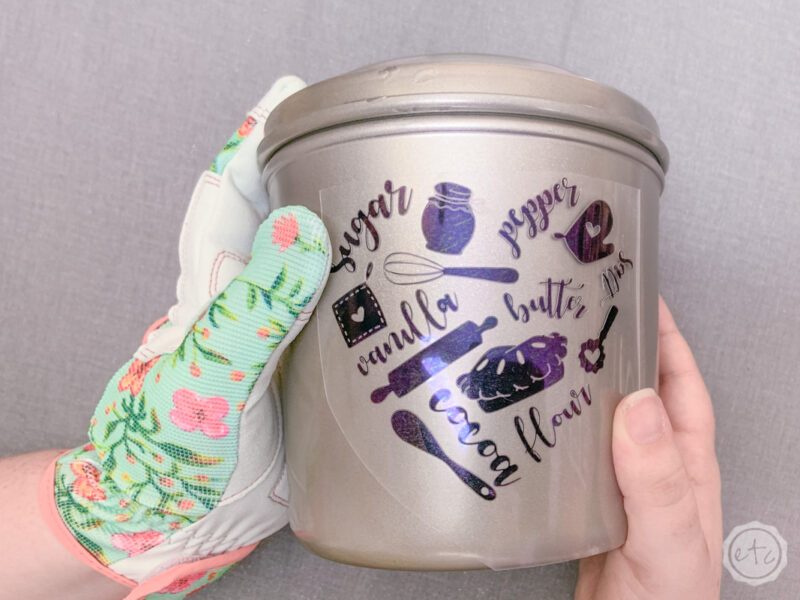
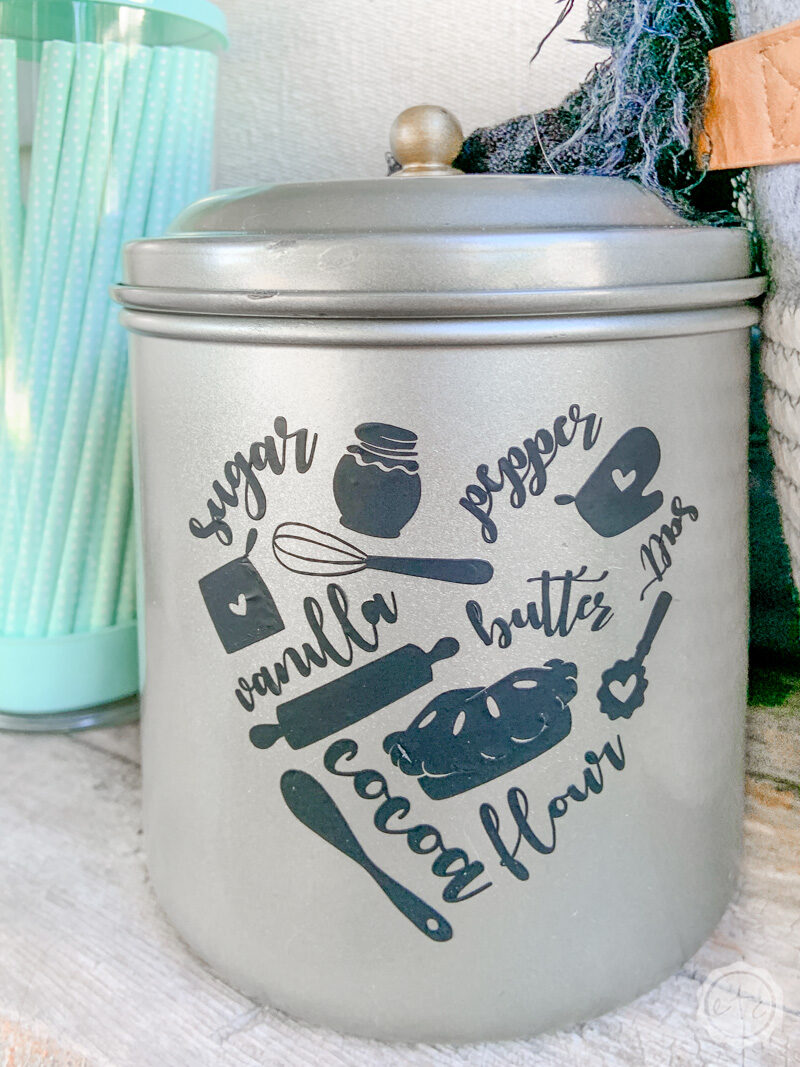
Settings for Stainless Steel and Thicker Metal
- Project Blank: Stainless Steel Canister
- Heat Gun Setting: Low 450°F or High 680°F
- Protective Cover: None or Cricut Protective Sheet
- Difficulty Level: High
Are you confused yet? I saved this one for last since it’s the hardest one on the list. This thicker metal canister really resisted the heat so it was a pain in the rear… although after a little trial and error it ended up looking absolutely beautiful.
As always set your iron on vinyl in the center of your surface and make sure the decal is stuck in place before moving on. Start on one side hitting the iron on one design at a time for about 10 seconds with the heat gun set on high.
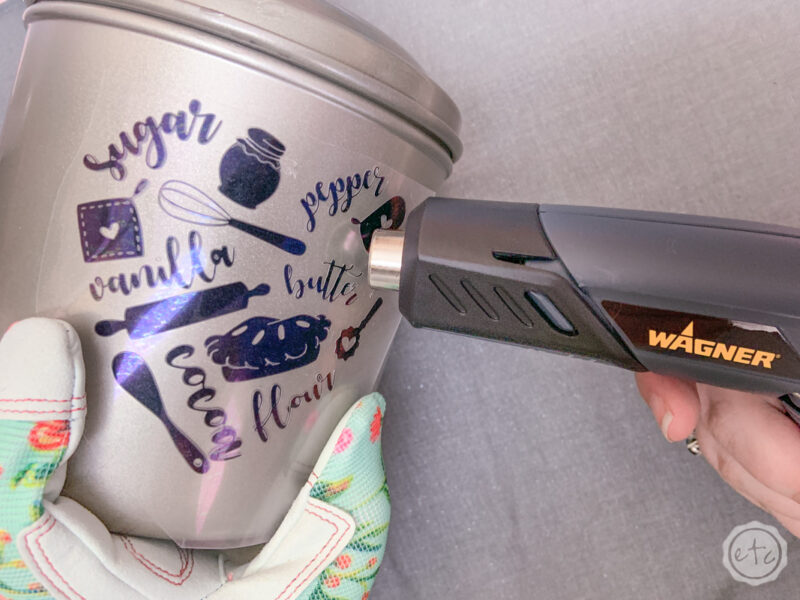
After 10 seconds go ahead and press your iron on vinyl down firmly onto the canister with your wash cloth so that it’s in firmly in place. The high temperature of the heat gun will start to melt the plastic protective covering if you have to hold it in one spot too long.
If this happens the iron on designs can start to stretch and warp beyond usability (which sucks!). I added my thicker Cricut protective sheet over the plastic cover to prevent the warping and this seemed to correct the problem!
Of course, it’s a white color so it’s a little harder to see through than the clear protective sheet that’s built into your iron on vinyl but that’s ok.
BONUS TIP: Okay if you don’t have a thicker protective sheet to toss over your project but your clear protective covering is melting and threatening to kill your project I have a solution.
No protective sheet at all. That’s right… go for the full monty and lose the protective sheet all together. It goes against every bit of instinct I have (since I’ve had iron on wrinkle and buckle by hitting it with heat before) BUT in this case it works.
Carefully peel the clear protective sheet off your word or icon and place it on your stainless steel container. Then set your heat gun to low (NOT HIGH) and hit the iron on for about 4 seconds with low heat and no protective cover. This will soften the iron on and activate the adhesive. Firmly press the iron on down onto your canister so that it’s bonded.
If bits of the word are still sticking up or it doesn’t feel firmly bonded hit it with another few seconds of heat.
Keep in mind that while this method works if you keep the heat in one place too long it will pucker your iron on… and peeling the words/icons off the clear protective backing is a pain in the rear (especially for this little heart design that has entirely too many pieces to make this feasible).
But it looks oh so pretty in the end!


[…] gun has 2 heat settings, 450 and 680 which makes it perfect for projects where you need less heat (I used it to add iron-on quotes to mugs, milk jugs and baskets in this post) as well as projects like this flow art that need more […]