

Remember when I started this closet series way back on December 29th? Well it’s taking longer than planned to make my way around to all of the different hiddy holes… but we’re slowly getting there! Last time we were rocking the master closet but today is a beast of a different color entirely… the craft room closet!
We’ve been working steadily to make this one ship shape with our DIY Cardboard Bookcase and Decorative Boxes for Wall Storage but the real kicker? Finally getting all of the Christmas Boxes the heck out of dodge! That’s right it is April 8th today and my Christmas decorations are finally put away! Yes I know I’m bad, ashamed even… it was getting to the point where I told my hubby not to invite people over “they might see the Christmas decorations and think we’re crazy!”. Well we are crazy (especially since I won’t let my friends and family see my belated Christmas decorations but I’ll post about it on the internet…. ) but it’s finally done! The decorations are gone, the closet is organized and now we are ready to share with you lovely people.
We are rocking it over here I tell you, rockin’ it!
Looking for a bunch of posts on organization & planning? I’ve got you covered! Click here to see all of my organization & planning posts in one place!
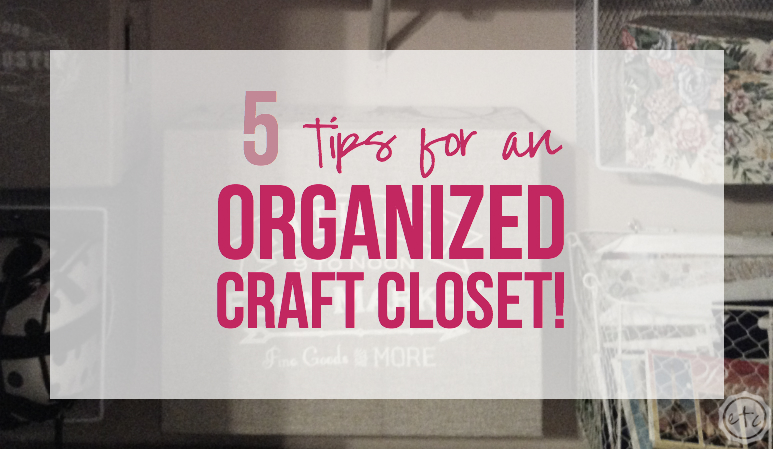
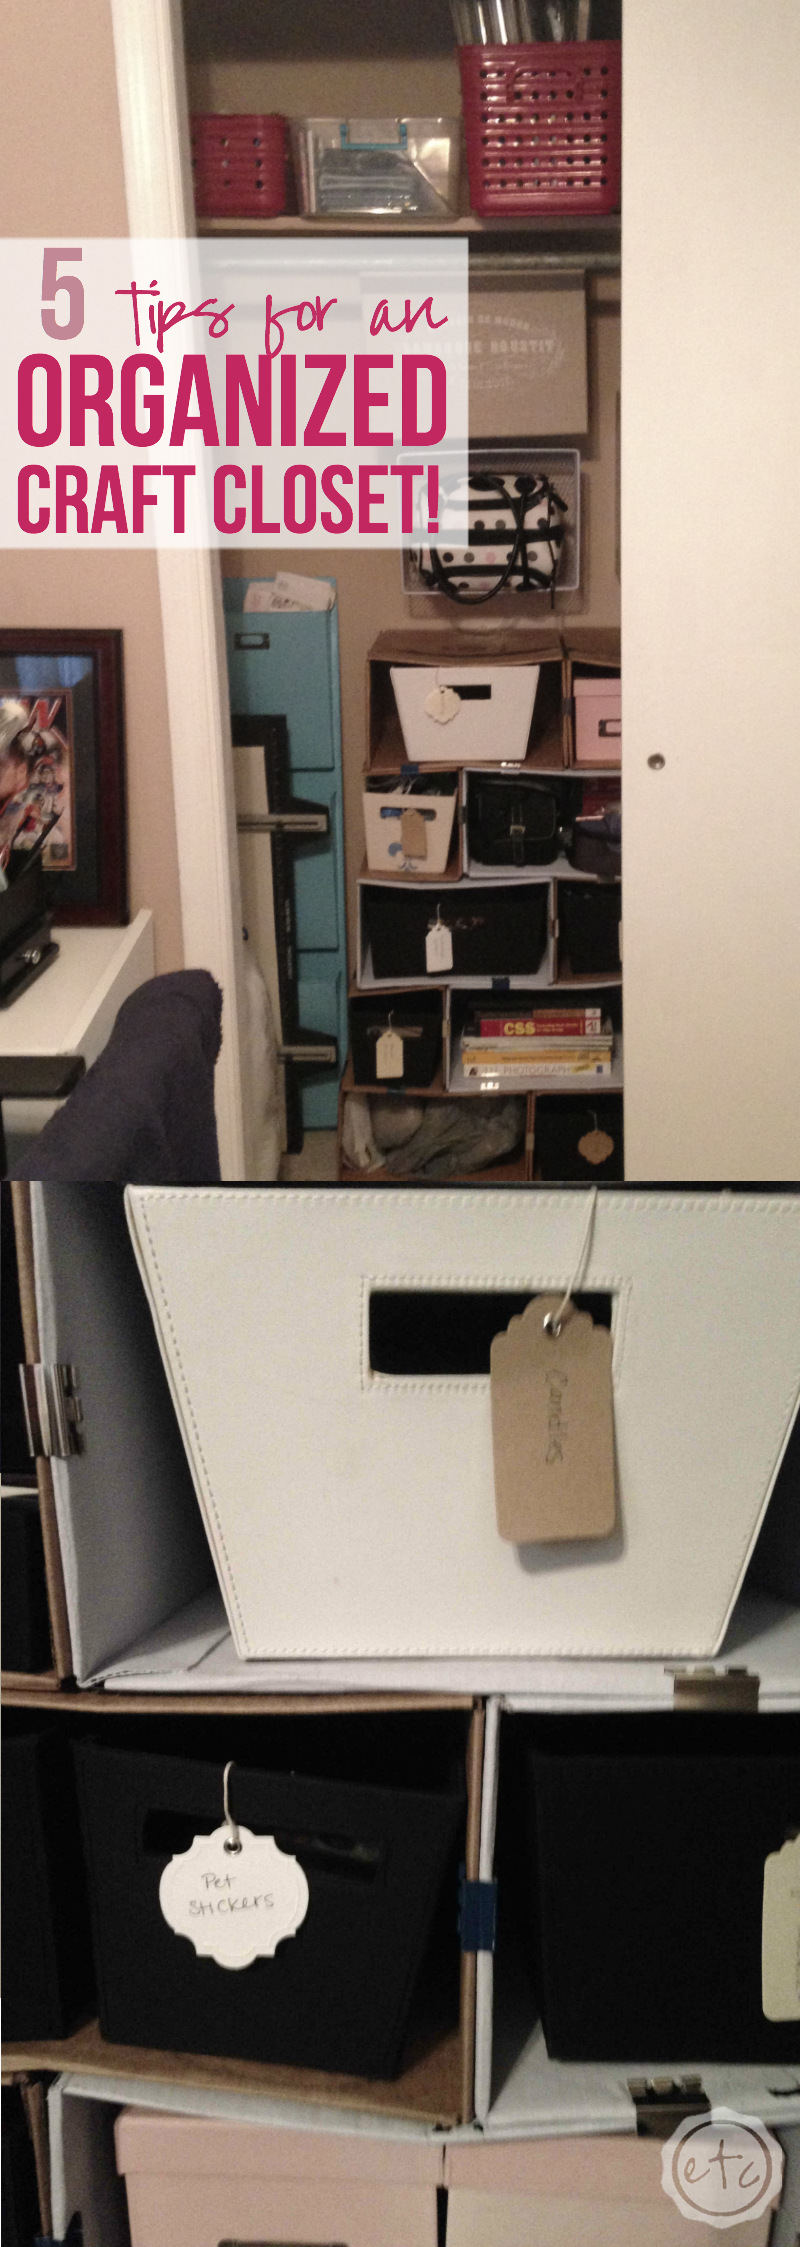
5 Tips for an Organized Craft Closet
1. Buy (or Make) shelves!
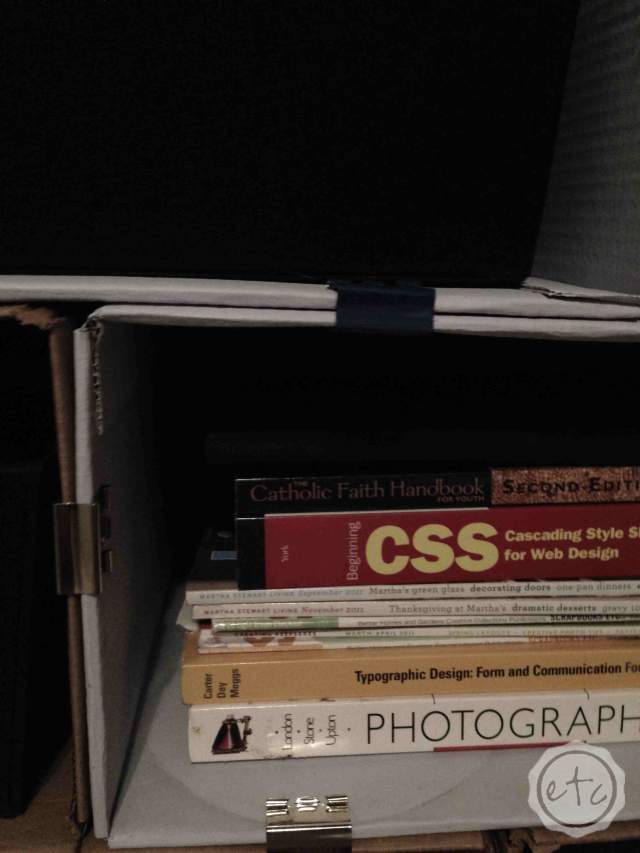
2. Crafting has many little teeny tiny teensy weensy parts… Label Everything.
3. Don’t let gravity hold you down Go Vertical! Use all parts of your wall below the shelf and above… hang an extra shelf at the top of your closet if you can!
4. If your room is tiny don’t let doors hold you back, take off the doors of your closet to extend the room as far as possible! Sliding barn doors that stay open would be another perfect solution!
5. Be creative with your storage containers! Baskets are great but there are plenty of non-traditional options… think outside the box! Literally!!!!
Alright y’all let’s get down to business… this closet was such a mess when we started that I was too ashamed to even take pictures. Basically picture fifty unpacked boxes shoved haphazardly into a small space. There you go… our craft closet. So we started by unpacking, but you know what you get when you unpack? Yup, lots of crap… crafty crap that has no where to go. We needed shelves, we needed baskets, we needed organization and we needed it all on a budget.

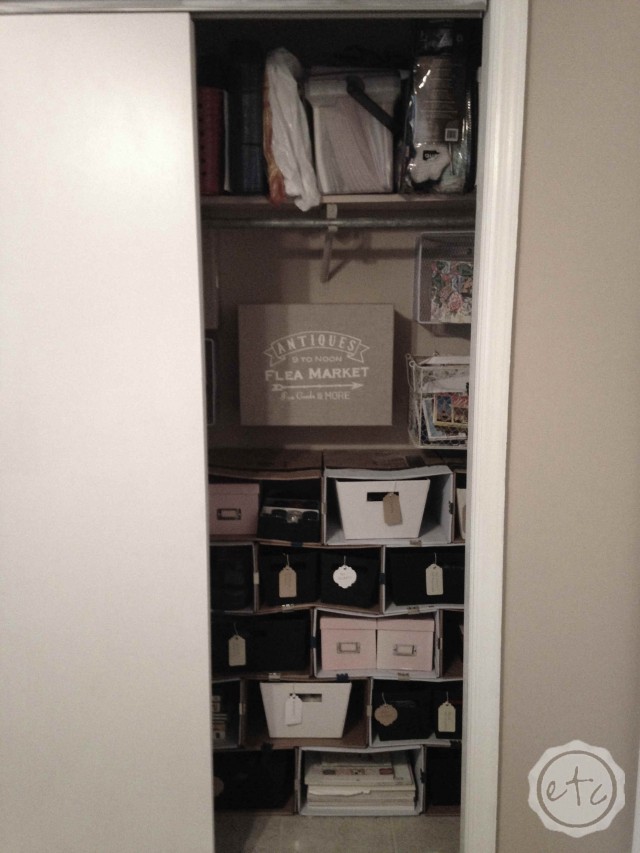
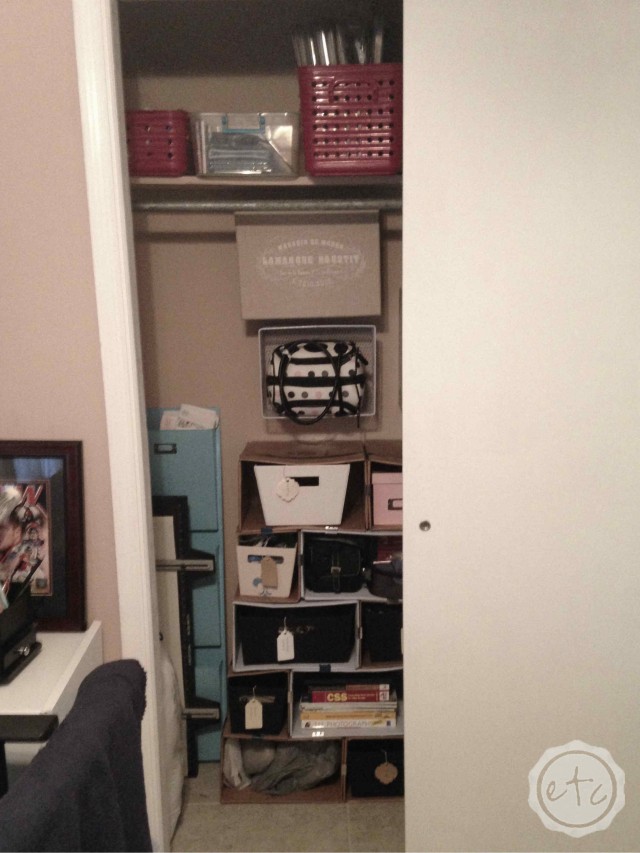
So we came up with the brilliant idea to build our DIY Cardboard Bookcase and you know what? Three months later and it’s still going strong! It provides us a perfect place to store the majority of our crafting supplies and looks super awesome. (That’s a hidden perk!) Plus I love that it pretty much cost us zero dollars. The only thing we had to buy were the binder clips to hold the front together… which was a “pretty” purchase. As in the binder clips make it prettier… duct tape would have worked just fine!
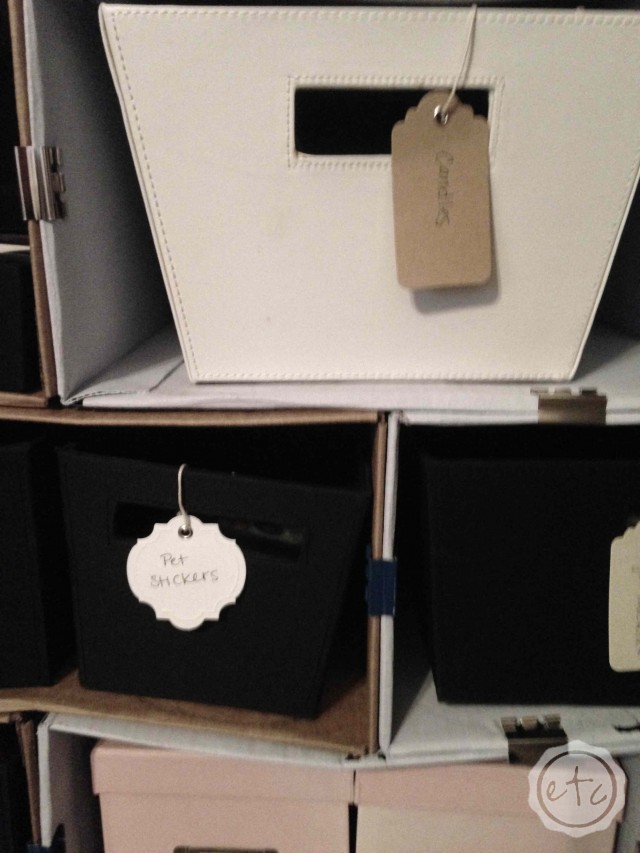
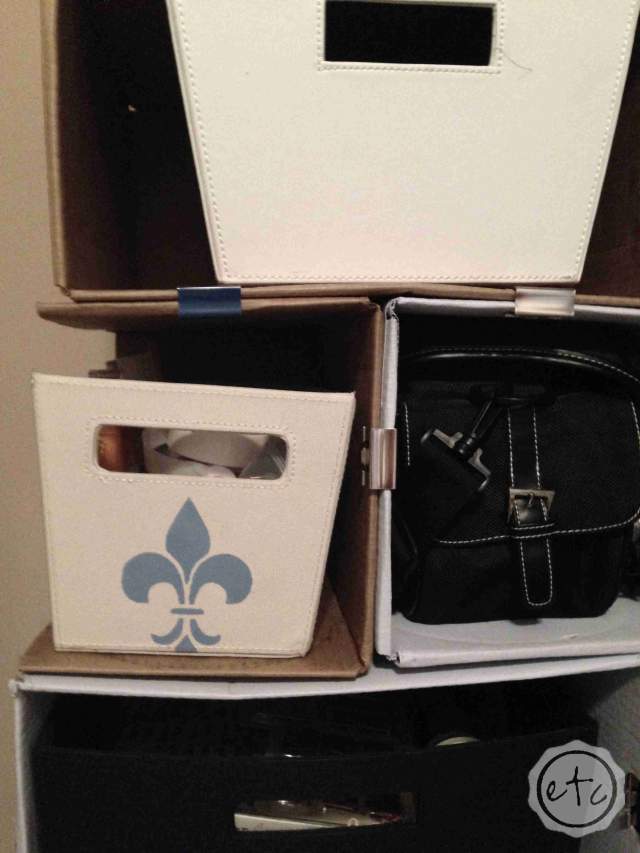
After our Bookcase was built we filled it with baskets (remember y’all being a basket hoarder seems crazy until it comes time to organize things… then you’re everyone’s best friend!). The baskets kept everything looking neat and separated all of the little things into categories. The one downside of baskets? Short of pulling them out and looking inside you can’t tell which basket holds the tape and which one is full of stick on rhinestones (yes, I do have an entire basket of stick on rhinestones, jealous yet?). The easy solution was to use hanging labels… we sat down one evening after work and wrote out each category before tying the labels on with bits of string. Now even my hubby can find the tape (trust me, I tested him!).
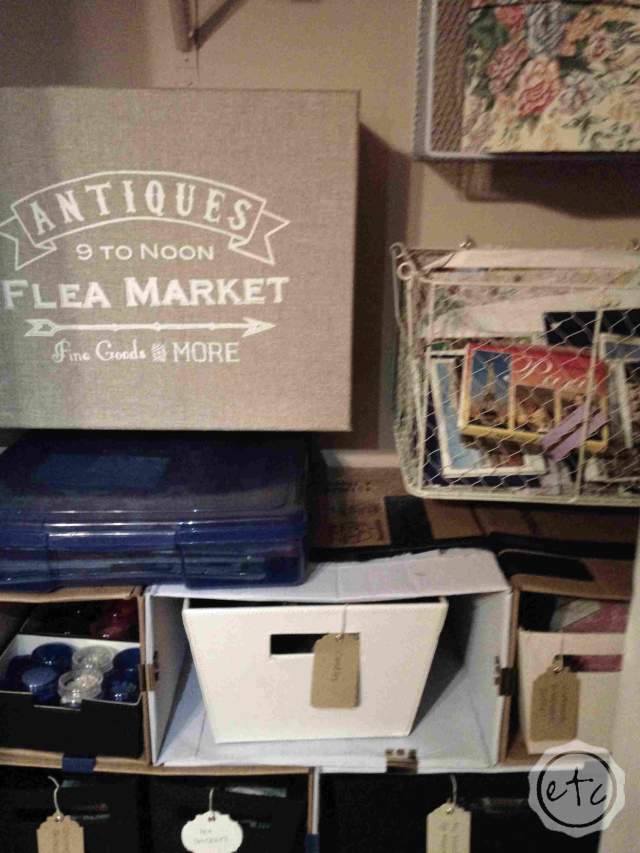
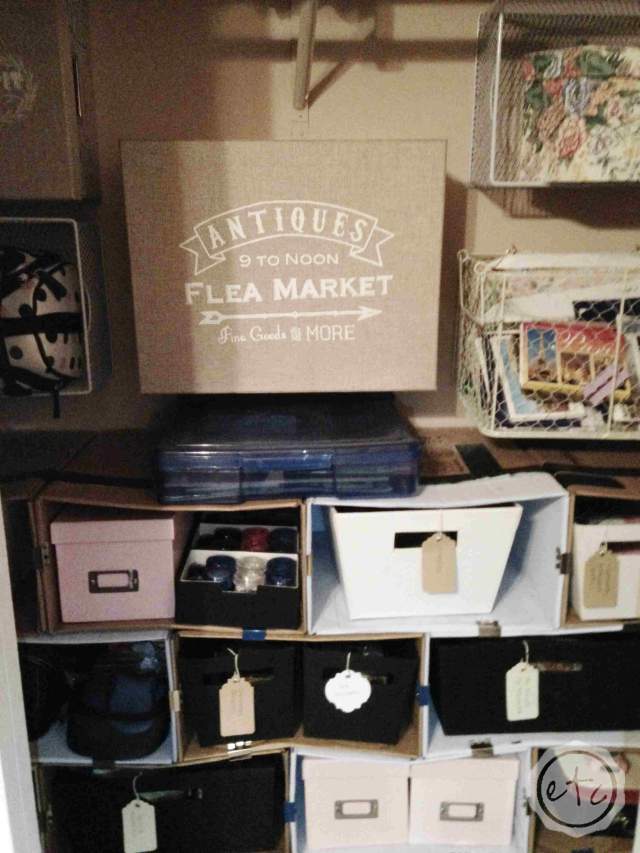
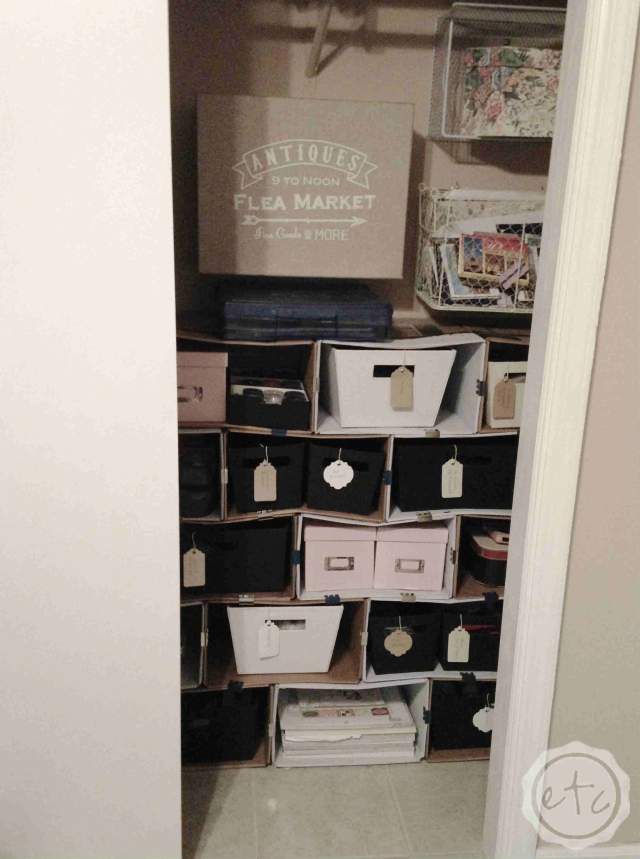
Once the bookcase was finished I realized that it was short and squatty… there was still a good 3 feet of useable space in between the bookcase and the shelf above. At first I wanted to hang baskets from the clothes rod but that wouldn’t have maximized space or held the large books and supply’s that still needed a home. So we went with the next best thing Decorative Storage Baskets hung directly on the wall. They allow for maximum storage and maximum cuteness.. just pick baskets with adorable lids!
My favorite part? How the decorative tops seem to extend the room and make it larger! Now when the closet door is open it doesn’t look like a cluttered mess. The “Antique Flea Market” basket top looks like a wall canvas… and the baskets and labels on the cardboard bookcase coordinate with the other two in the room. With such a small space that added bit of depth (aka the width of the closet) seems to extend the room and make it feel larger. If we weren’t renting I would take down the doors and rolling track all together… then we would have an extended room all the time!
Even better than no doors? Sliding barn doors… then you have an extended room when you want it and a mess-hider when you don’t! (Yes mess-hider is a word, we have got to get y’all a copy of my dictionary).

The final step to organizing my closet? The top shelf. I used a collection of baskets, bins, file folders and old bedding bags to corral the rest of my clutter into one neat row. Important documents went into the file folder on the right, now it’s all in one place when we need to find that one special file. Scrap-booking projects were individually bagged or boxed and stored next to the big pink basket I use to contain my scrapbook paper. The big old clear bedding bag? It houses my collection of yarn and knitting needles… now I don’t have to open the whole bag (aka mess) to see if I have a certain color yarn. Love it!
It feels so good to have these two closets finished! These are the rooms I’m in most (my bedroom and my office) so it’s nice to have functional (pretty) closets that work for me… not against me.
What does your closet do for you?
Linking up with: A Mothers Shaddow, Dandelion Patina, Tatertots and Jello, Thrifty Decor Chick & Little Red Brick House


Hi Betsy, that is a great low cost organized closet. You used boxes to think outside the box. Well done.
Kathleen
Fridays Blog Booster Party
Saving this post! Right now my craft closet is hideous. It’s screaming at me to organize it! Thanks for sharing.
I know what you mean Cryatal, craft closets always seem to get out of hand! All those little pieces! Hopefully this helps, good luck with your closet!
I wish I had a craft closet. It would be handy for sure! I could definitely apply these tips to my kid’s closets, though! Great tips@
Thanks for stopping by Logan! You could definitely use these tips on a kids closet, I actually use this closer for multiple things but crafts seem to take over, haha!
I seriously need to organize my crafting stash. Thanks for the great ideas and tips!
Anytime Sara! Seems like crafting supplies always take over… so many little bits are pieces!
Hi Betsy,
Thanks for the great tips, definitely some in which I will be using.
My craft stuff currently resides all around our entire house, my lady shack & my husbands shop… as its just such a huge project to organize & seems like more of a disaster when you start going through it.
Thanks for the inspiration.
All my love,
Laurie
Thanks for stopping by Laurie! I know what you mean my crafting stuff always seems to explode when I’m working on a project and without a system it seems to hang out all over the house! It’s so much easier now that everything has a specific home!
Very cool ideas! I love those folding fabric bags. I have them all over my house. It’s always nice to find another use for them!
Aren’t those little fabric bins the best? They hold everything!
Ug my craft area is a mess! It’s needs organized so badly. Thanks for sharing this! It’s given me so great ideas. Now I just need to do it haha.
That’s always the hardest part… you can do it! Just eat a lot of chocolate first! That always gets me hyper enough to work! JK!
Very cool idea! I like the baskets hung on the wall between the top shelf and the next set too, it really does maximize the space you have there. The hanging labels are awesome too, I will have to remember those. Mess-hider is a great word, and I think I will add it to my dictionary too. 😉
Thanks Brandee! It really does all work together! Looks like we have similar dictionaries… score!!
Great tips!! Now if I only had a craft closet…..
One day Ashley! One day!
Wow! Closet looks great! I’m such a disorganized person.
Thanks Cole! I tend to be REALLY messy… so being organized is the only way to try and combat that! If it has a specific home I am fifty million percent more likely to put it back where it came from! Haha!
How cool to have a craft closet to store everything together! Going vertical definitely helps when trying to keep everything organized!
It makes it soooo much easier! In my first apartment I only had room for a bookcase… I had no idea what to do with all my supplies!
Great read 🙂 Thanks for sharing! Hope you have a wonderful day!
http://www.littlepinkdiaryblog.com
I’m glad you enjoyed it Sharmane! Thanks for stopping by!