


I have been puzzling the solution to this problem for MONTHS. How to fix it? What to do? Yet no matter how much I thought about it I could not come up with a solution. What was the problem? The ugly, unsightly, disgusting doorbell box in my hallway. The thermostat was easily disguised by a canvas however the doorbell is very deep. A canvas just wouldn’t fit over top! I looked for boxes that were deep enough, wall art, absolutely anything that would fit over the top… with absolutely no luck!
So what do I do when nothing I find seems to work? I make something of course! I scoured Pinterest but nothing really caught my eye. Then one day I was checking out Facebook and a wave of inspiration caught me… in the form of this post by The Rustic Willow!

I thought to myself… This is it! This is the idea that works! Make a teeny tiny little pallet for the hallway! I mean really, who doesn’t need a teeny tiny little pallet made of paint stirrers? Obviously everyone needs that! Plus my proximity to paint stirrers at work made this project a no brainer!
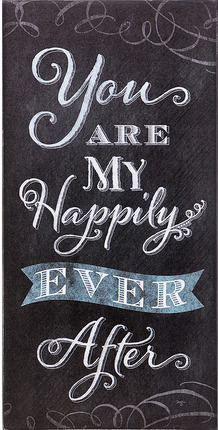
After last Friday’s post about how I came to be “Happily Ever After Etc.” I wanted to inject that quote into my home one more time. I thought about painting “Happily Ever After” on my teeny tiny pallet and then I found this amazing printable. The colors are just about perfect and gluing is so much easier than hand painting typography!
Which takes the total time for this project down to about 20 minutes! Plus by using free paint sticks the only item I had to purchase for this project was a color print of my printable! $0.59 cents for an entire project? Soooo worth it! (Yes I could have printed this at home however with all that black ink I decided to spend the $0.59 to have it printed. My printer has been on the fritz lately and I didn’t think it could handle it!)
Looking for a bunch of posts on DIY & Crafts? I’ve got you covered!
Click here to see all of my how to DIY & Craft posts in one place!
I had to manipulate the file just a little bit to make the design fit on a 8.5 x 11 piece of paper… but luckily the pallet idea makes small pixels look more lifelike instead of just blurry! Plus it’s not that stretched… moral of the story: just make sure you’re paying attention to the print quality whenever manipulation graphics!
I gathered all of my supplies at the kitchen table and got to work. The first step is to cut the paint stirrers down to size. I measured the proper height and marked them with a pencil. Then I used a box cutter to slice through the wood. After the first cut I realized that a) I needed a cutting board to protect my table (duh! don’t judge me) and b) this would be so much easier if my honey was home! The universe must have heard my thoughts because not two seconds later my honey walked through the door… home EARLY from work!
Let me tell you, this project goes much faster if you outsource the labor! 😉


The next step was to cut the printable down to size. I lined my paint stirrers up on top of my paper to make sure that they were in the right position before I started drawing lines. Then simply mark off lines to cut on! So far… easiest project ever!

After your paint stirrers and your image are both cut to size you can glue them together! I’ve seen many people use mod podge for projects like this however I was fresh out (aka too cheap to buy a $6.99 bottle of mod podge for this $0.59 project!) so I used my trusty bottle of clear elmer’s glue instead! Place plenty of glue on your paint stick and then spread it out. You want to make sure that the glue coats the entire surface, otherwise you may have paper that curls up from the edges… which is not what we’re looking for! (Hint: the project goes faster if you outsource the glue application and spreading as well!)
I love my hubby!


We’re almost done! Now all you need to do is flip your pieces over and glue two paint sticks along the back! Now they’re attached together and ready to hang. Whoo hoo! I decided to space my pieces a bit apart to give them a pallet look, you could also stagger them up and down. Or at different heights! Just make sure that if you are using a printable with typography the image is still legible! I decided that my image was too text heavy and staggering the paint stirrers would only make it harder to read.


Now all that’s left to do is to hang your tiny art piece and enjoy! Check back later this week to see mine in it’s permanent spot… covering the annoying doorbell box! I will be revealing the entire hallway mural! Whoo hoo!
Linking up with: Just a Girl and Her Blog, Cherished Bliss, Table and Hearth, & Tatertots and Jello


This was such a cute idea! When I saw the picture and clicked on the link on Facebook, I was wondering how in the world you painted such beautiful letters. So clever to glue a printable on the paint sticks!
Thanks Ellen, I thought about painting them… But I figured the typigraphy on this one is just way to detailed! I love how it turned out though!
This is really smart. I’d be too lazy to think of something like this, but maybe I could try. Haha! Thanks for sharing. See you around! 🙂 -Mary
It was such an easy project! I’m sure you could tackle it!
such a cute idea!! I have never thought of using paint stirrers as pallet wood. GREAT idea! I might just have found another new project
Thanks for stopping by! The paint stirrers worked perfectly for this project… Plus they’re free which is always the goal 😉
I’m so happy my post inspired you! Your art came out beautiful.
It was a lightning bulb moment! I’m glad it worked out… Thanks for stopping by!