• House Tour
    • Reveals
  • About
    • Smith Life
    • Disclosure and Privacy Policy
      • Terms and Conditions
      • Store Affiliates
  • Contact Me
    • Want a Button?
  • Shop
    • Floral Printable Planners
    • Paint eBooks and Packages
    • Wedding Binders & Extra Printables!
    • Planner Bundles
    • Planner Accessories
    • Home Decor Printables!
    • Cart
    • Bloglovin
    • Facebook
    • Instagram
    • Pinterest
    • Twitter
    • YouTube

Happily Ever After, Etc.

Creating Our Own Fairytale

  • Happily Ever After, Etc.
  • Home
  • Home Decor
    • My Home
    • Paint
    • Before and After
    • Tablescapes
    • Mood Boards
    • Furniture
  • DIY & Crafts
    • New to Cricut – Start Here
    • Cricut Projects
    • Resin
    • Scrapbooking
  • Organization & Planning
    • Cricut
    • Organization
    • Planner
  • Wedding
    • Cricut Wedding Projects
    • Free Wedding Binder
    • Bride Bag- The Ultimate Wedding Planner
How to Make Chalk Paint | Happily Ever After, Etc.

How to Make Chalk Paint

Hey y'all

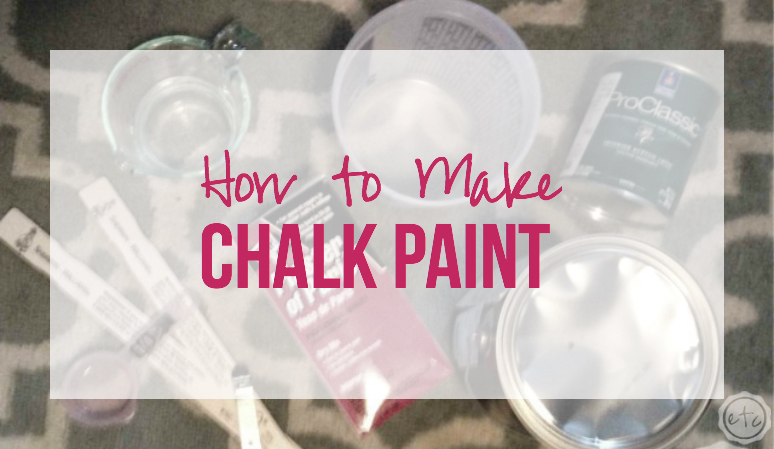
Guess what I did this weekend? Can you guess? I decided to MAKE chalk paint!!!! I am so proud of myself! Haha… I’m humble too! I have wanted to paint my (last unpainted) dresser for so long but couldn’t quite decide what to do with it! First I had to decide on color, then I had to decide on paint (I don’t love latex for furniture but I didn’t want to make the 45 minute drive to buy chalk paint…) but I’ve seen the hype about making your own chalk paint and I decided I was going to give it a try!

I made two batches: one grey and one sea-foam! Since I needed two different colors and there are sooooo many different chalk paint formulas out there I decided to switch thing sup a little and try different formulas for each.

It was awesome! It worked like a charm and I still have buckets and buckets of paint left over… seriously I could paint so many more things!

Looking for a bunch of posts on painting? I’ve got you covered!
Click here to see all of my helpful paint posts in one place!
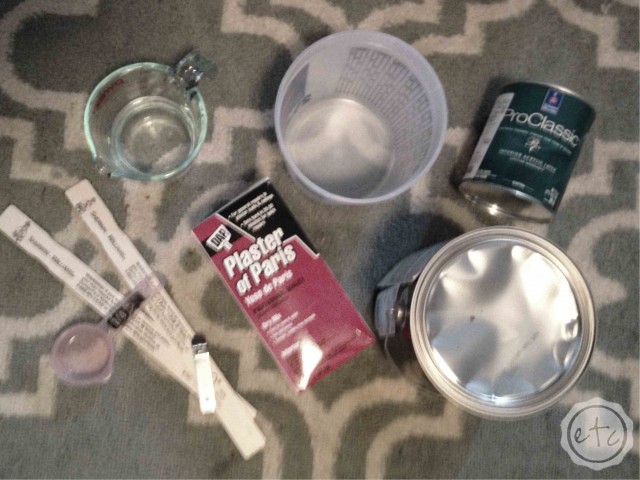
How to Make Chalk Paint | Happily Ever After, Etc.

Supplies:

Latex or waterborne paint! I tried Cashmere for the grey paint and ProClassic for the seafoam.

Plaster of Paris… did you know this stuff was so cheap? 3.49 for a large box! I have leftovers!

Plenty of hot water!

A container for stirring your chalk paint… preferably one with measuring increments on the side.

Something to stir with! I used a small paint stick however I have heard that spoons work great for getting the clumps out!

How to Make Chalk Paint | Happily Ever After, Etc. How to Make Chalk Paint | Happily Ever After, Etc.

The body of my dresser is going to be grey… plus the shelves my hubby is currently building me! So I wanted to have enough grey chalk paint to paint EVERYTHING with the same batch. That way I know the colors match! So for the grey paint I mixed quite a bit of chalk paint!

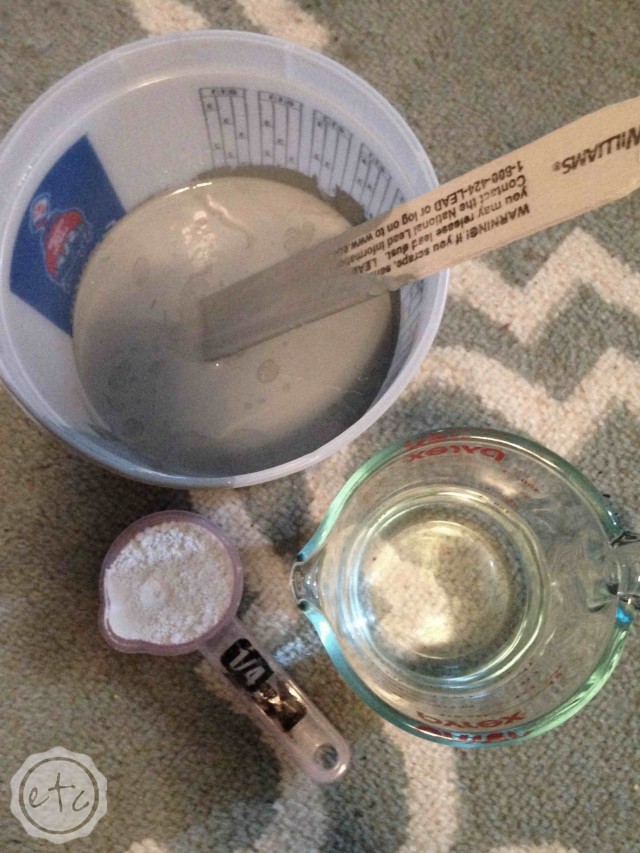
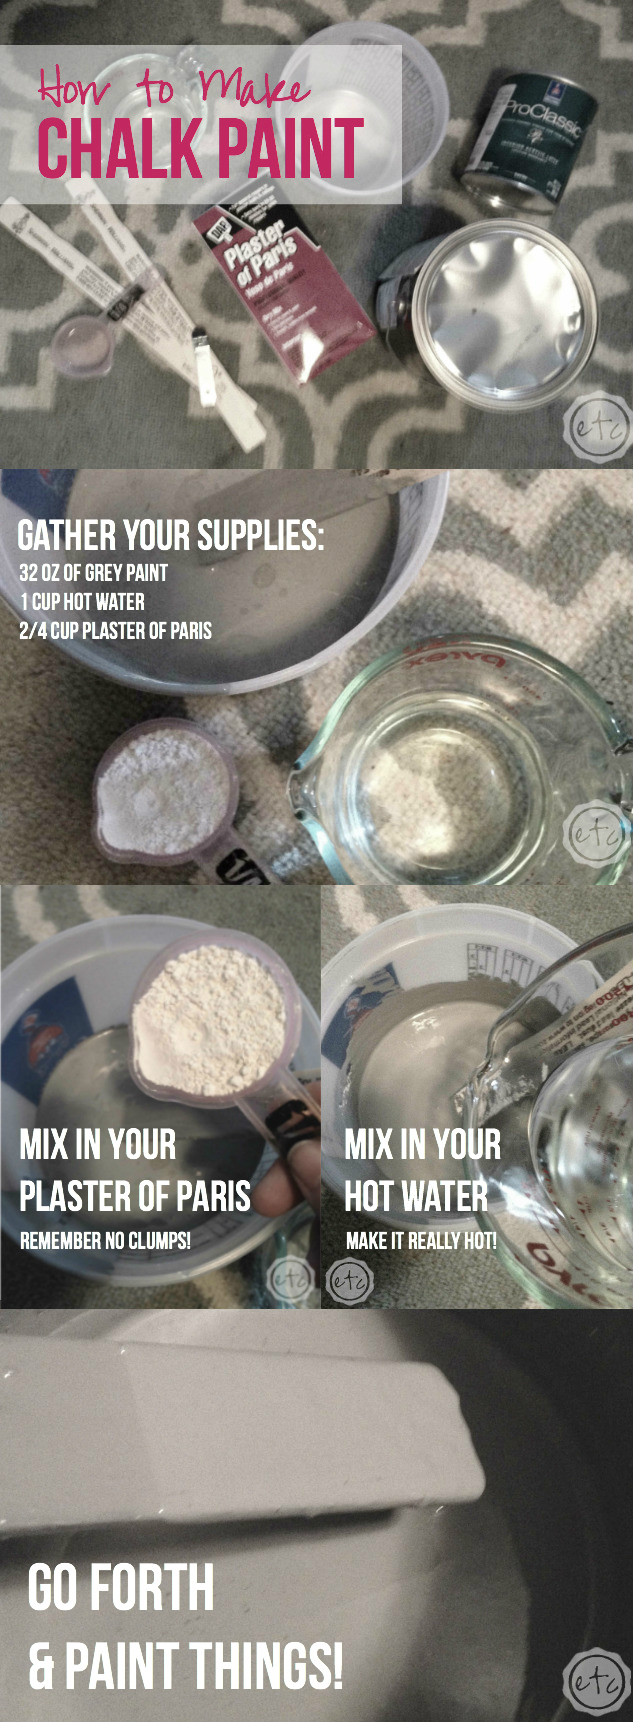
Measurements for Formula 1:

32 oz of grey paint

1 cup hot water

2/4 cup plaster of paris

How to Make Chalk Paint | Happily Ever After, Etc. How to Make Chalk Paint | Happily Ever After, Etc. How to Make Chalk Paint | Happily Ever After, Etc.

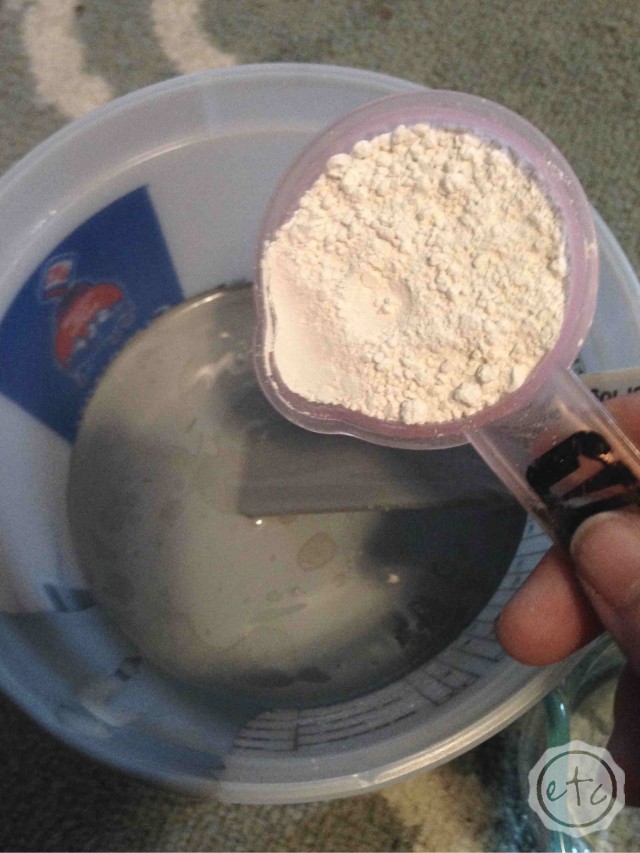
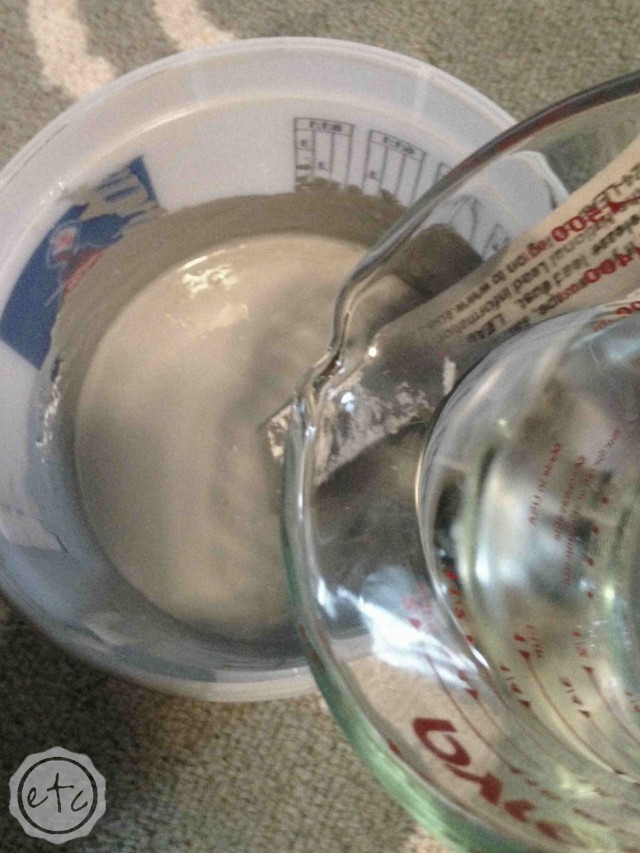
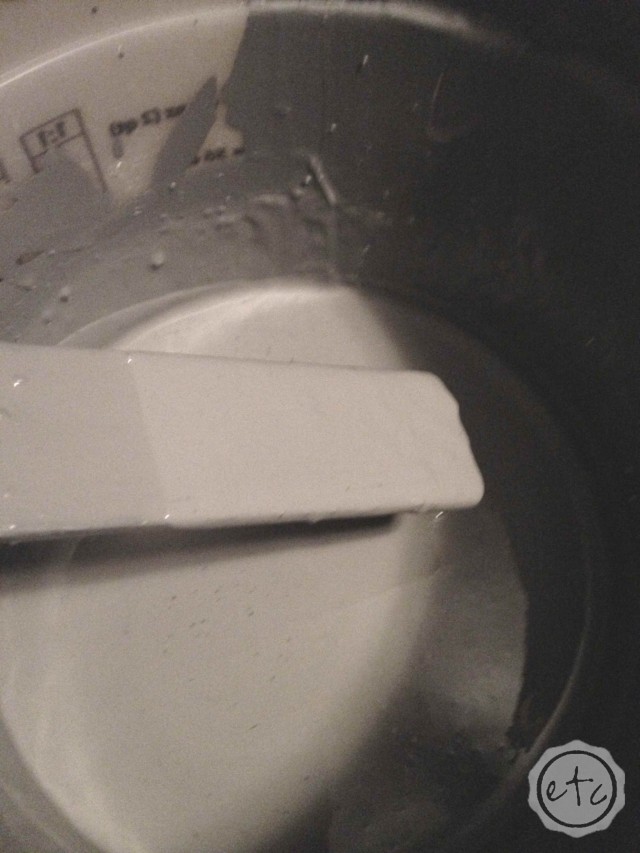
The grey chalk paint went on like a dream… it was super smooth and all of the plaster of paris easily dissolved leaving no clumps! It was VERY watery… which is why the measurements say 2/4 cup of plaster of paris but the picture only shows 1/4 of a cup. After I mixed all of the ingredients together I felt like it was too runny… so I added a second 1/4 cup of plaster of paris. That gave it a bit more substance… yet it was still watery.

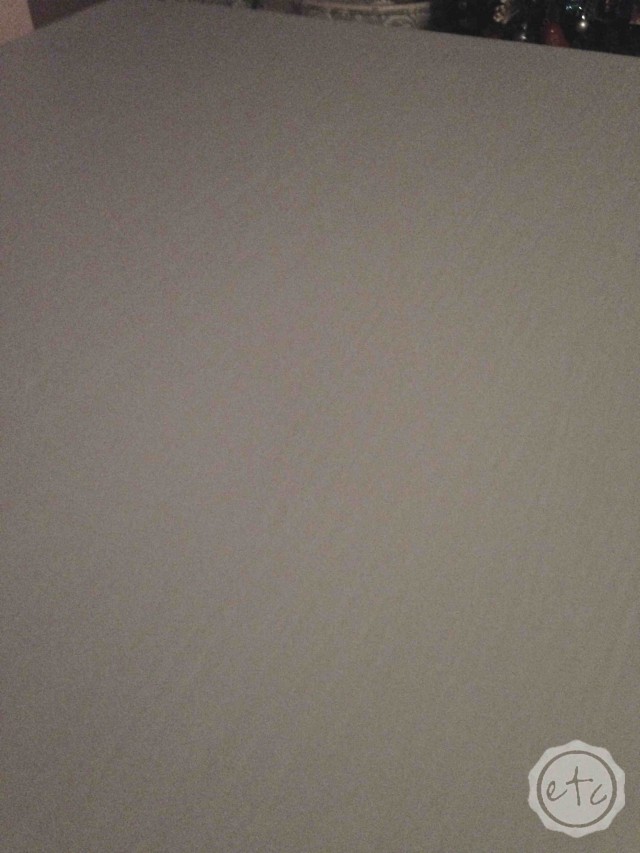
I was worried at first but after putting two coats on my dresser I’m amazed at the finish! It looks so smooth and it covers so well! The only downside is that you have to be extra vigilant at catching drips! The watery formula is prone to running on the vertical sides… but a quick brush stroke levels the whole piece out!

How to Make Chalk Paint | Happily Ever After, Etc.

Above is an example of the dresser top after one coat: you can definitely see the brush strokes and the paint is not quite covering. That is alright… DON’T PANIC! As with most chalk paints a second coat will take care of both problems! As you can see in the picture below a second coat levels out the brush strokes and leaves the paint silky smooth! I did add a third coat to the top… but that’s a habit of mine. I always do an extra coat on the top surface where the most wear and tear occurs… the sides look just fine with two coats!

How to Make Chalk Paint | Happily Ever After, Etc.

Now I know what you’re wondering… didn’t she say she made two batches of paint? What about the second batch? Don’t worry… I didn’t forget to share my second experiment with you! For my second batch of sea-foam paint I mixed up the ingredients even more… adding even more plaster of paris to try and alleviate the watery-ness of the first batch. Yes watery-ness is the correct spelling… just go with it!

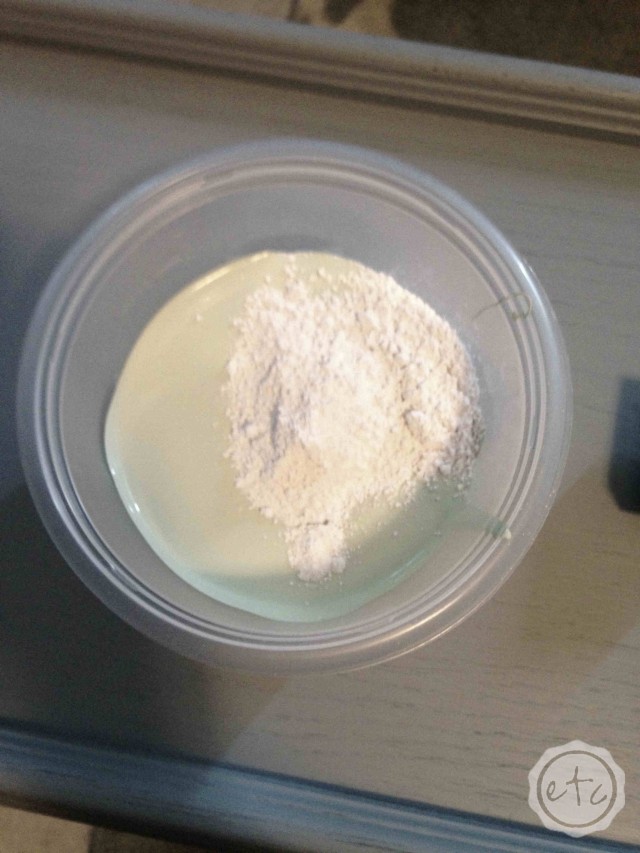
Measurements for Formula 2:

1 cup of sea-foam paint

2/4 cup hot water

1/4 cup plaster of paris
How to Make Chalk Paint | Happily Ever After, Etc. How to Make Chalk Paint | Happily Ever After, Etc.

With this batch I had the opposite problem… not watery enough! I had to add a second 1/4 cup of hot water to have any leveling… it seemed more like a paste than a paint! Look at this second picture… the paint can be scooped up! No liquid properties at all!

How to Make Chalk Paint | Happily Ever After, Etc.

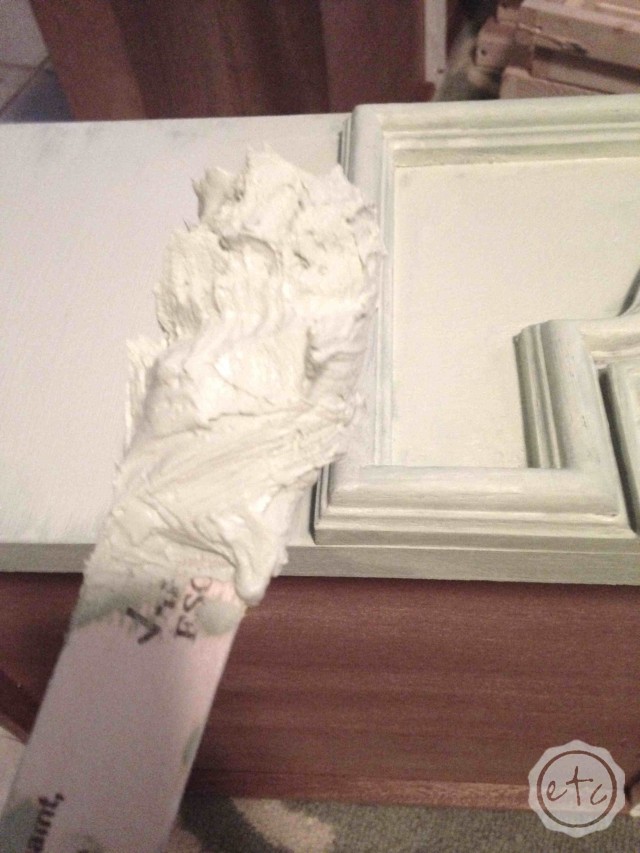
The sea-foam paint covered in one coat since it was so thick however it left more brush strokes than the watery grey paint. The grey paint was also easier to use. So although I was worried about the chalk paint being too watery… it looks amazing and was went on SOOOO easily. While either formula would work I would recommend formula number one! If you’d like to see the dresser as a finished product… check back next week! I’m so excited to show it to you!

All in all the whole process was a success… I’m so glad I decided to make my own chalk paint!

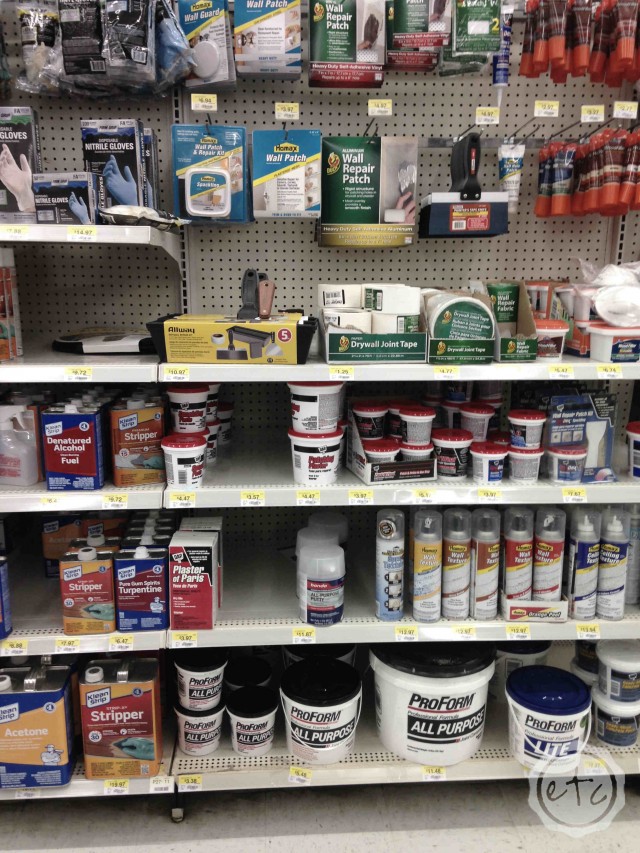
P.S. If you’re struggling to find the plaster of paris (like I was) and not a single wal-mart employee stops to help you (like they did for me) PLUS you’re too darn shy to ask… I’m here to help. It’s in the hardware section.. by the wall Spackle. Not in craft section like I first thought.

You’re welcome.

How to Make Chalk Paint | Happily Ever After, Etc.

P.P.S. Here’s a helpful graphic with all the steps!

How to Make Chalk Paint | Happily Ever After, Etc.

Linking up with: Lou Lou Girls

Save

FREE 6 Day E-Course

Looking for the perfect paint color? In several minutes a day I'll guide you from swatches to done in 6 days.

Success! Now check your email to confirm your subscription.

There was an error submitting your subscription. Please try again.

I hate spam... so I'll never send you any! Powered by ConvertKit
You made it through the entire post? That means you're one of my new favorite people! I'd love to be friends and see what else you would like to read about! Leave me a comment and then sign up for your very own FREE paint planner.... so that you can keep track of every single paint color with ease!
Welcome back! I'd love to be friends and see what else you would like to read about! Leave me a comment and then sign up for your very own FREE paint planner.... so that you can keep track of every single paint color with ease!

Show me some LOVE y'all:

  • Facebook
  • Pinterest
  • Twitter
  • Email

Related

«
»

DIY & Crafts, Furniture, My Home, Paint 6

Comments

  1. Ellen Russell says

    March 30, 2015 at 5:55 am

    This is great! I’ve been thinking about using chalk paint for something. Can’t wait to try this out when I do!

    Reply
    • Happily Ever After, Etc. says

      March 30, 2015 at 9:49 am

      I love Annie Sloan but this is a great alternative, it worked great! Let me know when you paint something… I’d love to see!

      Reply

Trackbacks

  1. Seafoam & Gray Dresser Reveal | Happily Ever After, Etc. says:
    March 30, 2015 at 5:01 am

    […] How to Make Chalk Paint […]

    Reply
  2. March Round-Up - Happily Ever After, Etc. says:
    September 14, 2015 at 3:43 pm

    […] How to Make Chalk Paint Guess what I did this weekend? Can you guess? I MADE chalk paint!!!! I am so proud of myself! Haha… I’m humble too! … read more. […]

    Reply
  3. The ULTIMATE List of Painting Tools! - Happily Ever After, Etc. says:
    June 9, 2016 at 5:01 am

    […] a-days people love painting furniture with chalk paint which is low-smell but you never know when a good respirator will come in handy! Expectant moms […]

    Reply
  4. 20 Most Asked Questions About Furniture Paint - Happily Ever After, Etc. says:
    August 5, 2019 at 6:00 pm

    […] Read the full tutorial on how to make your own chalk paint here. […]

    Reply

Leave a Reply Cancel reply

Your email address will not be published. Required fields are marked *

sidebar betsy I'm Betsy, Home Decor Enthusiast, Yorkie Mama, Crafter, Blogger, Picky Eater, Chief Mess Maker, Antique Hoarder and Graphic Designer. You can generally find me working on (attacking with a paintbrush) the 3 bed, 2 bath home we are currently renting! Our home might not be perfect but it is ours & if you hang out long enough you'll see that what we lack in know-how we make up for in passion!
Shop My Craft Room

Shop My Home

Featured Articles

15 Fabulous Ideas to Organize your Laundry Room
25 FREE Printables For Your Home!
What to do with EXTRA Paint with Happily Ever After Etc
10 Ways to Make Your Bed EXTRA Comfy with Happily Ever After Etc.
Ready to Pick your Perfect Paint Color? We'll help you with our 6 Day FREE E-Course

Hey y’all,

Profile

I'm Betsy, Home Decor Enthusiast, Yorkie Mama, Picky Eater, Chief Mess Maker, & Graphic Designer...

A Little Note!

Many of the links on Happily Ever After, Etc. are affiliate links. If you purchase a product after clicking an affiliate link, I receive a small percentage of the sale for referring you, at zero cost to you! How awesome is that? Purchasing through affiliate links is an easy, painless way to help out your favorite bloggers. Thank you so much for your continued love and support! Read the full disclosure here!

Instagram

The number one question people ask when they watch The number one question people ask when they watch my new home tour on YouTube? Why is there so much clutter... um excuse me I like stuff! The second question? How did you frost the doors? Don’t worry... I wrote out the whole process, check out the step by step tutorial on the blog!
With Christmas fast approaching I’m having secon With Christmas fast approaching I’m having second thoughts... about taking down my holiday decorations! I absolutely love all the blush and rose gold this year and think I might have to add more pink to my every day decor. Until then maybe it will just stay Christmas at the Smith house! Tutorials for both the “Merry Christmas” resin sign and the “Dear Santa” Cricut sign are in my profile! #pinkchristmas #pinkchristmastree #pinkchristmasdecor
Well y’all Christmas is coming up quick... which Well y’all Christmas is coming up quick... which means I need to get a move on with all that wrapping! I got a jump start this morning after whipping up a few little resin light bulbs! Check out the full tutorial over on the blog if you’d like to wrap your presents with a few resin goodies this year... and tell me in the comments below. Are you finished wrapping or (like me) are you still getting started? #pinkchristmas #pinkchristmasdecor #resinchristmas #giftwrappingideas
Ready for another fun and easy resin project? Thes Ready for another fun and easy resin project? These little Christmas trees are the perfect beginner level project so if you’ve never done resin before don’t let it intimidate you!! Grab your heat gun and jump in... I’ll walk you through it! Check out the full blog post for these little guys on the blog (link in profile!)
If you haven’t joined Michelle at @weekendcraft If you haven’t joined Michelle at @weekendcraft SVG membership then WHAT ARE YOU WAITING FOR?! I am obsessed with all the cute svg’s and y’all she is doing a live craft night every month to walk you through making one of her designs... and the first craft night is tomorrow! She’ll be making this “Merry everything and Happy always” SVG and it’s so cute! You don’t want to miss it! See you there! 

(Also who noticed the sneak peek at my new kitchen?!)

#cricutsvgfiles #christmassvg #cricutsled
Well y’all I’m getting this close to unpacked Well y’all I’m getting this close to unpacked in my new house!! And since I’m a blogger Christmas is going up! So here’s the question... do you want a 1 month house update or do you want to wait for the Christmas tour? #lulamaefarmhouse #rosegoldchristmastree #newhouse
Well it’s still a work in progress but I finally Well it’s still a work in progress but I finally have a house!! They have to put it together and do all the detailing before I get keys... but we’re in the end game now! Check out my stories for a sneak peek at the moving process... full YouTube video coming soon!
#ad how amazing did these little fall coasters tur #ad how amazing did these little fall coasters turn out?! Plus I absolutely love the matching tray! The best part? This is such a quick and easy resin project... a silicone mold, a little resin and your trusty heat gun and I promise you can make this baby!! Link in profile for the tutorial!! #fallresin #resinforbeginners #cheetahprint
Okay... is it bad if you just want to make coaster Okay... is it bad if you just want to make coasters in the same mold with the same technique but different colors?? They turn out soo differently! Just a sneak peek of my fall coasters and the blush ones I made last year!
Happy #nationaldogday to the fur babies that are ( Happy #nationaldogday to the fur babies that are (literally) behind (beside... or underneath!) all Of my projects! These sweet little cuddle muffins make everything better 😊🐶😘
GIVEAWAY CLOSED Our winner is @kamikvega Check you GIVEAWAY CLOSED
Our winner is @kamikvega Check your inbox girl, this little machine is headed your way! Thanks to everyone who participated... I can’t wait to see where we go from here!

🥳📦🥳 GIVEAWAY🥳📦🥳
If you have loved all of the Cricut projects I make here is your chance to win a Cricut Joy of your very own! If you’re ready for a little craftiness (maybe a little time to relax) then this giveaway is for you! I’m teaming up with a few of my cavities crafty bloggers so that one of you can win your very own mini crafting machine. Good Luck!!!!

TO ENTER GIVEAWAY:
1.) Follow
@creativeramblings 
@weekendcraft 
@craftylumberjacks 
@this.is.tisa 
@justcallmehomegirl 
@happilyeverafteretc
@lovebird_heartworks 
2.) Like this post
3.) Tag a friend in the comments.
.
.
.
Hurry! Giveaway ends Saturday 8/29/20 at 11:59PM PST. Winner will be notified via Direct Message. Share or tag a friend who'd love to win a Cricut. .
.
.
This contest is in no way affiliated with or sponsored by Instagram or Cricut. To enter you must have a U.S shipping address.
A little peek into the fun summery Tablescape I pu A little peek into the fun summery Tablescape I put together for a little garden party! Want to check out the full table? Wondering where to find all the pieces... click the link in my profile for all the details!
#ad Did you know you can put infusible ink onto al #ad Did you know you can put infusible ink onto aluminum? It's sooooo simple... honestly it's one of the easiest projects I've ever done. Even if you've never used your Cricut before you. can. do. this. I'll show you how every step of the way! Follow along with the full tutorial video over on YouTube! The best part? These little aluminum signs look amazing as part of a larger project! Check out how I added mine to a larger resin wave project on the last slide! @officialcricut #cricutcreated https://lnk2.io/wvMllZf
Okay so It’s no secret that I’ve been obsessed Okay so It’s no secret that I’ve been obsessed with resin for a while now but this week I’ve been playing around with resin waves! Including this tiny resin sea shell! Check out the link in my profile for the full tutorial!
After a lot of struggle, loss and frustration I am After a lot of struggle, loss and frustration I am finally dotting the i’s and crossing the t’s on my next chapter. Yesterday I went and signed the million and one papers to close on my new house! I cannot wait to share the moving (and decorating) process with all of you... next step: keys! #firsttimehomebuyer #newhouse
Load More... Follow on Instagram

Copyright © 2021 · Darling theme by Restored 316

Copyright © 2021 · Darling Theme on Genesis Framework · WordPress · Log in · Privacy Policy

loading Cancel
Post was not sent - check your email addresses!
Email check failed, please try again
Sorry, your blog cannot share posts by email.