


When I heard of travelers notebooks I was instantly obsessed… a notebook that I can literally customize every aspect of? Sign me up!
While there are a million (billion… trillion!!!) different options for Travelers Notebook covers on the market it is fairly simple to make your own. I tend to make mine out of a nice faux leather since it’s cost effective and beautiful but you could use this same tutorial to make a TN out of paper, leather, fabric… just about anything your little heart desires.
While the process itself is fairly simple it does take a little bit of skill (which is why I outsource all sewing to my Mom who is head seamstress around here). Take that into consideration when working on your first notebook and don’t be too hard on yourself if the first one isn’t perfect… practice makes perfect!
Supplies:
Faux Leather (in Primrose!)
Straight Edge Cutting Device
2mm Elastic Cord
Crop-a-Dile
Upholstery Needle
Glitter Leatherette
Spray Adhesive
Sewing Machine
Person Who Can Use a Sewing Machine
Want the 411? How about the 101? Check out alllll the planner info in my Planner 101 post here!
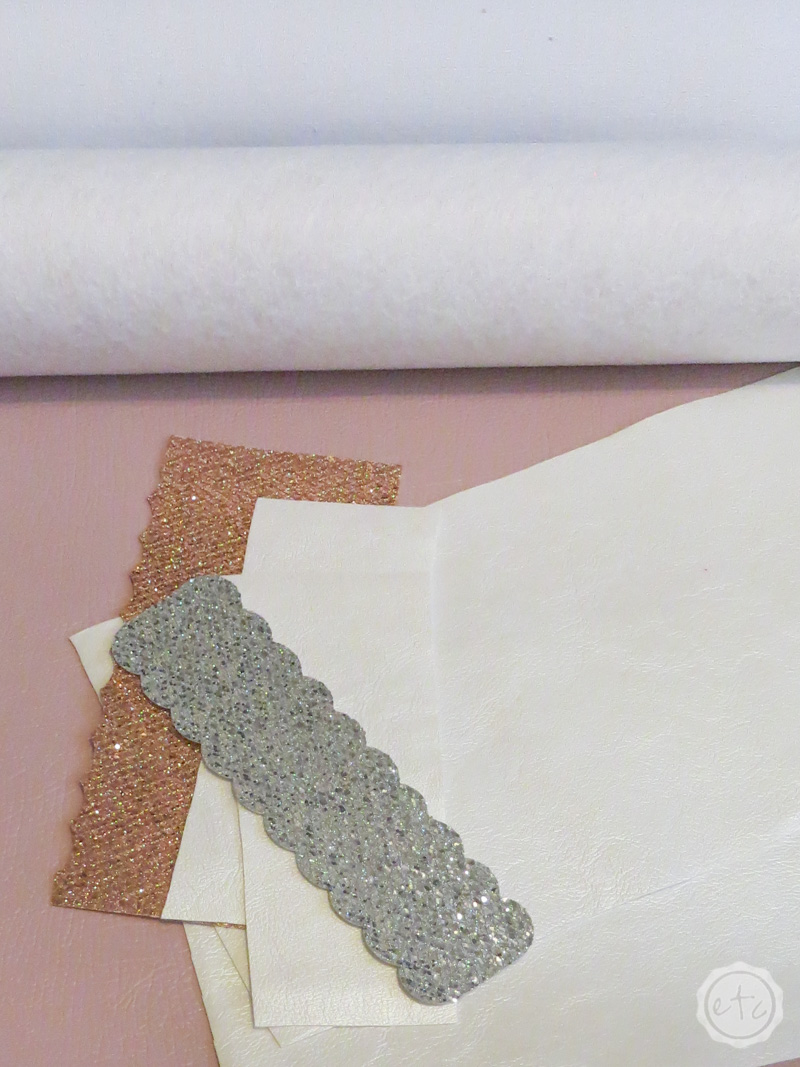
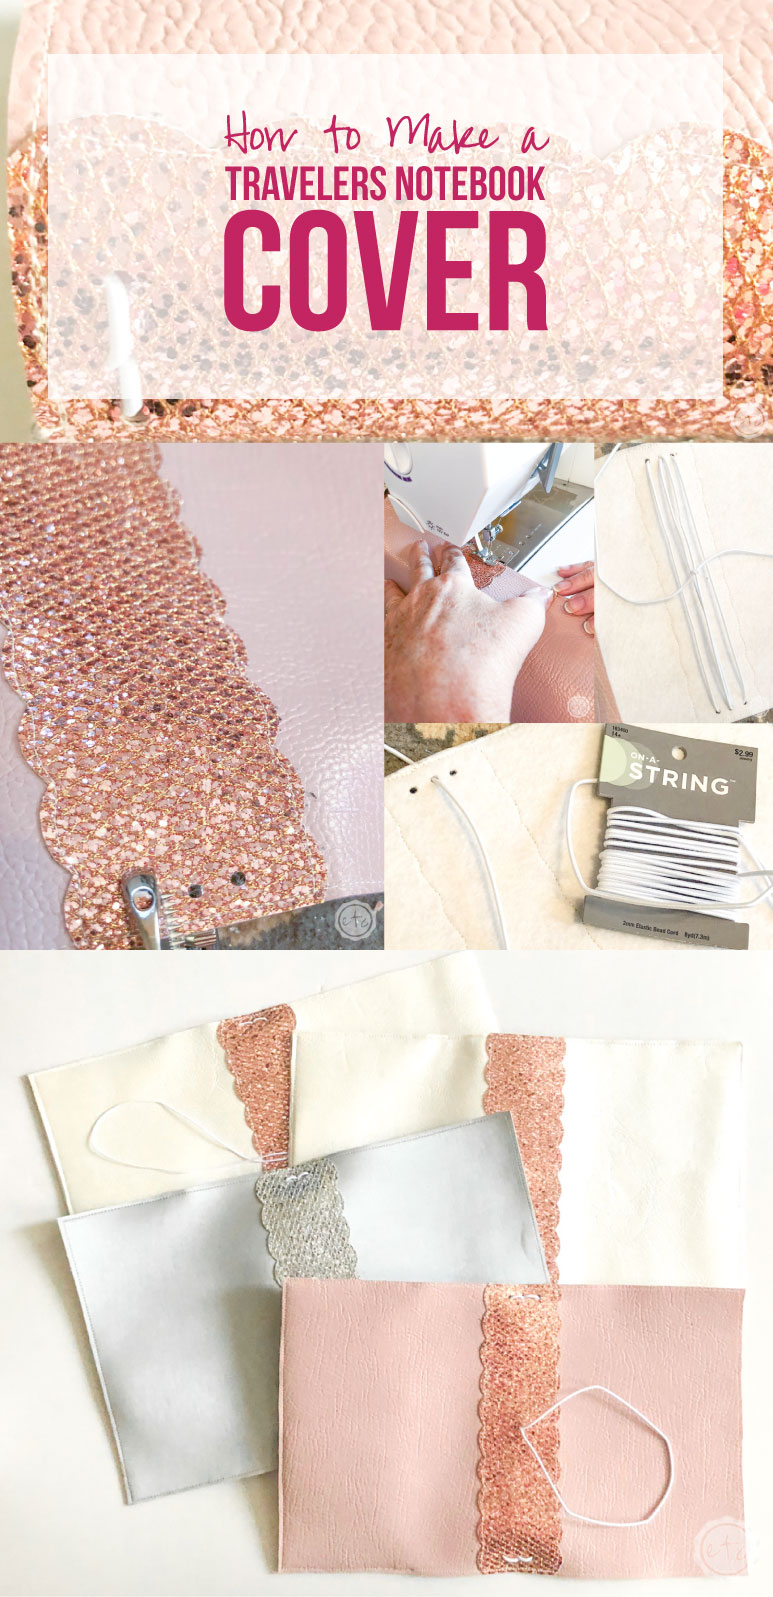
Step 1: Cut Out the Spine
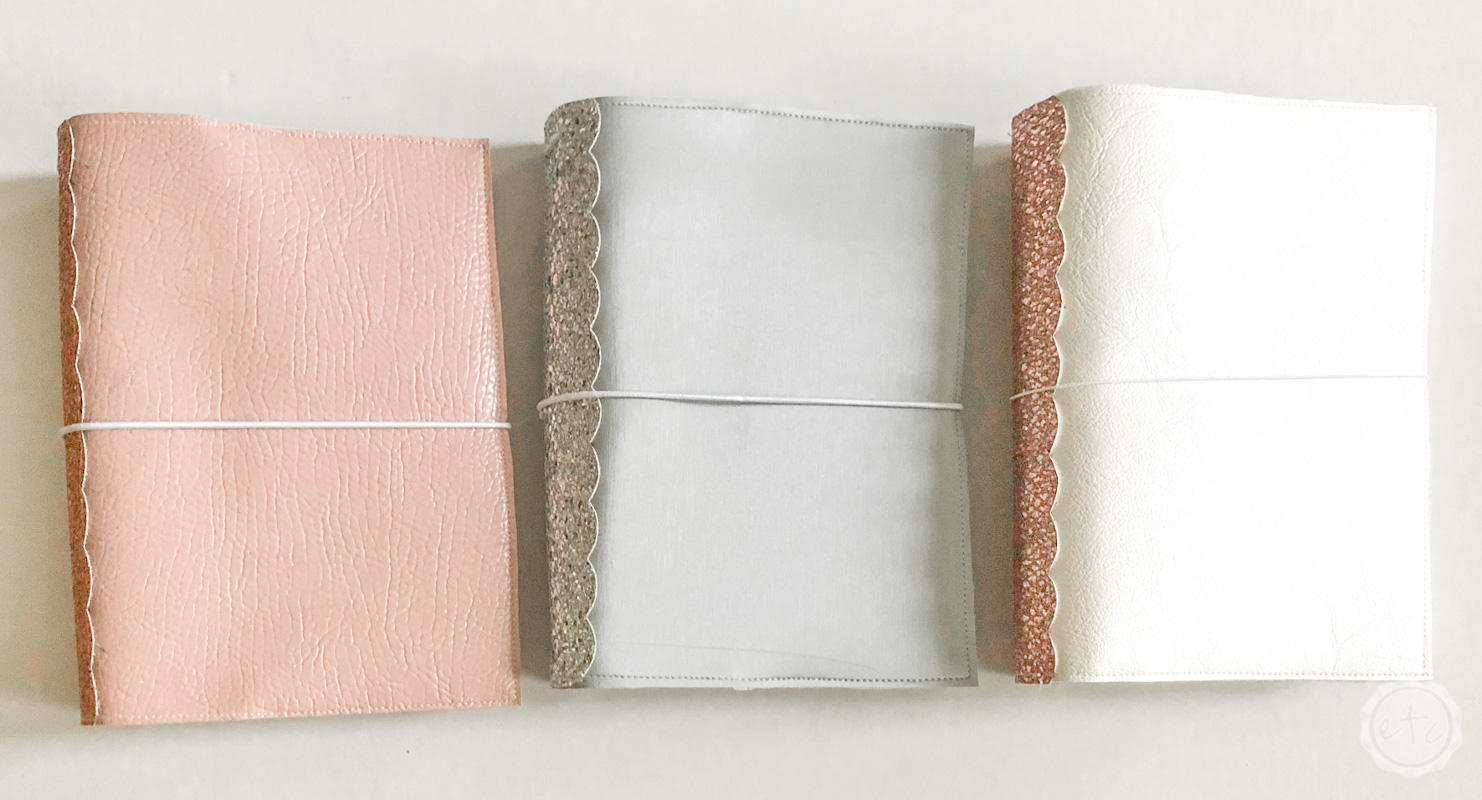
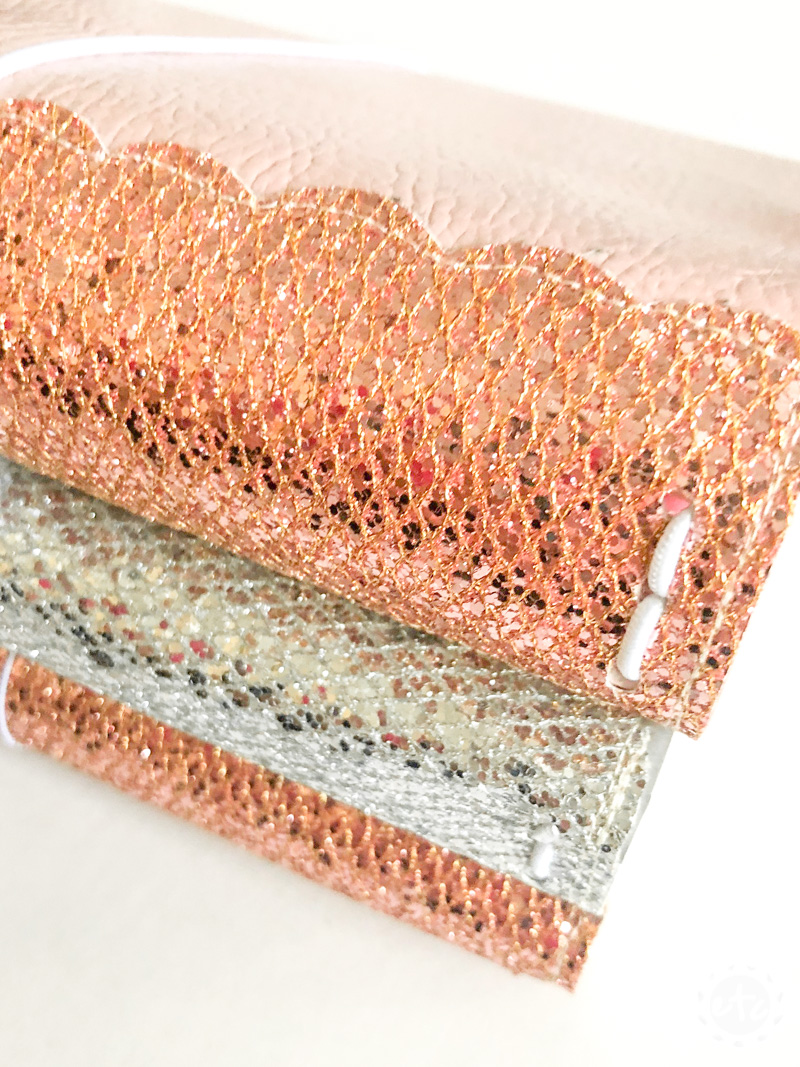
If you’re making your spine straight your basically cutting out a rectangle but a scallop takes a couple more minutes! I like to use a glitter canvas material (called leatherette! Which sounds like smurfette so I love it!) so that the spines are super sturdy but still have that all over glitter effect.
While you can easily use your scissors to cut a scalloped pattern I like to use my Cricut for this step. It’s much easier (and way more accurate!). Plus there’s the added bonus of scallops essentially being circles that makes designing this in Cricut Design Space super easy.
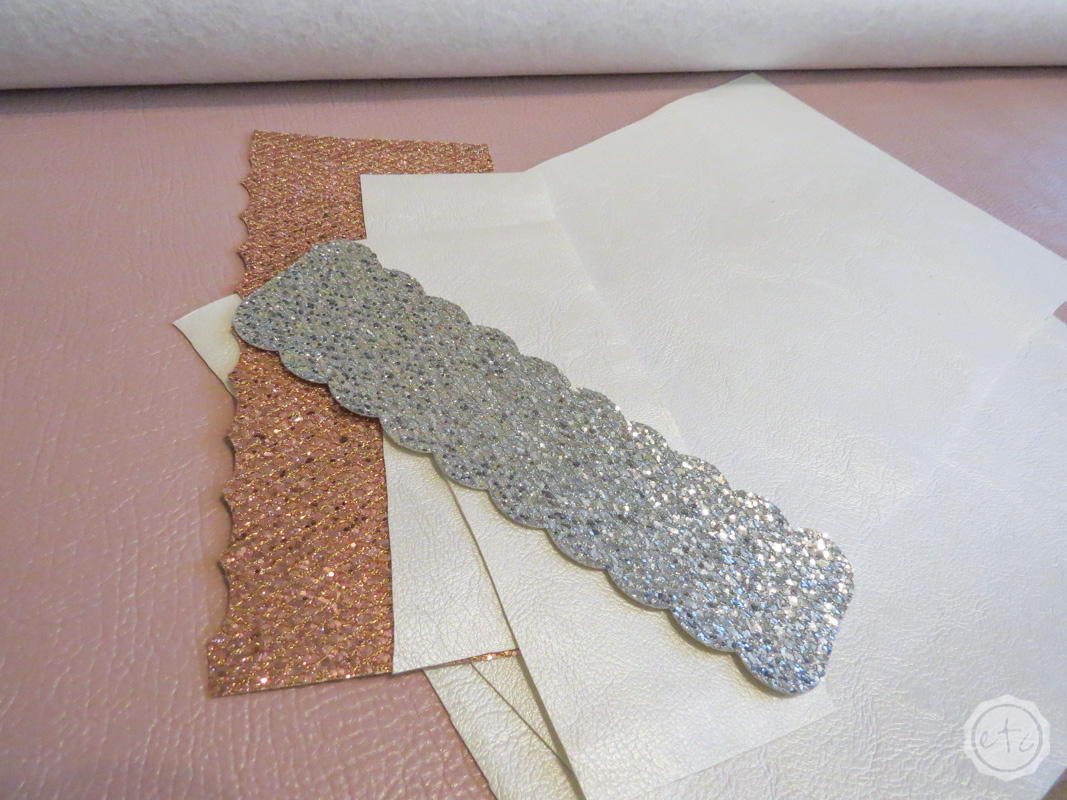

Step 2: Cut Out Your Cover and Interior Pocket
Once you have your spine cut out it’s time to cut out your actual cover! The cover itself is a rectangular shape so this one is super easy… a straight edge and an x-acto knife gets the job done.
Depending on the size of notebook you are trying to make the size of your cover will vary. I’ve inserted the different notebook sizes (and their corresponding inserts) below so take a peek if you’re not sure which size you’re looking for.
Travelers Notebooks are notorious for coming with enough cover to only cover the inserts or a bit of extra length that covers the inserts and then extends a little ways and provides an overhang. Neither option is wrong but keep this in mind when cutting your cover since you won’t be able to change it later if you decide you’d rather have a slightly longer cover.
All of the notebooks I made for this particular post are a B6 size… in case you were wondering!

Nano
- Approximate Dimensions When Laying Flat: 4.25 inches tall x 7 inches wide
- Insert Size: 3.75 inches tall x 2.5 inches wide
- Holding Capacity: 2 inserts
Passport
- Approximate Dimensions When Laying Flat: 5.5 inches tall x 8.45 inches wide
- Insert Size: 5 inches tall x 3.5 inches wide
- Holding Capacity: 4 inserts
Passport Wide
- Approximate Dimensions When Laying Flat: 5.5 inches tall x 9.5 inches wide
- Insert Size: 5 inches tall x 3.5 inches wide
- Holding Capacity: 6 inserts
- Approximate Dimensions When Laying Flat: 6 inches tall x 8.75 inches wide
- Insert Size: 5.5 inches tall x 3.5 inches wide
- Holding Capacity: 4 inserts
Pocket Wide
- Approximate Dimensions When Laying Flat: 6 inches tall x 10.25 inches wide
- Insert Size: 5.5 inches tall x 3.5 inches wide
- Holding Capacity: 6 inserts
A6
- Approximate Dimensions When Laying Flat: 6.5 inches tall x 10.75 inches wide
- Insert Size: 6 inches tall x 4 inches wide
- Holding Capacity: 4 inserts
Personal
- Approximate Dimensions When Laying Flat: 7.4 inches tall x 9.76 inches wide
- Insert Size: 6.5 inches tall x 3.75 inches wide
- OR Inserts that are 6.75 inches tall x 3.75 inches wide
- Holding Capacity: 4 inserts
B6 Slim
- Approximate Dimensions When Laying Flat: 7.5 inches tall x 11 inches wide
- Insert Size: 7 inches tall x 4.25 or 4.5 inches wide
- Holding Capacity: 4 inserts
B6
- Approximate Dimensions When Laying Flat: 7.5 inches tall x 12 inches wide
- Insert Size: 7 inches tall x 5 inches wide
- Holding Capacity: 4 inserts
A5
- Approximate Dimensions When Laying Flat: 8.7 inches tall x 14 inches wide
- Insert Size: 8.25 inches tall x 5.8 inches wide
- Holding Capacity: 4 inserts
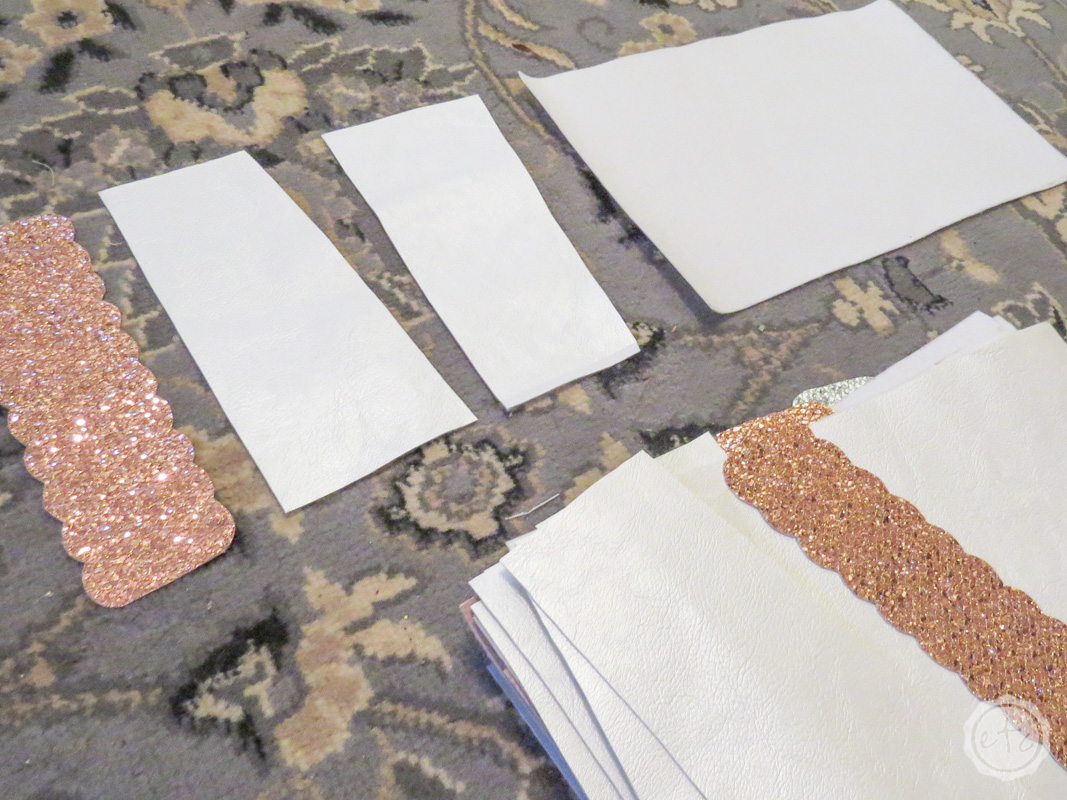
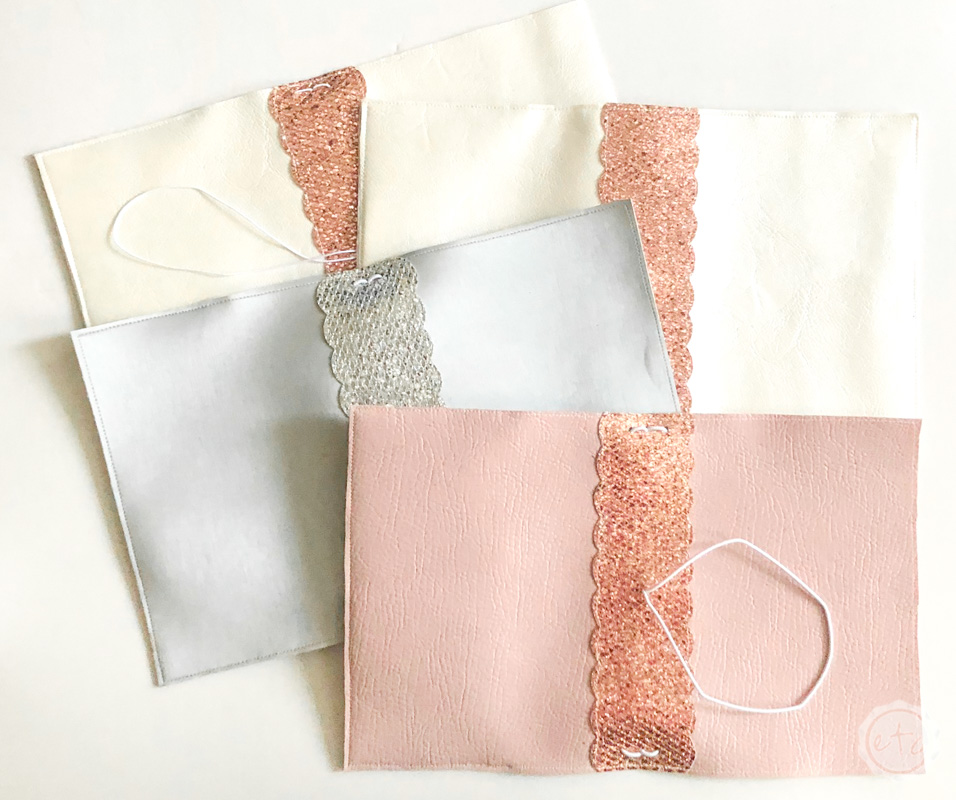
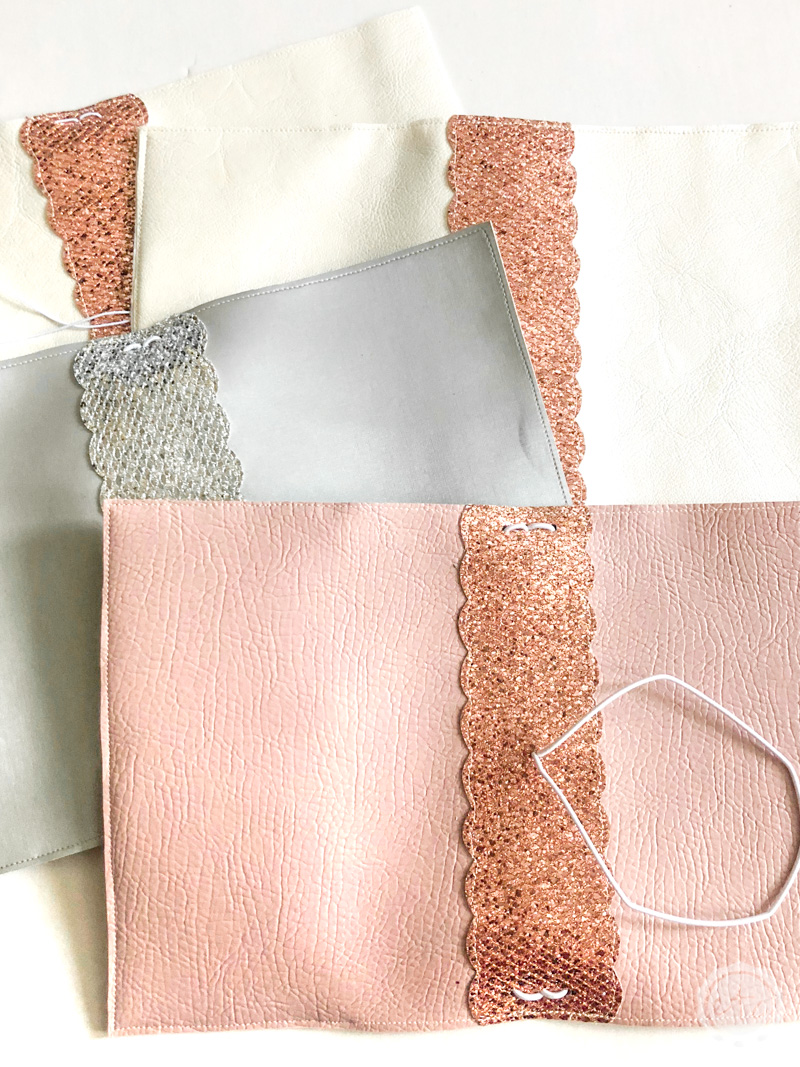
All of my notebooks have a crossover pocket on the front side and no pocket on the back… there are plenty of different pocket styles ranging from no pocket to a straight pocket.
If you’re unsure on cutting out the more complicated pocket a simple straight edge pocket will do the trick… simply cut your pocket the same height as your notebook but shorter than the front cover.
For a cross over pocket I cut two sections the same height as the cover and then cut one diagonally left and one diagonally right so that they will cross each other and form an x when they lay on top of each other.
This is my favorite configuration since a simple sewn seam creates two card pockets… one of which is hidden so that you can hide your cards inside.
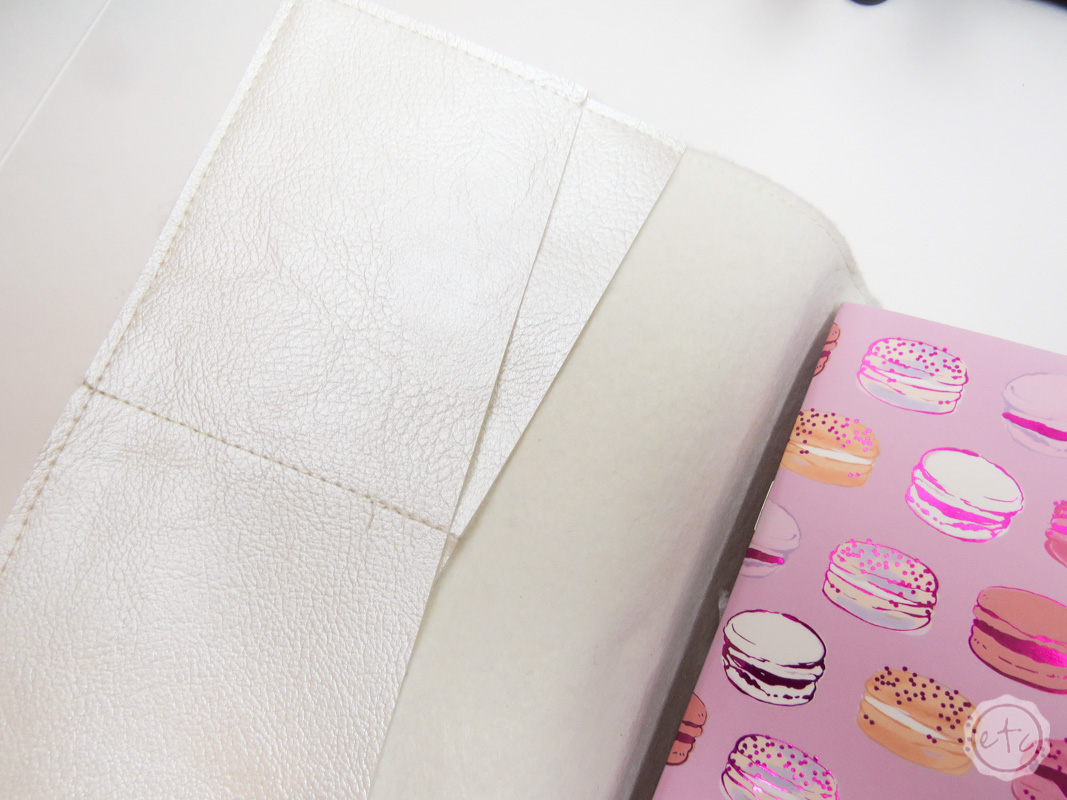
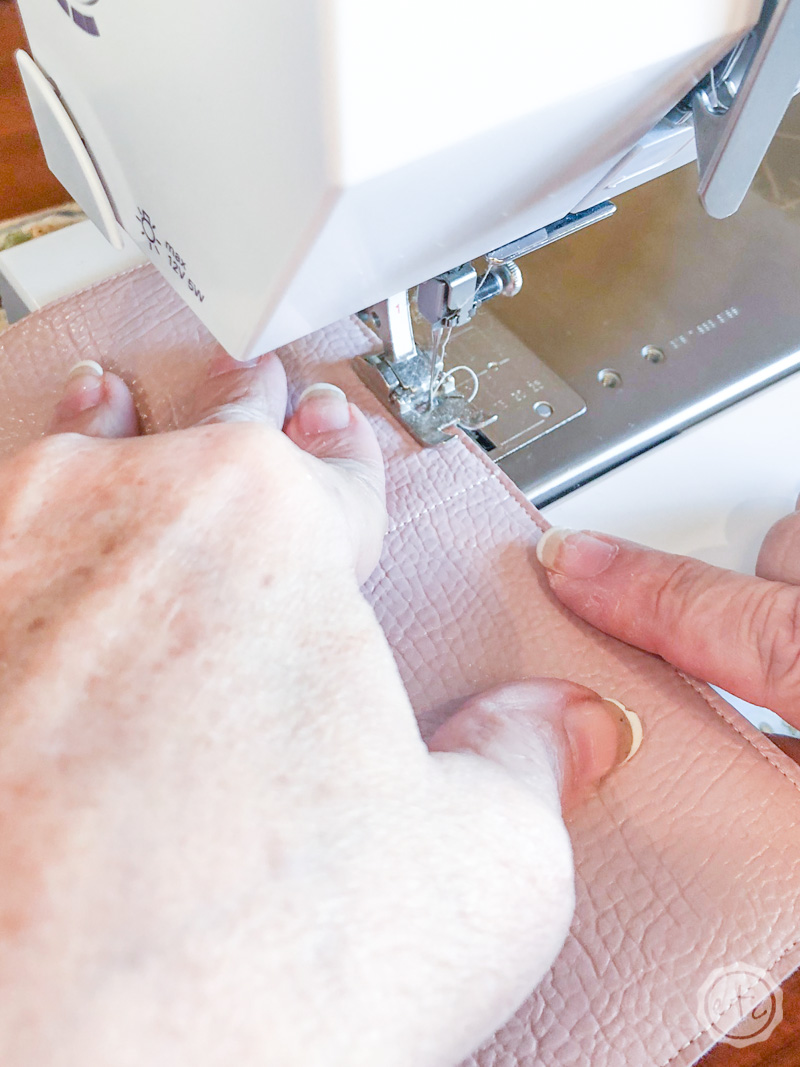
Step 3: Sew Everything!
Now it’s time to sew everything together… which is where Mom comes in. Don’t get me wrong I can sew but I’m not as handy with the sewing machine and I want my travelers notebooks to be professional. Mom literally use to run sewing classes so she’s all over it.
Anyways, once you grab your seamstress it’s time to get started.
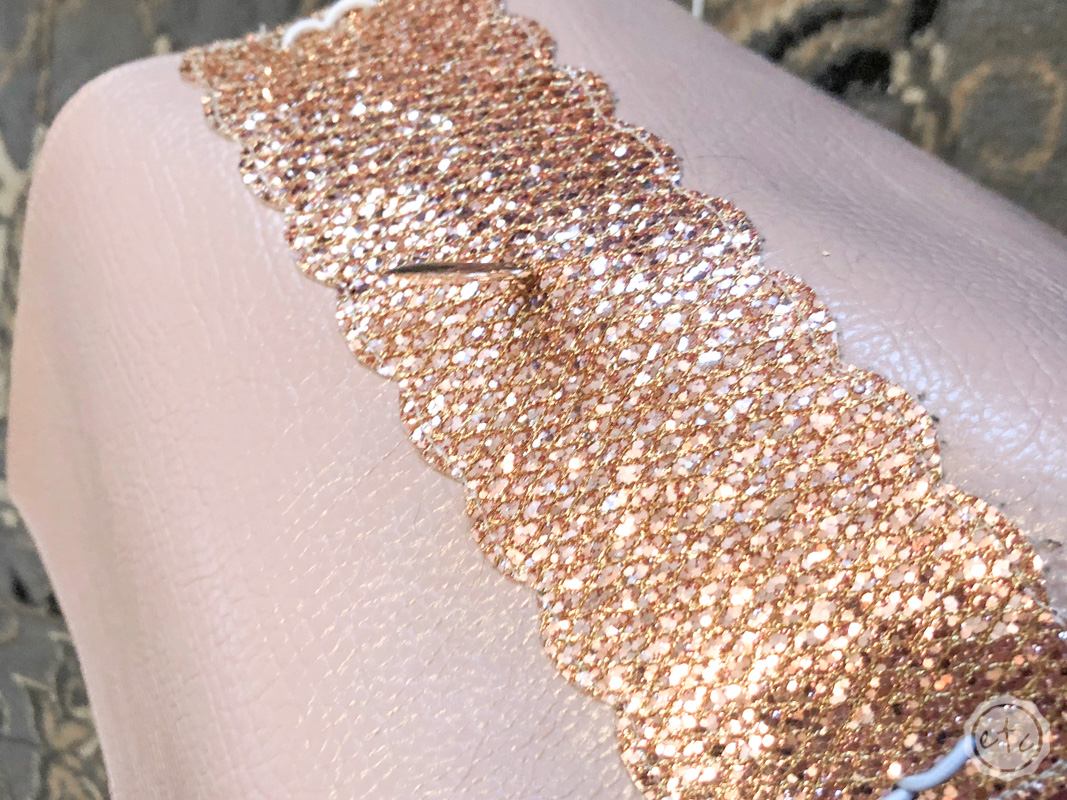
The first step is to spray the back of the scalloped spine with a bit of spray adhesive and lay it in the correct spot (in the middle of the back of the cover). The spray adhesive holds the scallops in place which is wonderful since this is the trickiest part to sew… plus the spray adhesive is strong enough to hold the spine in place without getting adhesive all over Mama’s needle.
Once the spine is in place go ahead and sew it on being careful to sew around each scallop so that they don’t lift up on the edges when you’re using the notebook. Make sure to be conscious about what color thread you use to sew your pieces together… that thread will be visible!
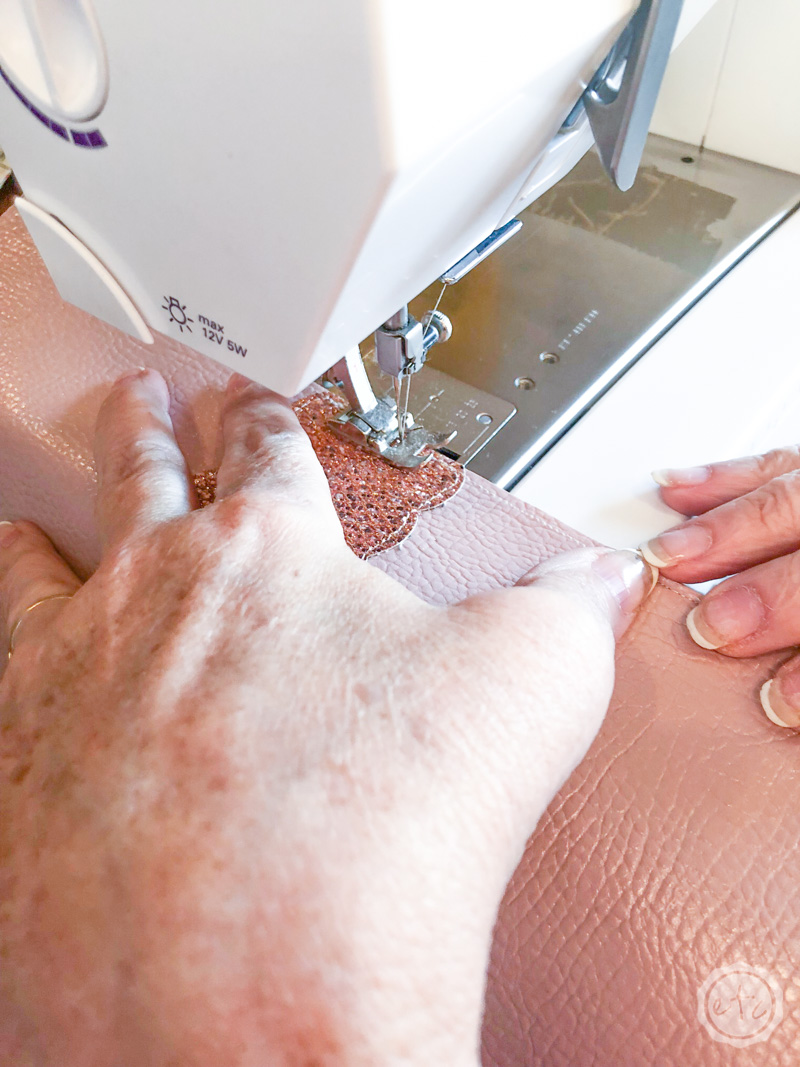
Once your spine is attached it’s time to put the pocket into place. Line your two pieces of pocket up together and then sew your one stitch down the middle to make that card pocket seem. Now place your pocket onto the travelers notebook and sew one large seam around the entire edge.
This outer stitch should secure the pocket in place on the front cover and make the entire piece look uniform with the stitching on the spine.
Easy peezy lemon squeezy!

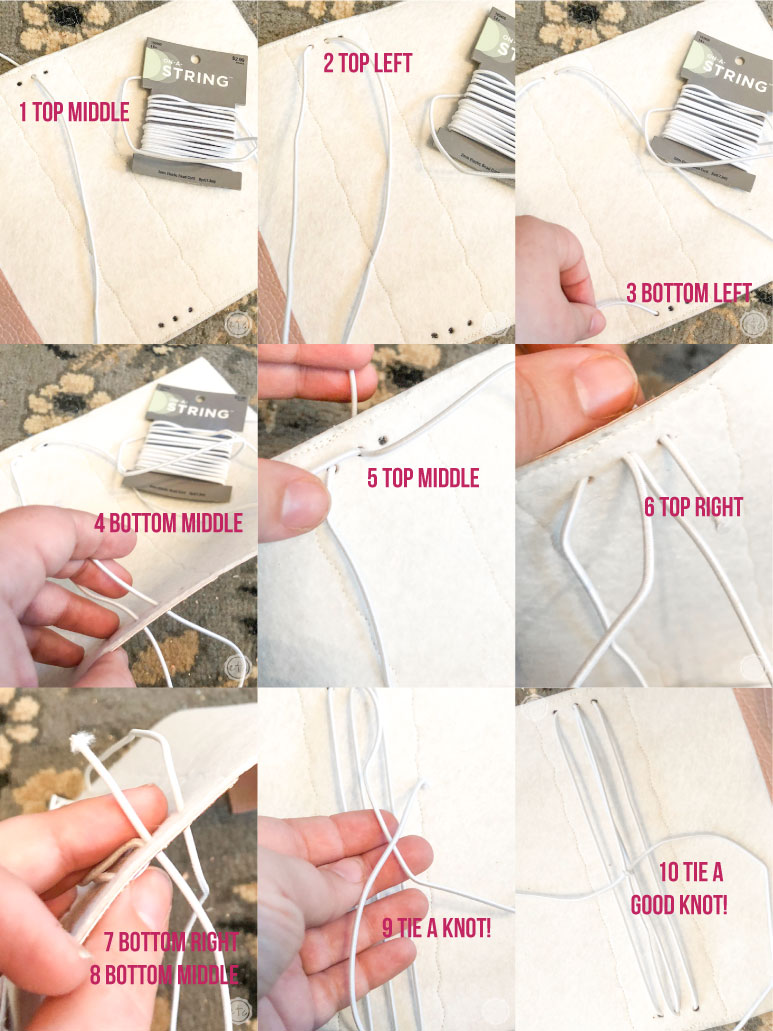
Step 4: Punch Your Holes!
Once you’ve sewn everything together it’s time to string your elastics so that your little travelers notebook can hold inserts! Of course, you can’t string elastics until we punch a few holes!
I like to break out my crop-a-dile for this! It’s strong enough to punch through two layers of leather but has a small setting so the holes aren’t large.
Punch three holes on either side of the spine… like you can see in the photo you’ll want them to be lined up. Three in a row baby! About half a centementer into the leather… far enough that the holes have support and won’t rip when you add the elastics but not so far in that they won’t buckle when you add the inserts!
Step 5: String Your Elastics
Now it’s time to string your elastics! This is easy as pie once you’ve done it a few times but I made a little diagram for you in the meantime… enjoy!

Step 6: Attach the Elastic for the Closure
We are so close to done I can taste it!
The only thing left to do is to add the elastic for the closure. Since the crop-a-dile isn’t long enough to reach the center I like to use my upholstery needle for this part.
Simply thread your needle with your elastic and pull it through the exact middle of your cover… then turn around and push your needle (and elastic) back through the same opening. You’ll have a loop of elastic left outside your cover which is exactly what we’re looking for!

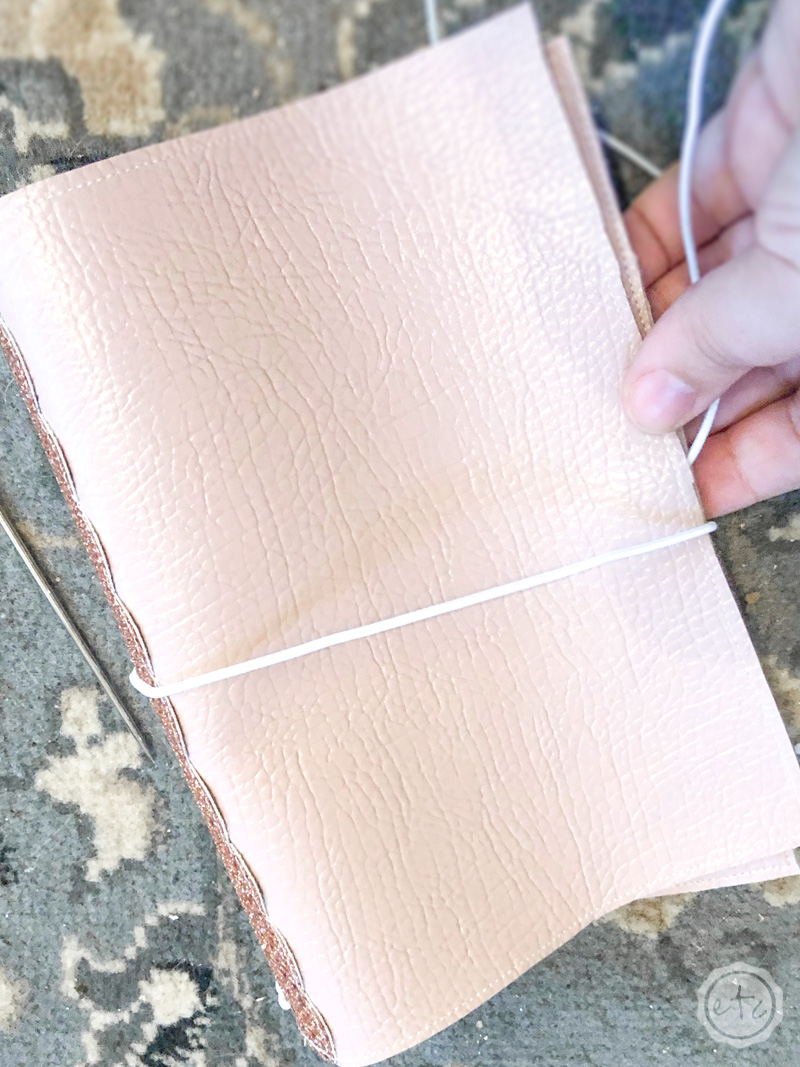
I like to wrap the elastic over the cover and close everything so that I can see what it will look like when it’s finished. Once you have the elastic closure at a length you like (not so loose the leather is flopping but not so tight the elastic is digging into the leather) go ahead and tie off the elastic inside the cover.
You’ll have a little knot on the inside of the cover and your loop of elastic on the outside… perfection!

Step 7: Enjoy!
This is my favorite step… because we’re done! Sit back and enjoy your hard work! Now you can load up your travelers notebook with a few inserts. Plus if you need to whip up a jump band for a few inserts you’ll have extra elastic just sitting by.
Of course, if you’re still not sure about making your own travelers notebook cover you can always buy one from our shop. Mom and I are always working on these and we’d love to make one for you!


[…] can add inserts and completely customize it from start to finish: bows, paperclips, vellum and all! Once you make the cover it’s just a matter of printing inserts and adding all the bells and […]