


It’s finally time… after prepping the land, planning the space and having the shed delivered almost a year ago it’s FINALLY time to start working on the dang thing. Starting with the basics: the walls. We’re going to install shiplap all along the back wall and then paint the rest of the interior a bright white.
Since this shed is going to be a workshed and a place to film content (we’ll be doing all our resin projects here as well as any wood working projects) it needs to be light and bright so that our videos are light and bright. It’s a small space so we’re going with white walls… but I want a solid focal point for the space so instead of painting all 4 walls we’re going to start by adding shiplap panels to the back wall.
This will give us a nice backdrop to film on as well as save us money and time on paint. Now since we’re still trying to re-do this shed as *ahem* cost effectively as possible I’ve picked up shiplap panels instead of actual boards. The panels are 4×8 and cost $24 a piece… whereas the price of wood right now is sky high. That means we’ll be able to do the entire back wall for a fraction of the cost of real shiplap.
Of course, there are other ways to do faux shiplap (like the thin shiplap style boards we did for Mom’s fireplace surround) but these panels are definitely easiest. Instead of 20 individual boards we’ll just nail these babies up boom, boom, boom and move on.
Let’s get started.
Supplies:

Step 1: Cut your Panels to Size
First things first… let’s measure our wall so we know exactly how tall our boards need to be. Next see how many boards you’ll need to cover your wall. In my case I needed 4 shiplap panels and they needed to be cut 6 inches shorter to fit on my wall.
The last board will need to have a few inches cut off the side as well… then they’ll fit four panels across.
I had the gentlemen at the hardware store cut my large panels but they’re easy to cut with a circular saw as well. If either of those options aren’t available these mdf panels are fairly thin… we used a box cutter and a straight edge to cut one board in half at the end of the project.
I was not getting out the circular saw for one forgotten cut!


Step 2: Use a Nail Gun to Attach your Panels
Now that our panels are the right size let’s put them on the wall!
Because I’m working in a shed and attaching my panels directly to the studs it’s a little different then if you were laying panels over drywall. Either way the application is the same… you’ll use a nail gun to secure your panel at the top, at the bottom and several places in the middle.
If you’re putting your panels up in a shed (like I am) you’ll need to place your nails directly into the studs… otherwise they’re going into thin air behind your panels. Which is useless. Make sure that you’re lined up for the first panel and then you can measure 16 inches to the next stud all the way across the wall.
We used a straight edge ruler for this and the second third and fourth panels went super quickly.


Step 3: Fill Nail Holes and Caulk Seams
Let’s make this baby look pretty!!
Using a bit of caulk and hole filler we’re going to fill in all those nail holes and caulk the seams. Since I don’t have anything but studs behind my panels the actual seams are a bit *hard* (impossible) to caulk. They don’t match up in places. Because this is a shed and I’m not worried about everything being perfect I’m going to skip that step… but if you’re working over drywall running a bead of caulk down the seams should be easy as pie!
If you’d rather have secure edges you could add an extra stud behind the seams of your boards… nail the edges down and then caulk the seams. I may do that at a later date but for now… good enough.
Step 4: Enjoy!
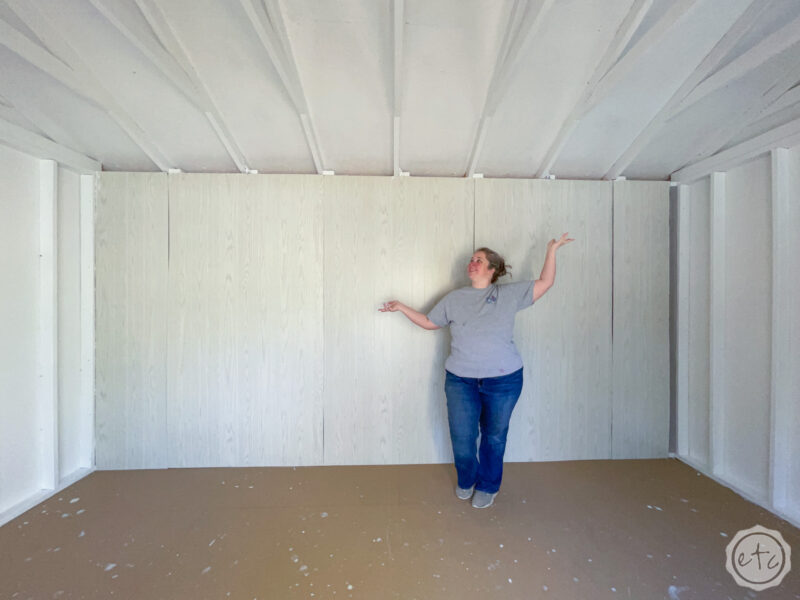
Don’t they look pretty?!
I know they’re not perfect but y’all… so much better!
Since my panels go floor to ceiling I’m done but if you’re adding any trim or crown molding that step will go here. We added extended crown molding over the shiplap boards in Mom’s living room and it looks AMAZING.
Go check it out if you’re thinking of adding that step.
In the meantime we’re going to move on to painting our little shed. I can’t wait!


Leave a Reply