• House Tour
    • Reveals
  • About
    • Smith Life
    • Disclosure and Privacy Policy
      • Terms and Conditions
      • Store Affiliates
  • Contact Me
    • Want a Button?
  • Shop
    • Floral Printable Planners
    • Paint eBooks and Packages
    • Wedding Binders & Extra Printables!
    • Planner Bundles
    • Planner Accessories
    • Home Decor Printables!
    • Cart
    • Bloglovin
    • Facebook
    • Instagram
    • Pinterest
    • Twitter
    • YouTube

Happily Ever After, Etc.

Creating Our Own Fairytale

  • Happily Ever After, Etc.
  • Home
  • Home Decor
    • My Home
    • Paint
    • Before and After
    • Tablescapes
    • Mood Boards
    • Furniture
  • DIY & Crafts
    • New to Cricut – Start Here
    • Cricut Projects
    • Resin
    • Scrapbooking
  • Organization & Planning
    • Cricut
    • Organization
    • Planner
  • Wedding
    • Cricut Wedding Projects
    • Free Wedding Binder
    • Bride Bag- The Ultimate Wedding Planner
How to Customize a Cardboard Animal Head with Happily Ever After, Etc.

How to Customize a Cardboard Animal Head

sponsor disclosure

Hey y'all

Every once in a while you find an idea that you absolutely love, something that jumps out and smacks you in the face! When I first started the mood board for our guest room I wasn’t sure on a lot of things… the color palette was up in the air, the decorations were uncertain, everything was undecided except for the furniture.

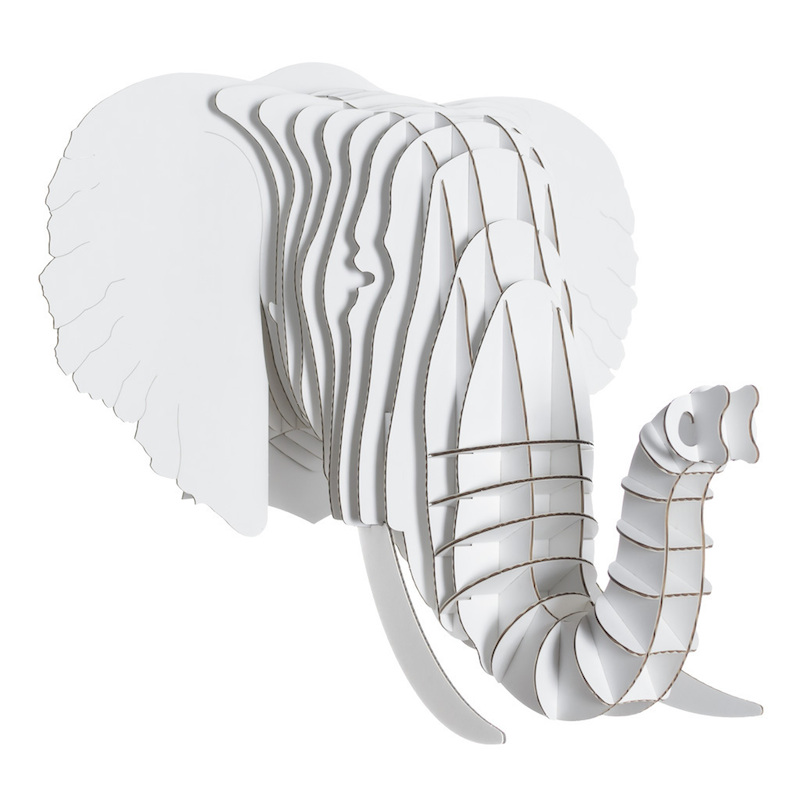
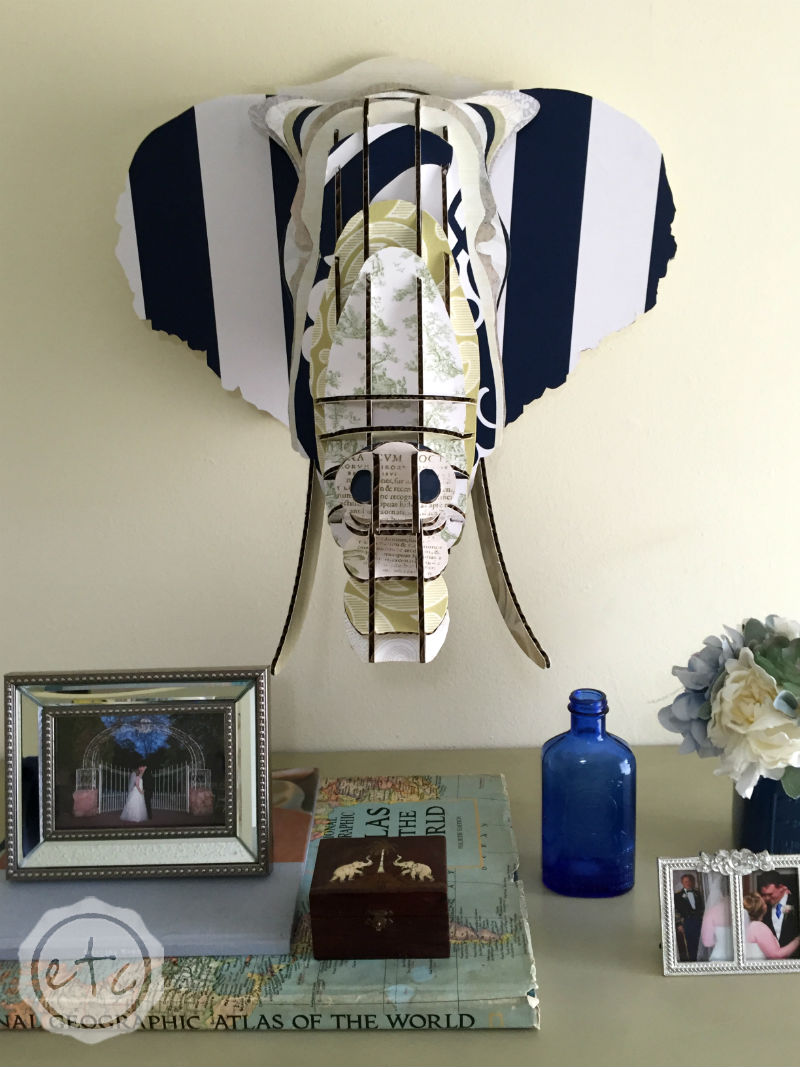
Then I found Eyan the Elephant. At first I thought I wanted a large deer head (I mean one cardboard animal head is just as good as the next and the pictures on Pinterest convinced me a deer was a great idea) but upon further investigation I figured out that what I truly wanted was an elephant head!

Who knew?

It’s really not surprising though… take a look at how cute this guy is!

How to Customize a Cardboard Animal Head with Happily Ever After, Etc.

Looking for a bunch of posts on DIY & Crafts? I’ve got you covered!
Click here to see all of my how to DIY & Craft posts in one place!

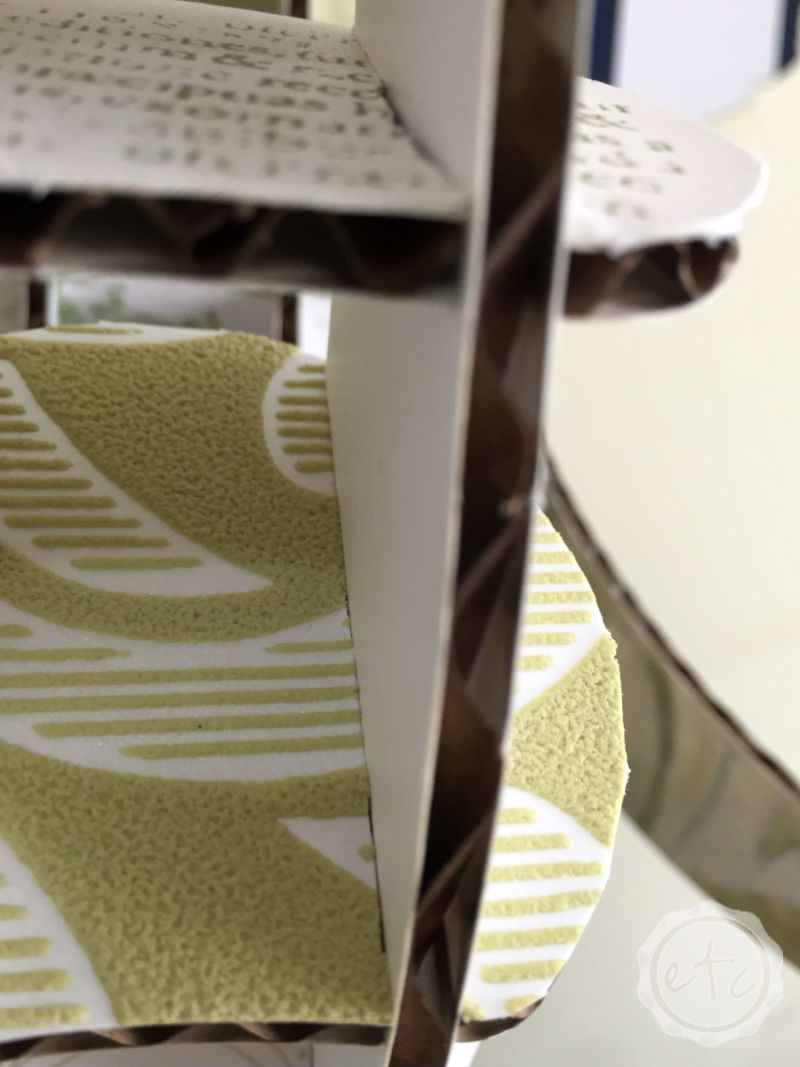
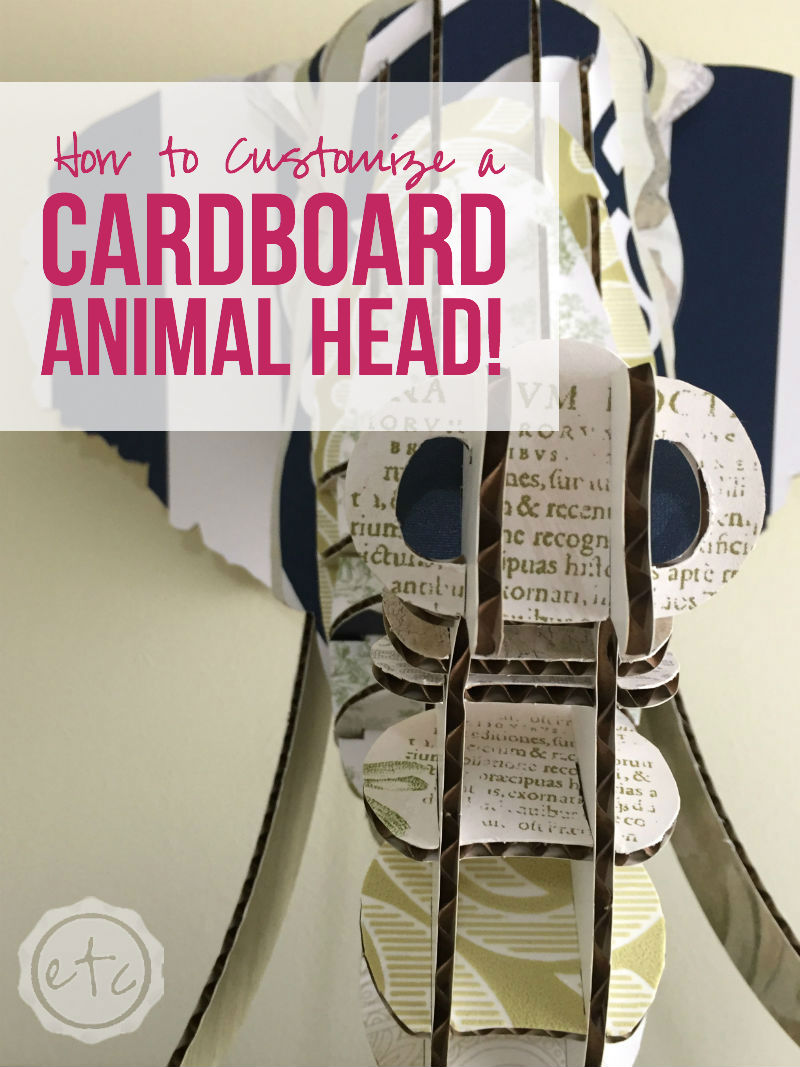
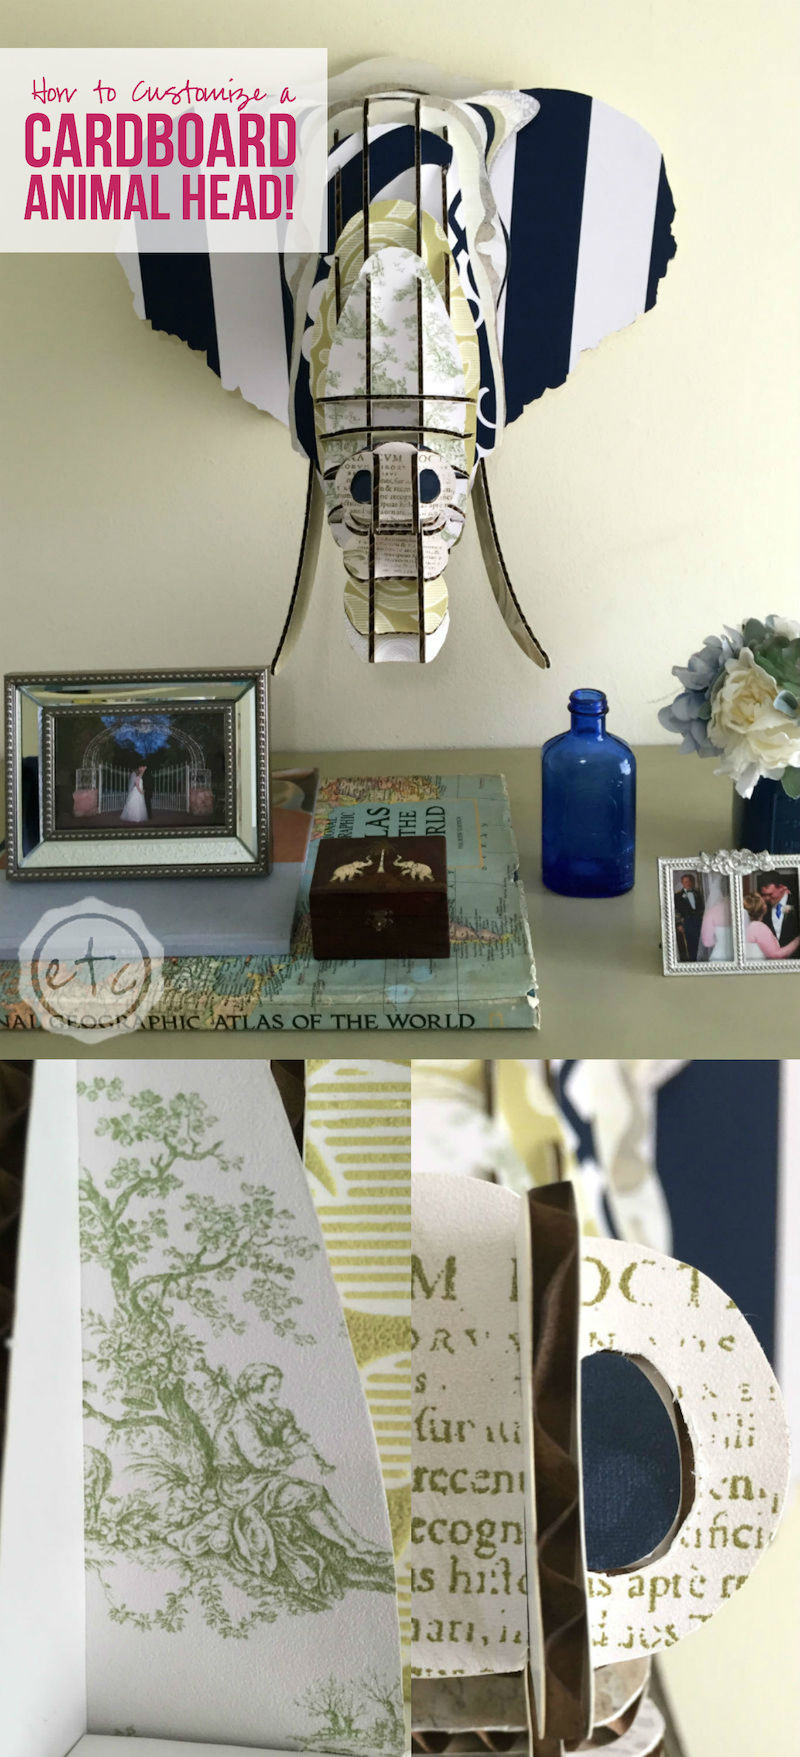
The best part about cardboard is how easily customizable it is! I absolutely love the shape but once I decided on a color palette I needed a great way to incorporate all of the colors throughout the room.  Luckily I have an easy solution: wallpaper samples!

They’re free, come in a fantastic range of colors and apply to cardboard like a dream. How fabulous is that?

Supplies:

One Cardboard Animal Head

Wallpaper glue

Chip Brush (or foam brush… the main point is that it’s disposable!)

Snap Off Utility Knife

Wallpaper Samples

How to Customize a Cardboard Animal Head with Happily Ever After, Etc.How to Customize a Cardboard Animal Head with Happily Ever After, Etc.

Step 1:

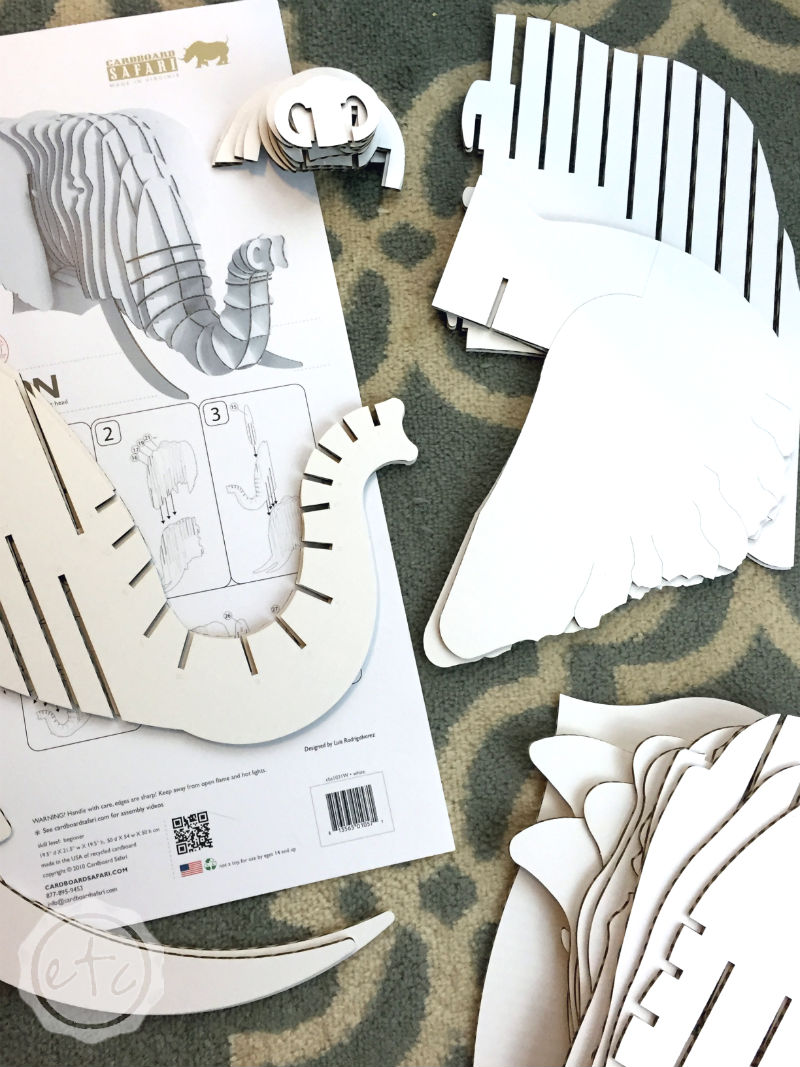
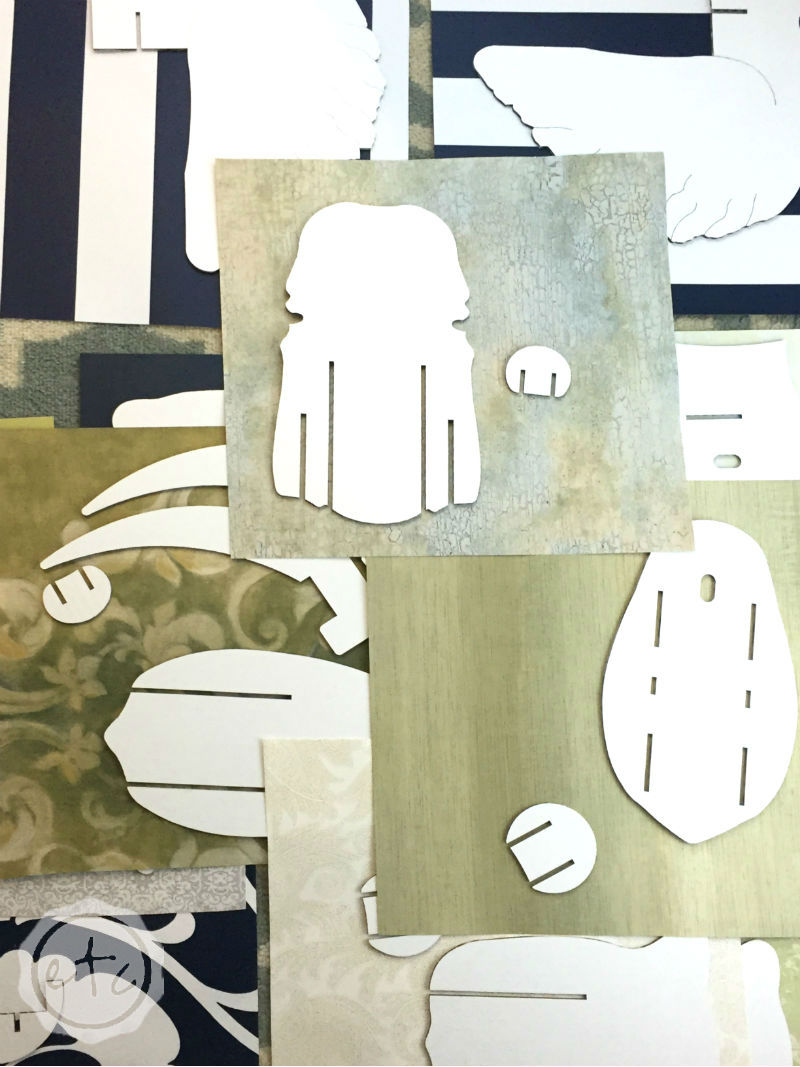
The very first thing I did was to detach all of the cardboard pieces from the boards they come on and organize them. They’re all conveniently labeled so it was super easy to lay them out in order (#1 being the smallest all the way up to #25!).

Now if you choose to wallpaper your animal in one continuous pattern or if you have a different pattern for each sheet you may not need to do this step… but if you’re trying to spread out your color palette laying your pieces out in chronological order is very important.

How to Customize a Cardboard Animal Head with Happily Ever After, Etc. How to Customize a Cardboard Animal Head with Happily Ever After, Etc.

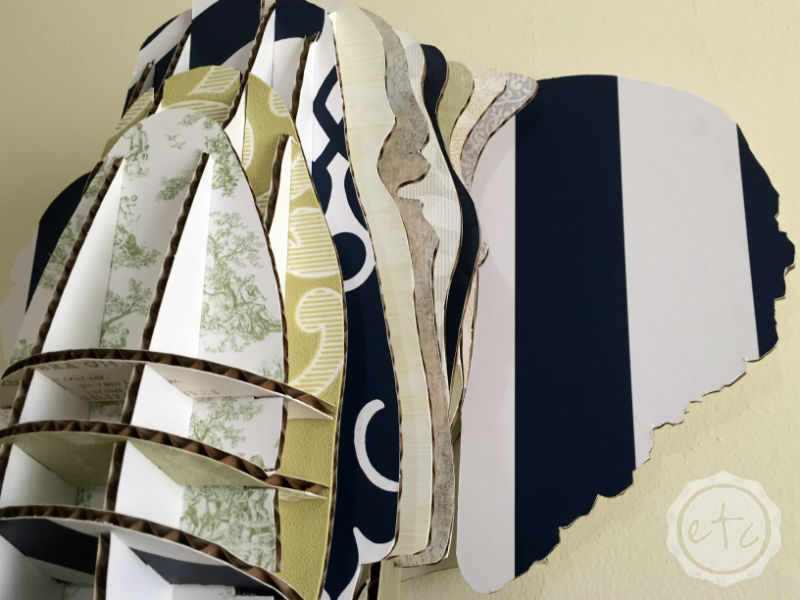
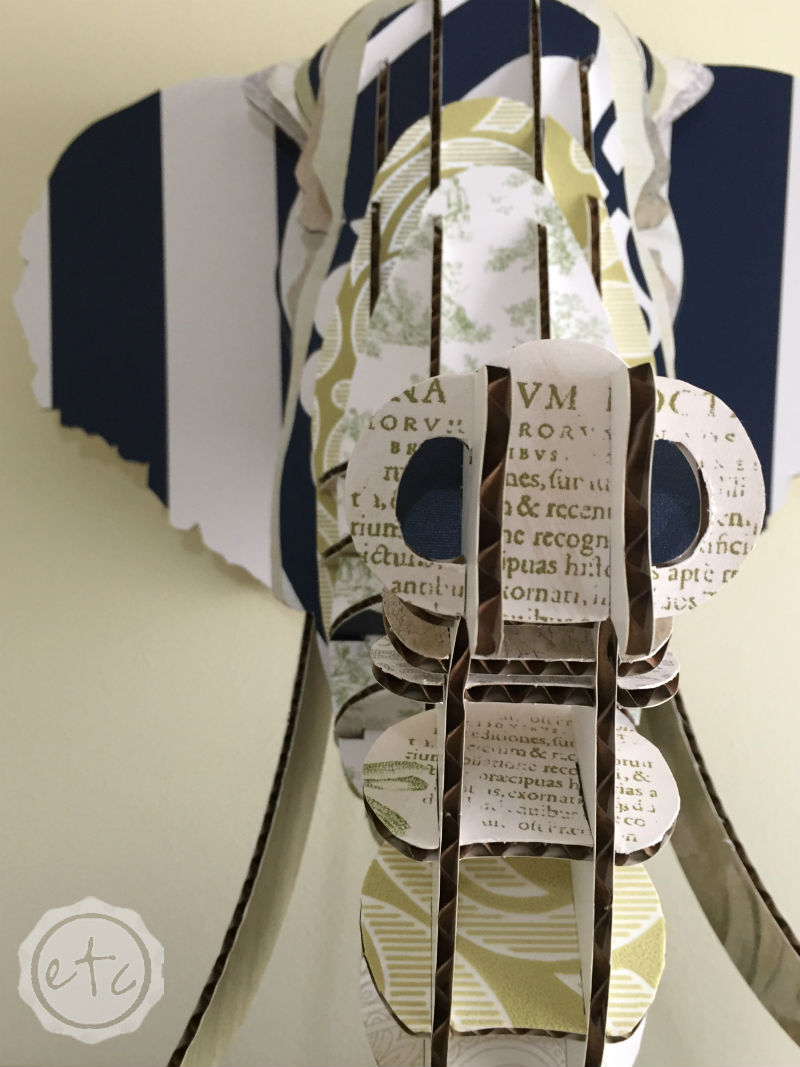
For example, I wanted my pieces to have a variety of navy, silver and sage. So by laying them out in order I was able to insure that two navy pieces weren’t touching or two silver pieces. I was also able to insure that over 70% of Eyan was sage green… which was important to my room design.

Bottom line: when planning your wallpaper sample order make sure to take into account where on the elephant your colors will be.

Bonus Tip: If you lay each piece out on your wallpaper samples first you can make sure that each cardboard piece fits it’s designated wallpaper sample! Then you can fit the smaller cardboard pieces into the negative space! Plus you’ll be able to insure that duplicate pieces (like your ears or tusks) have the same pattern.

How to Customize a Cardboard Animal Head with Happily Ever After, Etc. How to Customize a Cardboard Animal Head with Happily Ever After, Etc.

Step 2:

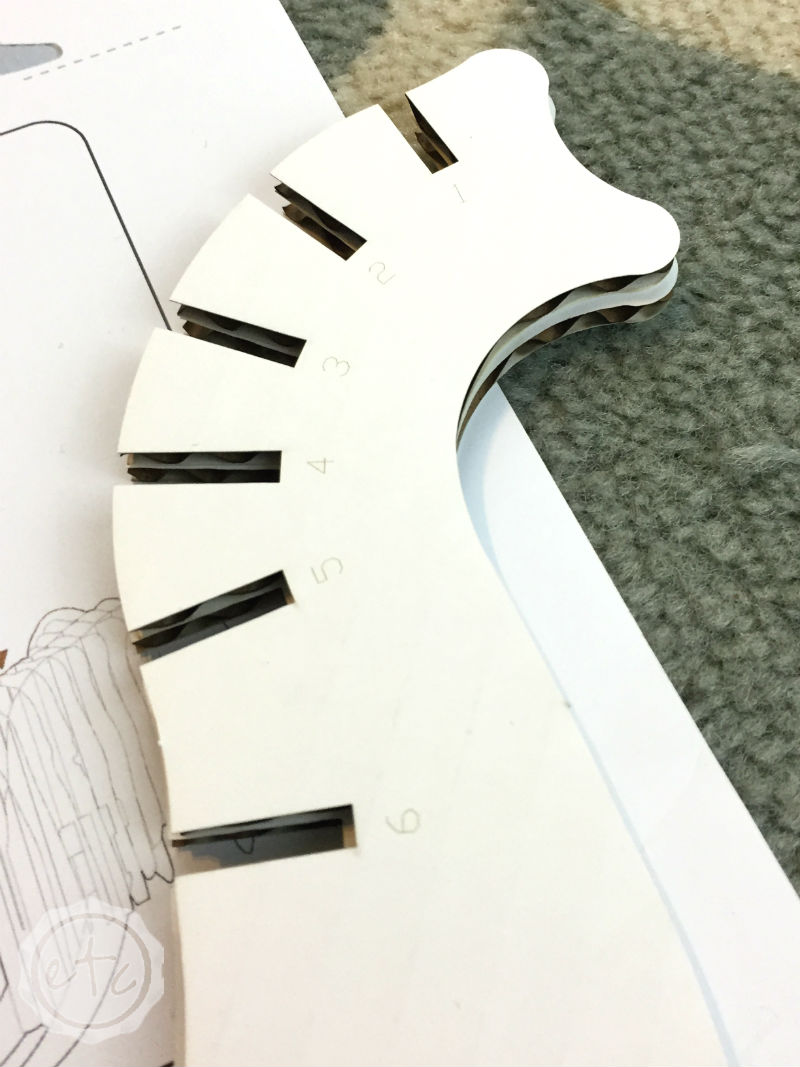
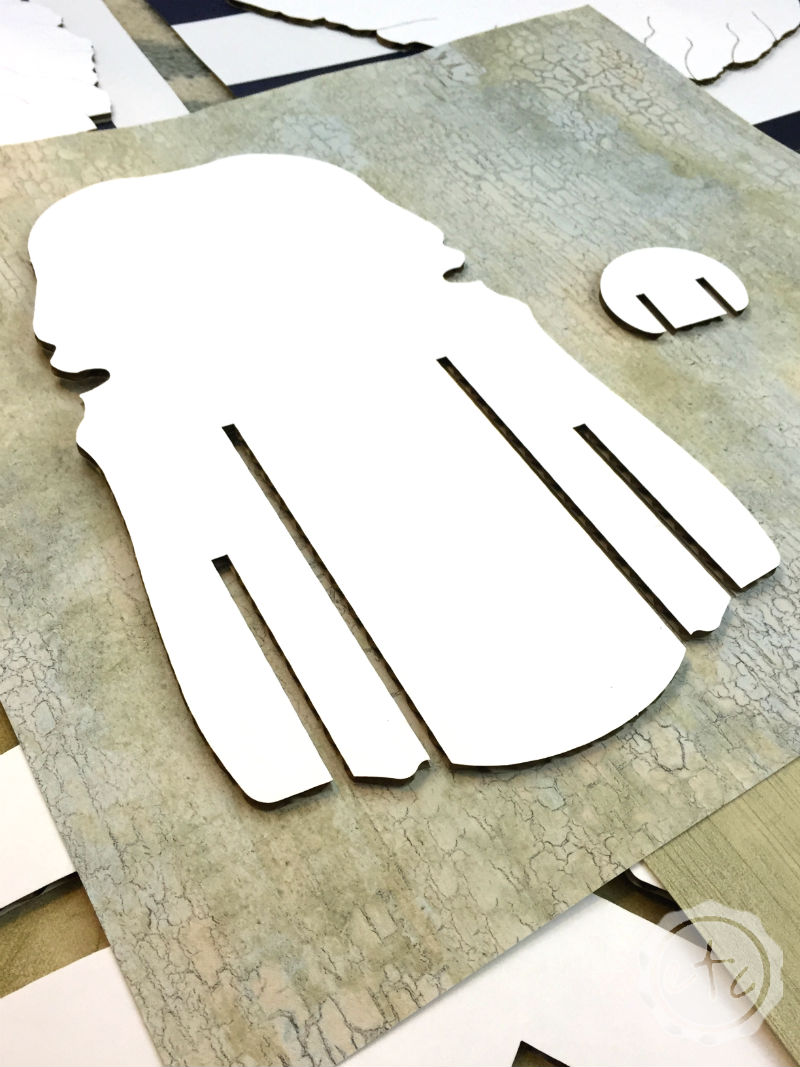
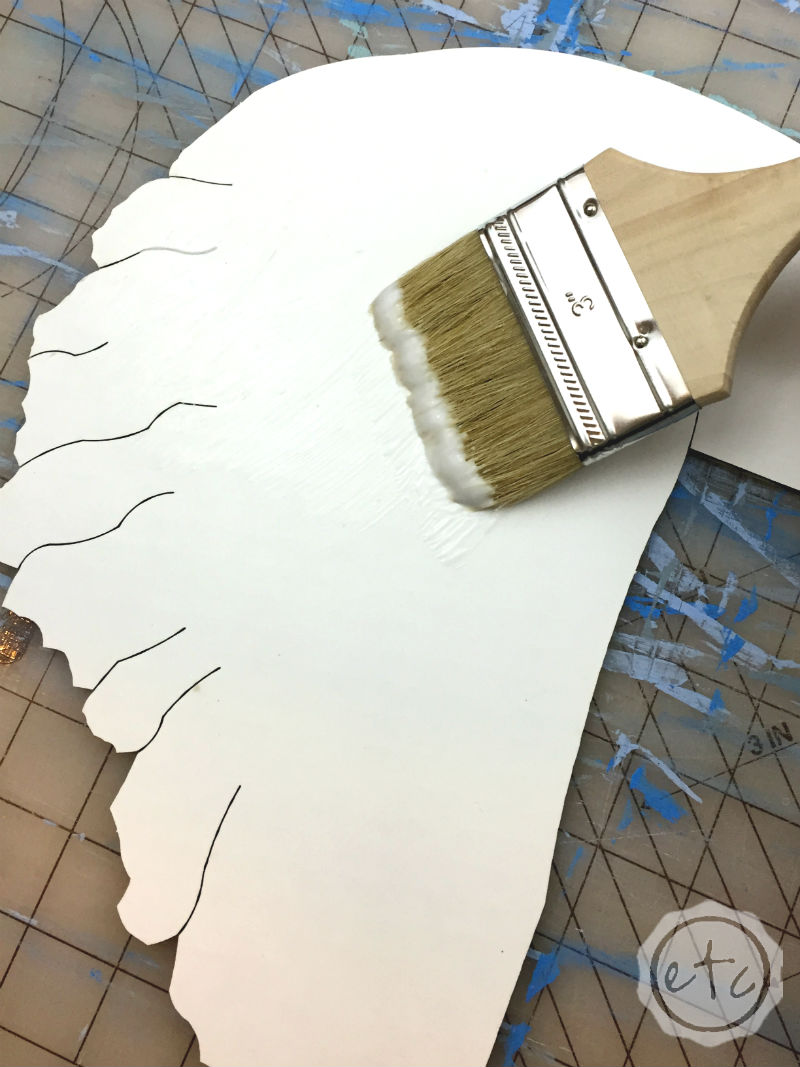
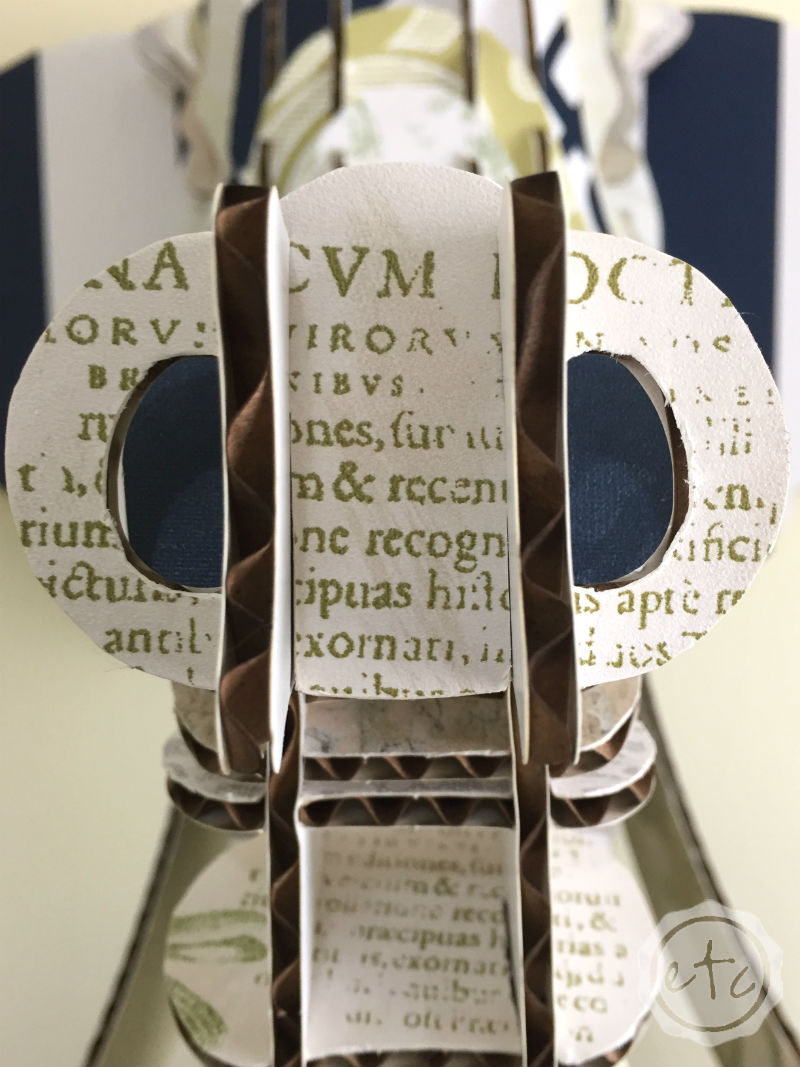
Once you’ve decided which wallpaper sample goes where it’s time to glue! Go ahead and cut a loose outline of your shape into your wallpaper sample… I simply traced with my exacto knife about an inch from the cardboard.

I tried to leave my very first wallpaper piece intact and soon learned that the larger your wallpaper piece is the harder it is to get the edges adhered properly! Basically a piece of wallpaper that is roughly the same size as your cardboard piece helps all the edges to glue properly. I don’t know the technical reason for this but trust me… it works.

My second tip is to place your glue directly on the wallpaper… and then press your cardboard firmly onto the wallpaper sample. Go ahead and press all those edges down firmly… just to get an extra good seal!

Bonus Tip: Make sure you glue the blank cardboard side to the wallpaper… your little tiny numbers need to be visible so don’t glue them down! Otherwise you will have the hardest time putting these pieces in order for the final put together!

How to Customize a Cardboard Animal Head with Happily Ever After, Etc. How to Customize a Cardboard Animal Head with Happily Ever After, Etc.

Step 3:

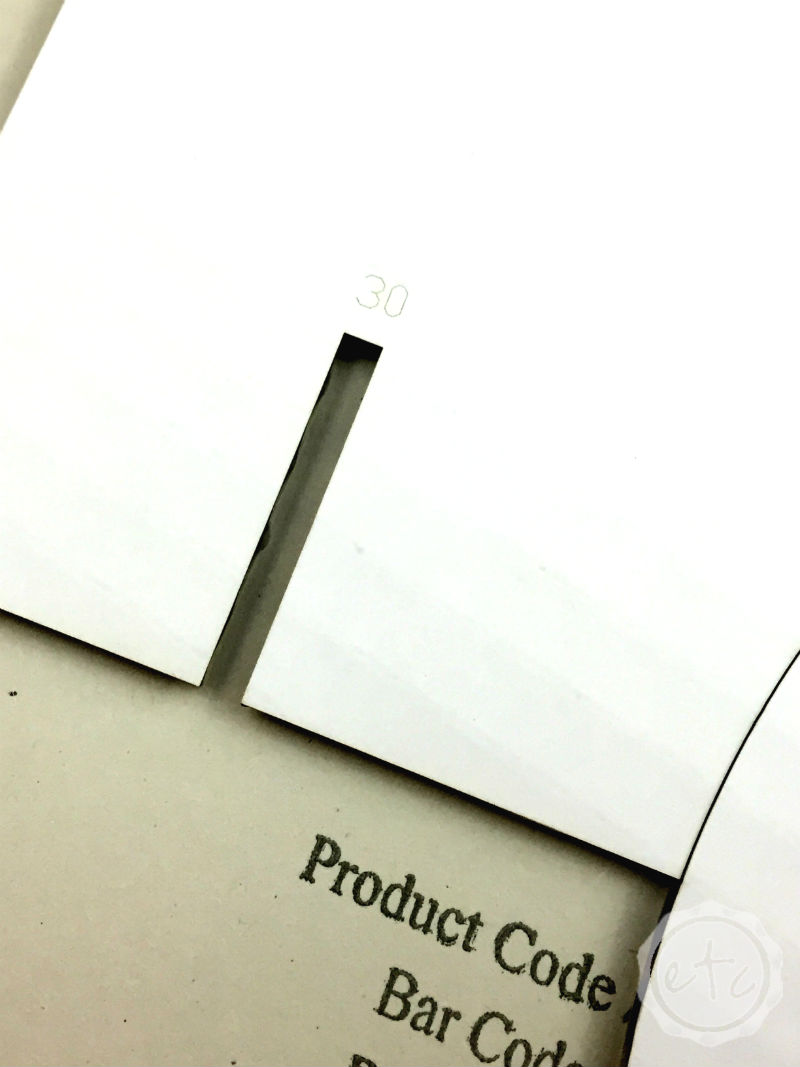
Once all of your pieces are glued down go ahead and cut the excess off from around the sides… and the little slots in the middle! The inside cuts don’t have to be perfect since you’ll be covering them with a different cardboard piece later.

I used a simple technique to cut the rectangular spots from the middle of each cardboard piece. The first step is to mark the top of the rectangle from the back. See how I place the tip of my exacto knife against the corner and then press down?

How to Customize a Cardboard Animal Head with Happily Ever After, Etc. How to Customize a Cardboard Animal Head with Happily Ever After, Etc.

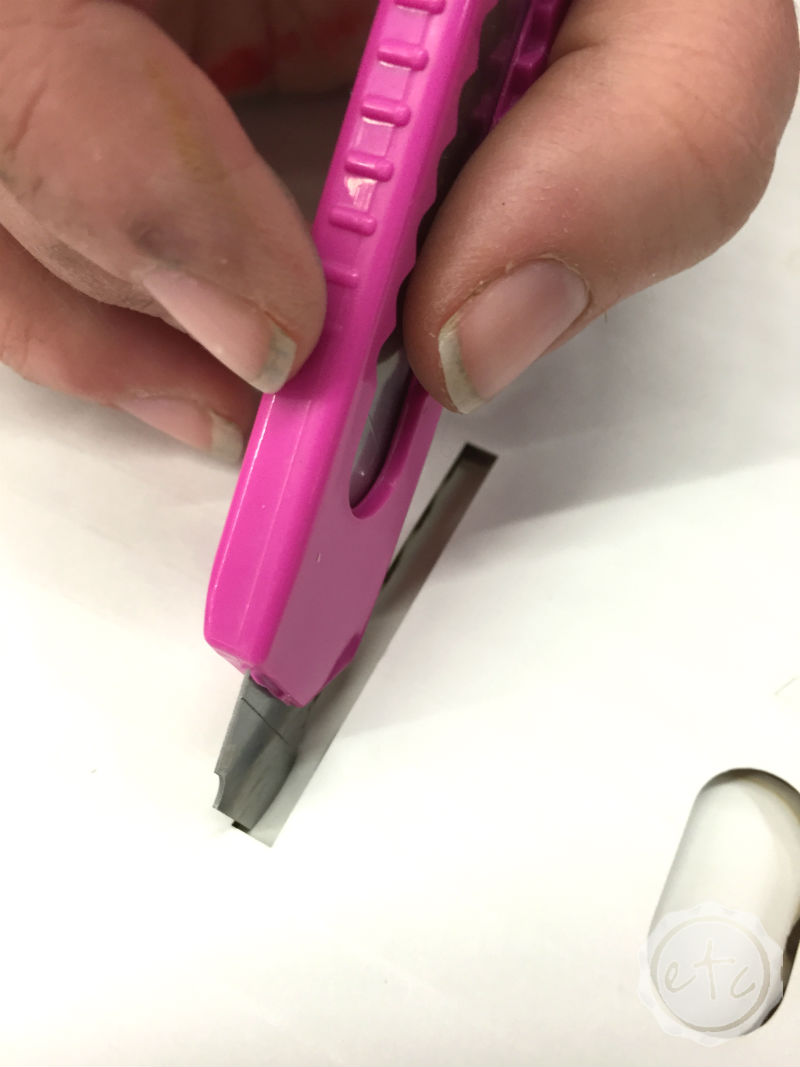
Now that I have two guide lines (one for the left and one for the right) I flip my cardboard piece over to the front. Now all I have to do is follow the cardboard down the entire space… don’t push just let the knife guide your hand. 9 times out of 10 it will try to follow the cardboard underneath.

Of course if that’s not working I find that holding your piece up to the light will give you a back-lit effect to cut a clean line

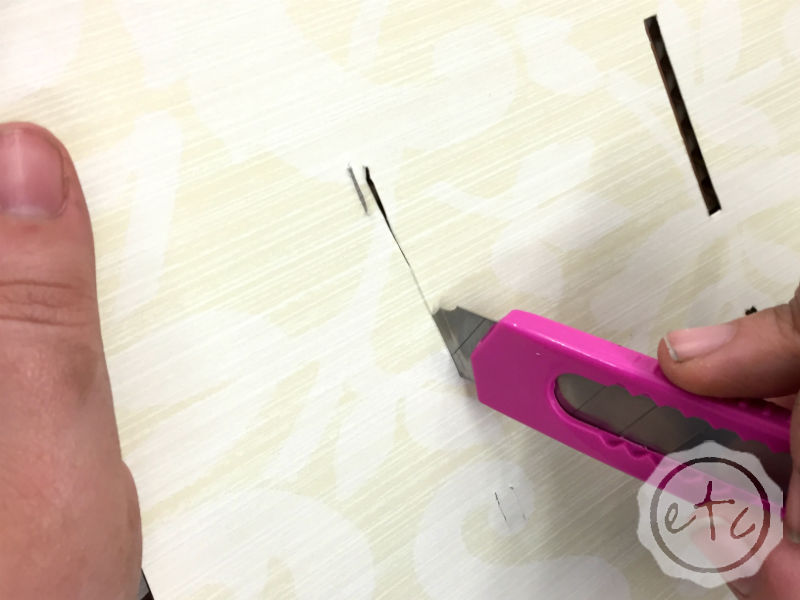
The final step is to cut the excess paper free! Easy peasy!

How to Customize a Cardboard Animal Head with Happily Ever After, Etc.

As for the sides… here’s a quick video on how I cut out each and everyone! I don’t know what y’all call it but it reminds me of cutting wrapping paper at Christmas! Go ahead and make your first cut and then let your blade glide along the edge all the way down… just like wrapping paper!

Once all of your pieces are cut that’s it! You’re done! Now you can follow the instructions to put together your very own cardboard animal head… or you can watch while your hubby does it! It looked super easy but since I conned him into cutting out half of my pieces he was fully invested in the project at this point… and he really wanted to assemble little Eyan all on his own!

I did get to put a few pieces of the trunk on though! They were easy!

How to Customize a Cardboard Animal Head with Happily Ever After, Etc. How to Customize a Cardboard Animal Head with Happily Ever After, Etc.

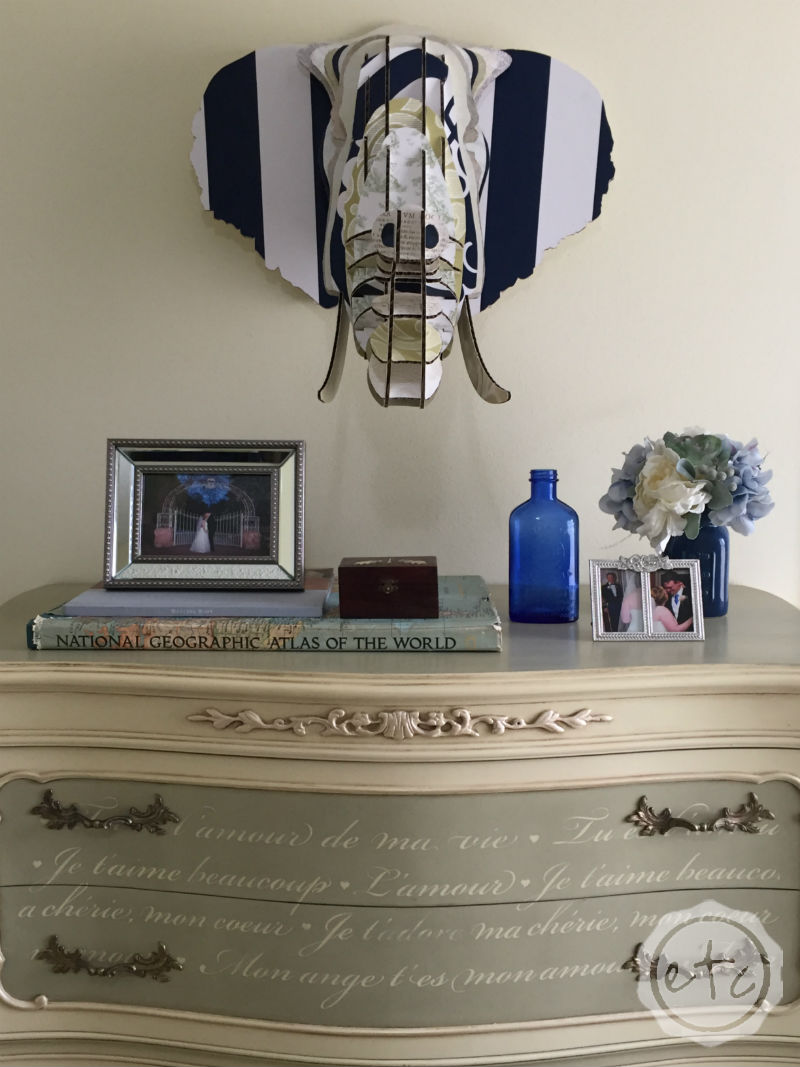
Well?!? Do you love him as much as I do? He’s the perfect accent for my little room… quirky but still sophisticated! Yup… that’s a thing! Of course, the best part is that the wallpaper samples I used blend perfectly with the colors for the room. When deciding on wallpaper swatches I grabbed a color swatch in the same shade as our furniture and matched each sample against it. If the color wasn’t close enough we didn’t use it! Simple as that!

Of course since I was working with discontinued wallpaper books I couldn’t be too picky… but there are plenty to pick from! Since Eyan is so funky I decided to go with fairly traditional patterns to go with the furniture. Toile, stripes, french script, filigree… nothing too modern or funky here! When blending two different styles (modern: elephant, traditional: bedset) it’s best to pick a few elements from each style so that they work together a little easier.

How to Customize a Cardboard Animal Head with Happily Ever After, Etc.How to Customize a Cardboard Animal Head with Happily Ever After, Etc. How to Customize a Cardboard Animal Head with Happily Ever After, Etc.

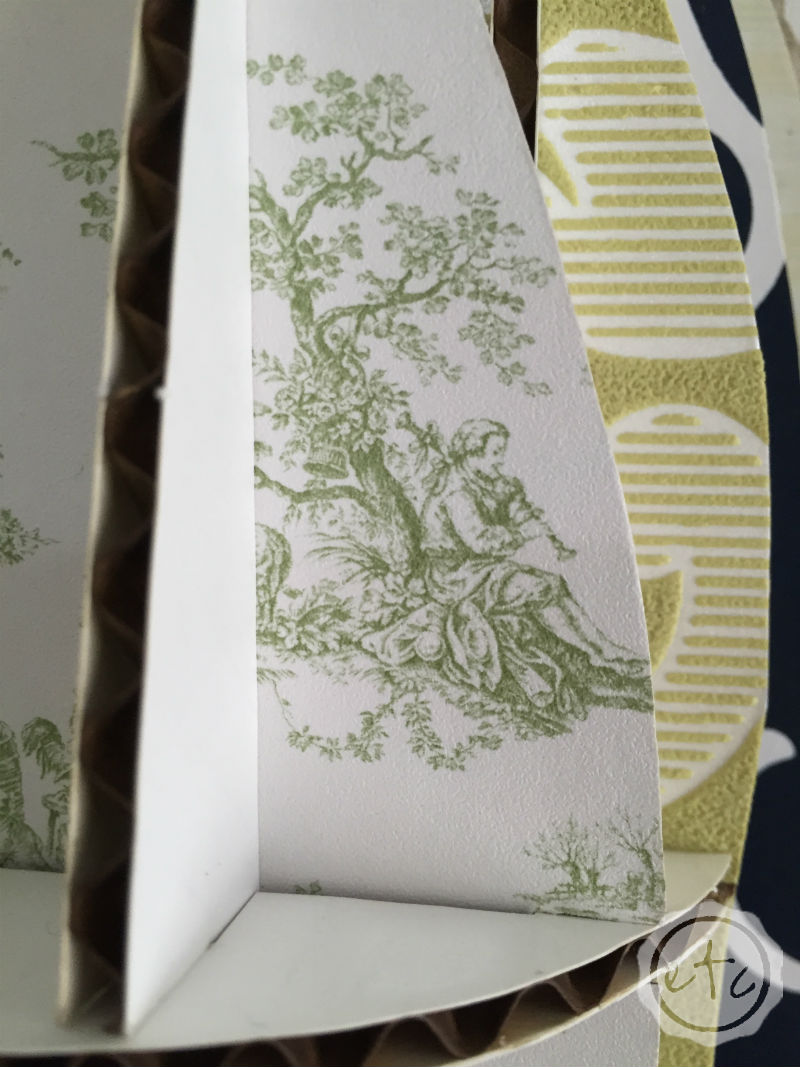
I mean just look at that toile! The color is dead on!

How to Customize a Cardboard Animal Head with Happily Ever After, Etc.How to Customize a Cardboard Animal Head with Happily Ever After, Etc. How to Customize a Cardboard Animal Head with Happily Ever After, Etc.

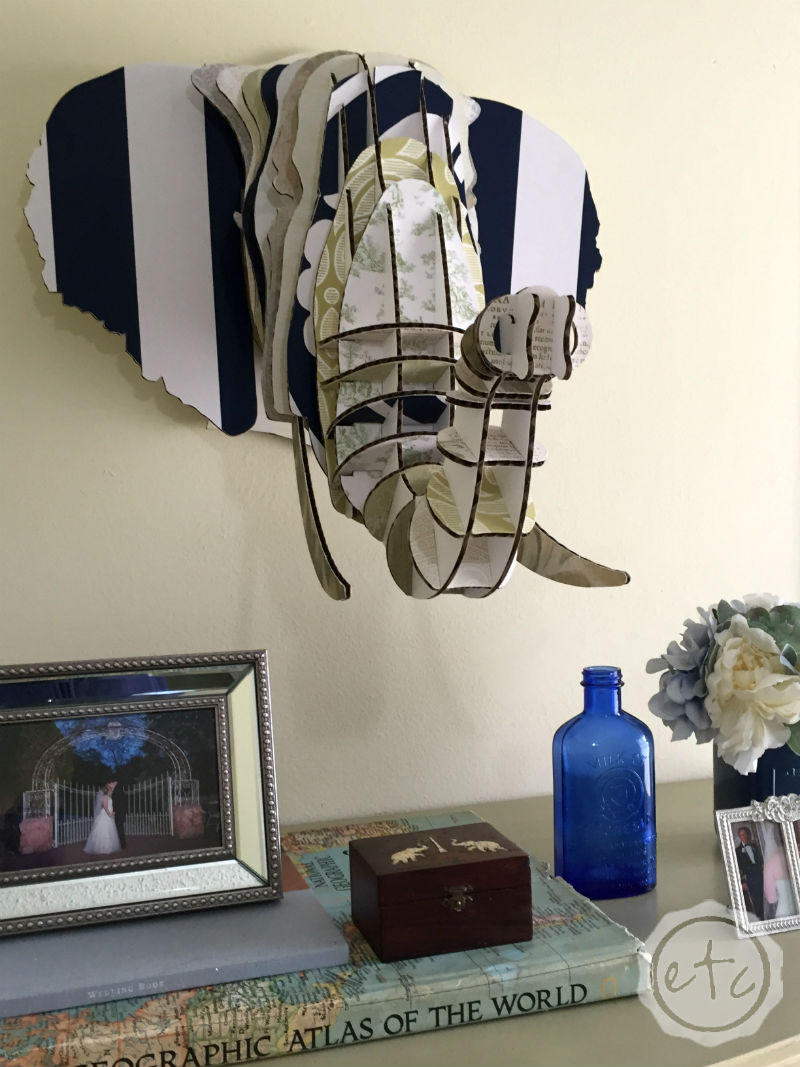
The best part of this little elephant is the sentimental value. My Nana (my great-grandmother) lived in India for a time and as a little girl I loved to listen to her stories of the elephants. She collected them and you could find elephant pictures and items all over her sweet little house. I suppose that’s why elephants always make me smile… and why I chose Eyan the Elephant over Bucky the Buck.

I even decorated the dresser top with items that remind me of Nana… a little tiny elephant box that she gave me and an atlas that use to be hers.

When I was a little girl just learning to sew I made her a stuffed bunny rabbit and she absolutely loved that thing. Kept it on her bed every single night! She would have been tickled pink with a cardboard elephant head!

Just like me.

How to Customize a Cardboard Animal Head with Happily Ever After, Etc. How to Customize a Cardboard Animal Head with Happily Ever After, Etc.

How to Customize a Cardboard Animal Head with Happily Ever After, Etc.

pink line

We’re almost ready for a full Guest Room Reveal… in the meantime don’t miss the rest of the series!

An InLinkz Link-up


Save

Get Your FREE Wedding Binder

Trying to plan your perfect wedding?

Here's 42 FREE printables to help you get organized!

Success! Now check your email to confirm your subscription.

There was an error submitting your subscription. Please try again.

Powered by ConvertKit
You made it through the entire post? That means you're one of my new favorite people! I'd love to be friends and see what else you would like to read about! Leave me a comment and then sign up for your very own FREE paint planner.... so that you can keep track of every single paint color with ease!
Welcome back! I'd love to be friends and see what else you would like to read about! Leave me a comment and then sign up for your very own FREE paint planner.... so that you can keep track of every single paint color with ease!

Show me some LOVE y'all:

  • Facebook
  • Pinterest
  • Twitter
  • Email

Related

«
»

Before and After, DIY & Crafts, Home Decor, My Home, Reveals 8

Comments

  1. Cindy Hoffman says

    March 5, 2016 at 6:37 am

    Hey Betsy, nice crafting there, just from a cardboard 🙂 and thanks for your easy and comprehensive steps too. I am not usually good with these kind of DIYs but I am sure I can make something from this. Will be trying out over the weekend. Thanks.

    Cindy

    Reply
    • Happily Ever After, Etc. says

      March 7, 2016 at 1:10 am

      Thanks Cindy! I absolutely loved this little project… and the hubby actually had a blast helping me! Make sure to send me a picture of your project… I’d LOVE to see it! Thanks for stopping by!

      Reply

Trackbacks

  1. Little Details to Make Your Guest Room More Inviting - Happily Ever After, Etc. says:
    March 4, 2016 at 5:01 am

    […] the big pieces of the guest room falling into place (we have the bedding picked out and the wall decor covered! I even have a plan for the back accent wall!) that only leaves the little details to be […]

    Reply
  2. February Round-Up - Happily Ever After, Etc. says:
    March 30, 2016 at 8:51 pm

    […] … read more! […]

    Reply
  3. DIY Lamp Transformation... How to Color Transparent Glass - Happily Ever After, Etc. says:
    April 10, 2016 at 10:45 pm

    […] DIY Cardboard Animal Head […]

    Reply
  4. Working on the Guest Room... Option 1! - Happily Ever After, Etc. says:
    April 10, 2016 at 10:52 pm

    […] DIY Cardboard Animal Head […]

    Reply
  5. Wall Decor for Your Guest Room... 3 FREE Printables - Happily Ever After, Etc. says:
    April 15, 2016 at 6:19 pm

    […] DIY Cardboard Animal Head […]

    Reply
  6. A Few of my Favorite Things... - Happily Ever After, Etc. says:
    September 27, 2016 at 5:48 pm

    […] Until the hubby decides that’s a good idea I guess I’ll just be happy with this cute little elephant in the guest […]

    Reply

Leave a Reply Cancel reply

Your email address will not be published. Required fields are marked *

sidebar betsy I'm Betsy, Home Decor Enthusiast, Yorkie Mama, Crafter, Blogger, Picky Eater, Chief Mess Maker, Antique Hoarder and Graphic Designer. You can generally find me working on (attacking with a paintbrush) the 3 bed, 2 bath home we are currently renting! Our home might not be perfect but it is ours & if you hang out long enough you'll see that what we lack in know-how we make up for in passion!
Shop My Craft Room

Shop My Home

Featured Articles

15 Fabulous Ideas to Organize your Laundry Room
25 FREE Printables For Your Home!
What to do with EXTRA Paint with Happily Ever After Etc
10 Ways to Make Your Bed EXTRA Comfy with Happily Ever After Etc.
Ready to Pick your Perfect Paint Color? We'll help you with our 6 Day FREE E-Course

Hey y’all,

Profile

I'm Betsy, Home Decor Enthusiast, Yorkie Mama, Picky Eater, Chief Mess Maker, & Graphic Designer...

A Little Note!

Many of the links on Happily Ever After, Etc. are affiliate links. If you purchase a product after clicking an affiliate link, I receive a small percentage of the sale for referring you, at zero cost to you! How awesome is that? Purchasing through affiliate links is an easy, painless way to help out your favorite bloggers. Thank you so much for your continued love and support! Read the full disclosure here!

Instagram

The number one question people ask when they watch The number one question people ask when they watch my new home tour on YouTube? Why is there so much clutter... um excuse me I like stuff! The second question? How did you frost the doors? Don’t worry... I wrote out the whole process, check out the step by step tutorial on the blog!
With Christmas fast approaching I’m having secon With Christmas fast approaching I’m having second thoughts... about taking down my holiday decorations! I absolutely love all the blush and rose gold this year and think I might have to add more pink to my every day decor. Until then maybe it will just stay Christmas at the Smith house! Tutorials for both the “Merry Christmas” resin sign and the “Dear Santa” Cricut sign are in my profile! #pinkchristmas #pinkchristmastree #pinkchristmasdecor
Well y’all Christmas is coming up quick... which Well y’all Christmas is coming up quick... which means I need to get a move on with all that wrapping! I got a jump start this morning after whipping up a few little resin light bulbs! Check out the full tutorial over on the blog if you’d like to wrap your presents with a few resin goodies this year... and tell me in the comments below. Are you finished wrapping or (like me) are you still getting started? #pinkchristmas #pinkchristmasdecor #resinchristmas #giftwrappingideas
Ready for another fun and easy resin project? Thes Ready for another fun and easy resin project? These little Christmas trees are the perfect beginner level project so if you’ve never done resin before don’t let it intimidate you!! Grab your heat gun and jump in... I’ll walk you through it! Check out the full blog post for these little guys on the blog (link in profile!)
If you haven’t joined Michelle at @weekendcraft If you haven’t joined Michelle at @weekendcraft SVG membership then WHAT ARE YOU WAITING FOR?! I am obsessed with all the cute svg’s and y’all she is doing a live craft night every month to walk you through making one of her designs... and the first craft night is tomorrow! She’ll be making this “Merry everything and Happy always” SVG and it’s so cute! You don’t want to miss it! See you there! 

(Also who noticed the sneak peek at my new kitchen?!)

#cricutsvgfiles #christmassvg #cricutsled
Well y’all I’m getting this close to unpacked Well y’all I’m getting this close to unpacked in my new house!! And since I’m a blogger Christmas is going up! So here’s the question... do you want a 1 month house update or do you want to wait for the Christmas tour? #lulamaefarmhouse #rosegoldchristmastree #newhouse
Well it’s still a work in progress but I finally Well it’s still a work in progress but I finally have a house!! They have to put it together and do all the detailing before I get keys... but we’re in the end game now! Check out my stories for a sneak peek at the moving process... full YouTube video coming soon!
#ad how amazing did these little fall coasters tur #ad how amazing did these little fall coasters turn out?! Plus I absolutely love the matching tray! The best part? This is such a quick and easy resin project... a silicone mold, a little resin and your trusty heat gun and I promise you can make this baby!! Link in profile for the tutorial!! #fallresin #resinforbeginners #cheetahprint
Okay... is it bad if you just want to make coaster Okay... is it bad if you just want to make coasters in the same mold with the same technique but different colors?? They turn out soo differently! Just a sneak peek of my fall coasters and the blush ones I made last year!
Happy #nationaldogday to the fur babies that are ( Happy #nationaldogday to the fur babies that are (literally) behind (beside... or underneath!) all Of my projects! These sweet little cuddle muffins make everything better 😊🐶😘
GIVEAWAY CLOSED Our winner is @kamikvega Check you GIVEAWAY CLOSED
Our winner is @kamikvega Check your inbox girl, this little machine is headed your way! Thanks to everyone who participated... I can’t wait to see where we go from here!

🥳📦🥳 GIVEAWAY🥳📦🥳
If you have loved all of the Cricut projects I make here is your chance to win a Cricut Joy of your very own! If you’re ready for a little craftiness (maybe a little time to relax) then this giveaway is for you! I’m teaming up with a few of my cavities crafty bloggers so that one of you can win your very own mini crafting machine. Good Luck!!!!

TO ENTER GIVEAWAY:
1.) Follow
@creativeramblings 
@weekendcraft 
@craftylumberjacks 
@this.is.tisa 
@justcallmehomegirl 
@happilyeverafteretc
@lovebird_heartworks 
2.) Like this post
3.) Tag a friend in the comments.
.
.
.
Hurry! Giveaway ends Saturday 8/29/20 at 11:59PM PST. Winner will be notified via Direct Message. Share or tag a friend who'd love to win a Cricut. .
.
.
This contest is in no way affiliated with or sponsored by Instagram or Cricut. To enter you must have a U.S shipping address.
A little peek into the fun summery Tablescape I pu A little peek into the fun summery Tablescape I put together for a little garden party! Want to check out the full table? Wondering where to find all the pieces... click the link in my profile for all the details!
#ad Did you know you can put infusible ink onto al #ad Did you know you can put infusible ink onto aluminum? It's sooooo simple... honestly it's one of the easiest projects I've ever done. Even if you've never used your Cricut before you. can. do. this. I'll show you how every step of the way! Follow along with the full tutorial video over on YouTube! The best part? These little aluminum signs look amazing as part of a larger project! Check out how I added mine to a larger resin wave project on the last slide! @officialcricut #cricutcreated https://lnk2.io/wvMllZf
Okay so It’s no secret that I’ve been obsessed Okay so It’s no secret that I’ve been obsessed with resin for a while now but this week I’ve been playing around with resin waves! Including this tiny resin sea shell! Check out the link in my profile for the full tutorial!
After a lot of struggle, loss and frustration I am After a lot of struggle, loss and frustration I am finally dotting the i’s and crossing the t’s on my next chapter. Yesterday I went and signed the million and one papers to close on my new house! I cannot wait to share the moving (and decorating) process with all of you... next step: keys! #firsttimehomebuyer #newhouse
Load More... Follow on Instagram

Copyright © 2021 · Darling theme by Restored 316

Copyright © 2021 · Darling Theme on Genesis Framework · WordPress · Log in · Privacy Policy

loading Cancel
Post was not sent - check your email addresses!
Email check failed, please try again
Sorry, your blog cannot share posts by email.