

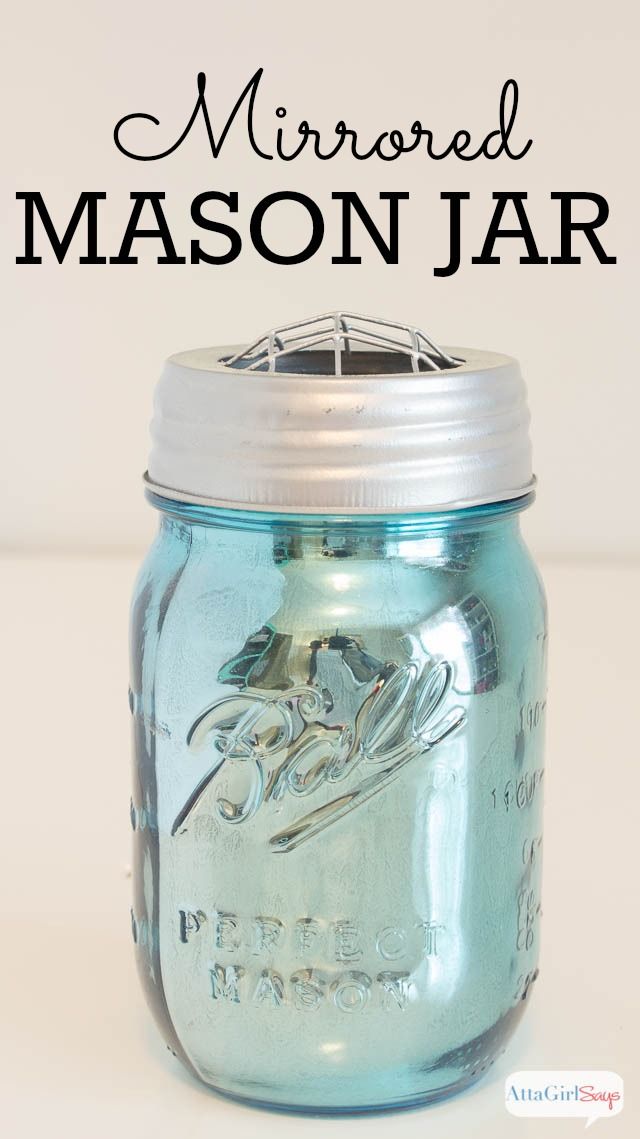
Today I have a project for you that first appeared on Megan’s blog See it, Pin it, Do ii, Blog it! She was so sweet to let me guest post on her fabulous blog… now it’s time for the full reveal here… for all of my fantastic readers! I first came up with the idea when I saw this pin from Atta Gril Says:
Looking for a bunch of posts on DIY & Crafts? I’ve got you covered!
Click here to see all of my how to DIY & Craft posts in one place!
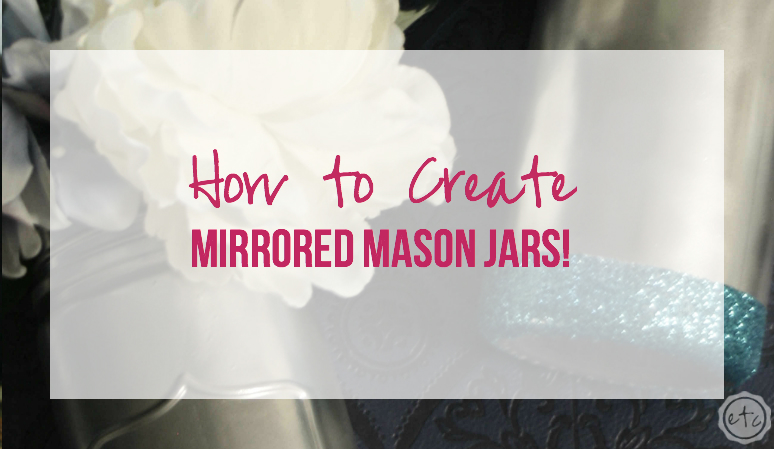
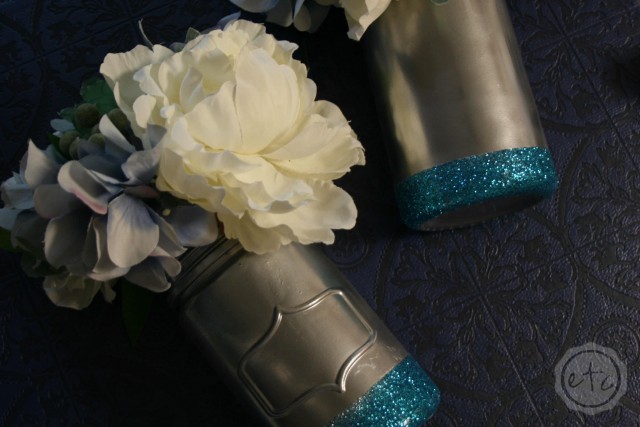
That’s right MIRRORED mason jars! With the mason jar trend going on I’m surprised we didn’t think of this sooner! I mean they’re clearly adorable! Here’s everything you need to make your very own mirrored mason jar:
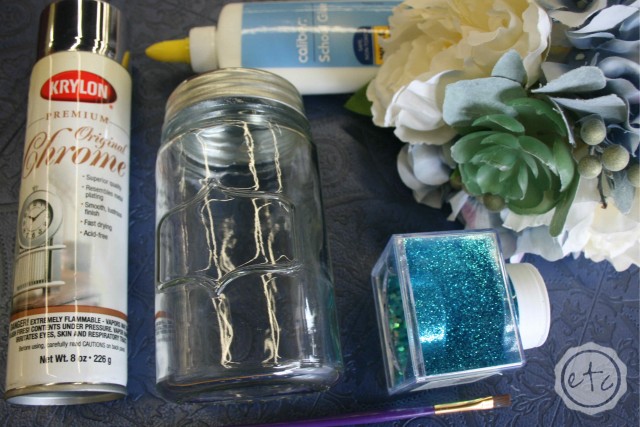
Supplies:
Several adorable Mason Jars! I picked up a couple from the Target dollar spot for (gasp!) $1!
Spray paint in a looking glass finish… I found mine at Michaels for 6.99. With a 40% coupon it wasn’t a bad price!
Frog tape or scotch blue tape… to tape off those crisp glitter lines!
One small paint brush you don’t mind throwing away… it will get gluey. (Yes gluey is a word).
Clear glue… nothing fancy here! Clear school glue will do… just make sure it dries clear and not white!
Your choice color of GLITTER! Because every project is better with glitter!
Adorable flowers or mason jar topper… Michales has a few options if you want to leave your mason jars open for any reason.

Alright now let’s start from the beginning! Step 1 is to spray paint your mason jars. Make sure to do light coats so that they dry smooth… and don’t forget the inside! By hitting the inside with your spray paint you ensure that if your jar chips it won’t be as noticeable! Yay!
Hint: Spray paint in a dry cool area… I did one jar inside the warehouse at work and it turned out great! Smooth as a baby’s bottom! The other jar I spray painted in my front yard on a hot (Alabama) day… I thought the heat would help the paint dry but it actually melted it a little. Yikes! When my hubby picked the jar up to bring it inside the paint melted off onto his fingertips… not a good look! Luckily I was able to fix it by sanding down the rough edges and re-spraying the melted spots. Then I let them dry in the shade!
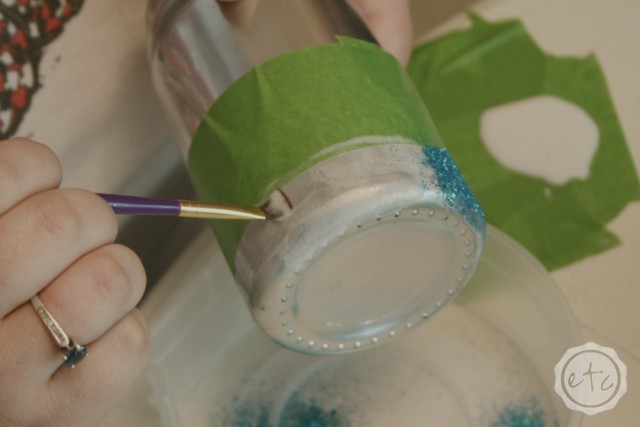
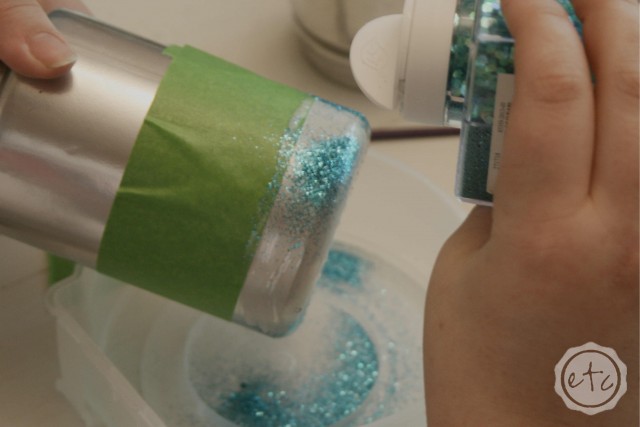
Step 2 is to tape off your jar with frog tape… I decided to glitter the bottom of my jars for a bit of extra bling but feel free to glitter whatever you like (really there can’t be too much glitter in the world!). Once your tape is straight go ahead and paint on your glue… that’s Step 3! Working in small sections make sure each spot is covered with glue and then sprinkle liberally with glitter! (Yup Step 4). Tap off any extra glitter and move on to the next section… I did three sections for my jar, just to make sure the glue didn’t dry and I had full glitter coverage!
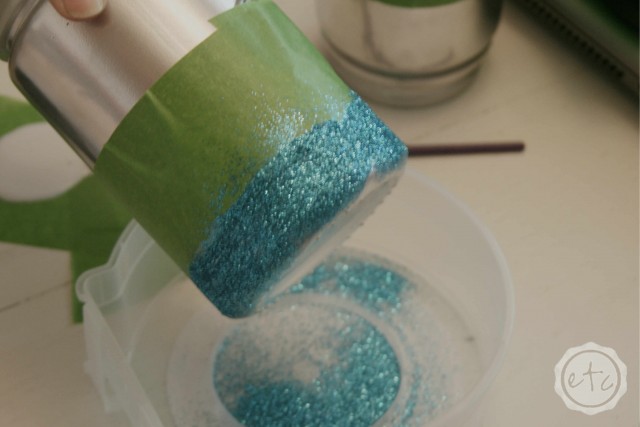
Once your jar is covered with glitter set it aside to dry for a bit… we waited about 30 minutes to make sure the glitter was fully set. Then we used our special handy dandy trick… hit the glitter with hairspray! After it dries it will keep the glitter in place so it doesn’t “rain glitter” every time you move your jar… yuck! We like glitter on our mason jars… not our counters!
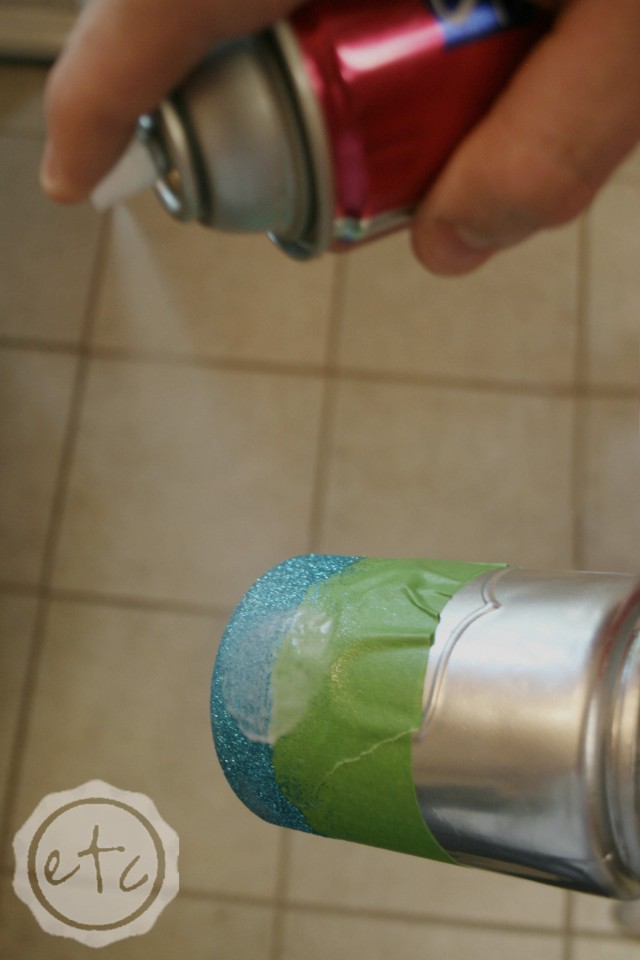
Hint: The above picture shows way too much hairspray! You only need light layers… but that’s what you get when you say “here honey hit this with the hairspray so I can take a picture!”
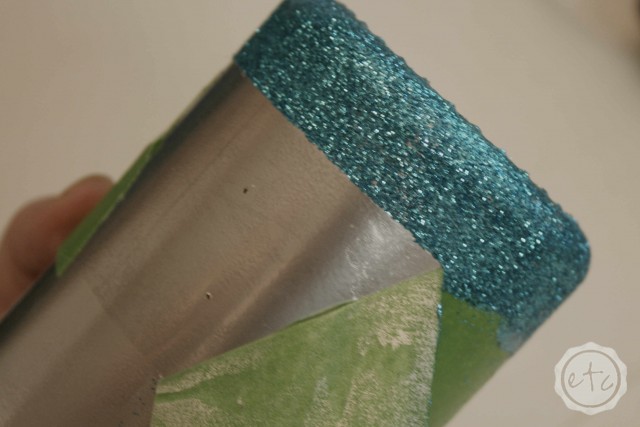
Step 5 is always my favorite… taking off the frog tape! I just love seeing those crisp clean lines! The tape seemed to leave a bit of a sticky residue though… even after a quick cleaning with some soap and water I could see shadows. I took my jars back outside (on the shady porch) and hit them with a bit more spray paint… being careful not to spray the glitter. Good as new!
Ta-da!

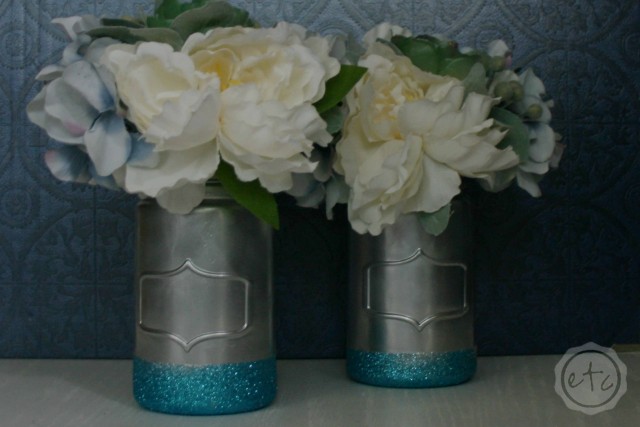

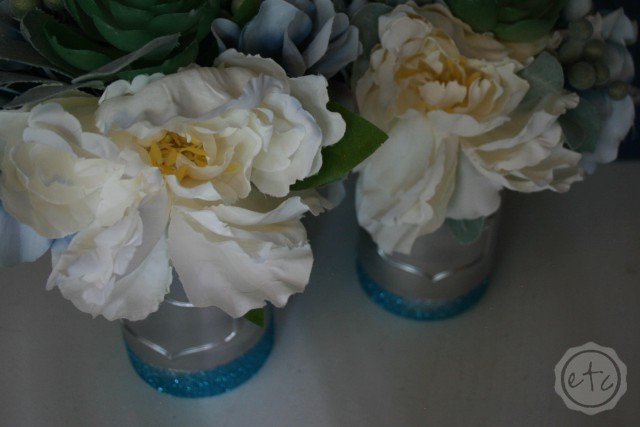

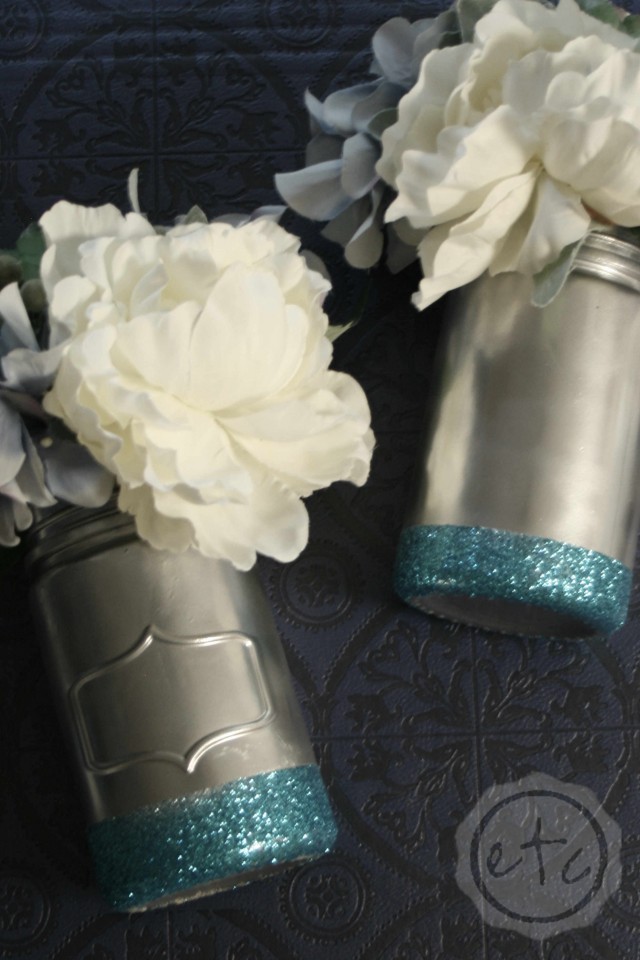
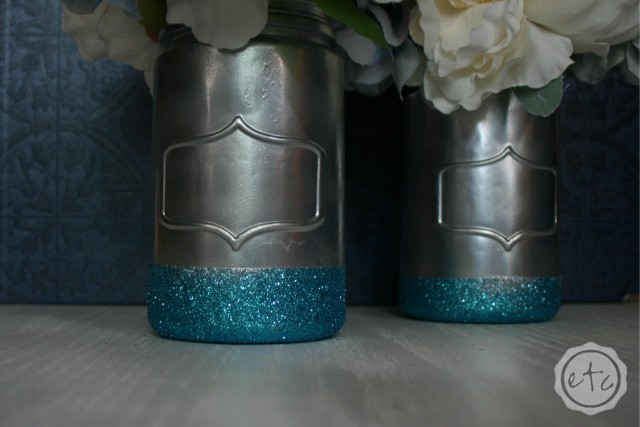
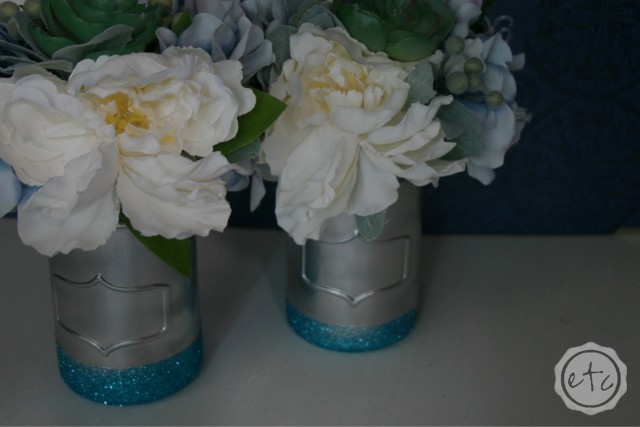
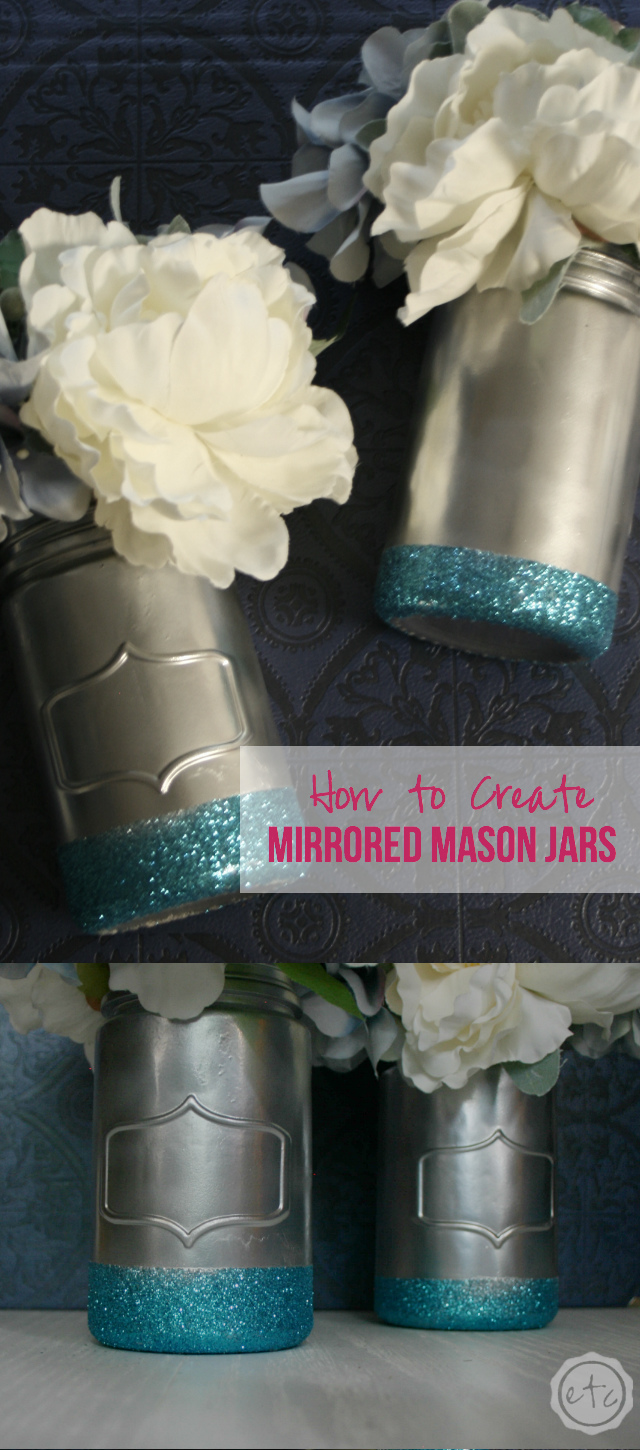
I absolutely LOVE how they turned out… don’t you? I can’t wait to put them out around the house… a little touch of spring!


These are so pretty!!! I can think of so many great uses for them (with or without the flowers!)
Definitely Karen! I actually ended up using the flowers in a different set of Mason jars and used these for pens… You can do so much with them!
Love this! I’m a big fan of 40% coupons at Michael’s! Picking up something almost every week.
Tell me about it! Those 40% off coupons really get me in trouble! I can never limit myself to one thing! Haha! Thanks for stopping by Timber!
I love all things Mason jar! This is a very easy tutorial to follow. Pinning so I can do this project, maybe for the holiday season…
Please stop by and share at the Merry Monday party!
Thanks for stopping by Shirley! I love that you want to try these… They were so fun to do!
Love your DIY Mason jar idea esp with the blue glitter on the bottom!
Ursula aka Blueridge Beauty
You’re so sweet! The blue glitter was a fun touch… I wanted to break up the silver a bit! Thanks for stopping by!
I absolutely love these mason jars! Thank you so much for posting this. I will have to try this out!
Thanks hon! It was such a fun project… You should totally try it!
The mirrored mason jars turned out so cute! It’s amazing how versatile those little jars can be — I feel like I’m always using a mason jar for something.
I totally agree Alex! They’re so cute too!! I love how you can use them for so many things! Thanks for stopping by!
Wow! These are adorable, and I love the glitter. Everything is better with a little glitter. I would have new thought to use hairspray to keep the glitter in place. Great tip, thanks for sharing!
Thanks for stopping by Danielle… I totally agree! Glitter always makes things better!
Those are very cute and they would make great gifts! Thanks for sharing, Haley from http://haleysvintage.com
I had no idea there was “looking glass” paint. These are adorable and look like something I could actually make! LOL! Thanks for sharing. Glad I found you via The Blog Love Project!
It seems like there is a little bit of everything now a days! Looking glass paint being no exception! I was worried about how it work but it was so easy… Just like normal spray paint! You should totally make some Marie… Thanks for stopping by!
So pretty! I love mason jars.
I agree Jenny, Mason jars are the best! Thanks for stopping by!
that’s awesome. love that diy stuff
Thanks Jason, you’re so sweet!
What a fun craft idea. Thanks for sharing your step by step tutorial on how to do this.
Of course Sicorra, I’m glad you liked it!
oh I need to make these! Look like I am making a trip to the craft store!
Sounds like fun Kristen! Just don’t forget your coupon! 😉 thanks for stopping by!
Well…these are just fabulous!!!!!!
Aww you’re such a sweetheart Chelsea! Thanks for stopping by!
Super cute! I love mason jars and anything with glitter on it!
You’re so sweet Jasmine! I agree… Anything with glitter is a win in my book!
Those are SO cute. I love how they came out!!
Thank you for stopping by Robin… You’re so sweet!
I saw these on your Instagram. I love them & I want to make some for my bedside table.
I’m so glad that you stopped by! They would be so cute on a bedside table with fresh flowers!
Holy smokes these are super cute! Can’t wait to make these!
You should totally make them Melodi! They’re so cute! Thanks for stopping by!
These mason jars look super cool, what a great way to make them look so classy.
Thanks Curtis! I think they’re pretty classy too 😉
How fun!! 🙂 Looks like a great craft to make. Mason jars are super awesome!
I totally agree Michelle! I love the cute mason jar trend going on these days! Thanks for stopping by!
Those are so cute. I really love the glitter touch at the bottom too.
I totally agree! They were super cute without the glitter… but glitter makes everything better!
These are gorgeous! I’m getting married in a year, and this has my creative wheels turning…
Coming Up Roses
Congratulations! These would be so pretty at a wedding… and you could totally do them in different colors! Have a great time planning!
There really are so many cute things to do with mason jars. I think your idea here is awesome.
Thanks Rosey! You’re such a sweetheart!
These are beautiful! I actually purchased a gold mason jar last year and I kind of kick myself because I think it’s easier (and more fun) just to make them yourself. I love how these turned out!
I’ve bought them ready made and made my own… I love both equally! It really only matters how much you love it! I figure if I still love something months later it’s money well spent. Thanks for stopping by!
What a super cute idea! I just love it!! Those mason jars came out so adorable. I think I need to try this.
I think you do too! *wink wink* Thanks so much for stopping by Stephanie… I am so glad you like the jars!
These are absolutely beautiful. I’ve got a few mason jar left, I will have to try this.
I was so happy with how they turned out! Thanks for hanging out… I hope yours turn out great!
What a clever idea! I love the mirrored finish.
Isn’t it fancy? I love how simple it was to do… yet it looks fantastic! Thanks for stopping by Elizabeth!
This is such a cute craft. I have wanted to get on the Mason Jar bandwagon.
Oh honey you should totally get on the Mason Jar bandwagon! It’s a great place to be! Thanks for stopping by Victoria!
This is so great! I am very excited to decorate my home with these. Lovely color as well.
http://www.divinedirectionbeautified.com
Sw