
This post is sponsored by arrow fasteners and includes affiliate links for your convenience. All opinions, ideas, tips and tricks are my own!

I have a fun, quick and super easy project for you today! A DIY laundry bin with wheels and a french flair! The best part is that most of these supplies are things you should have around the house (or at least I had them at my house!) so this should be an inexpensive project… I only spent about 10 dollars on this entire project!
Ready to get started!
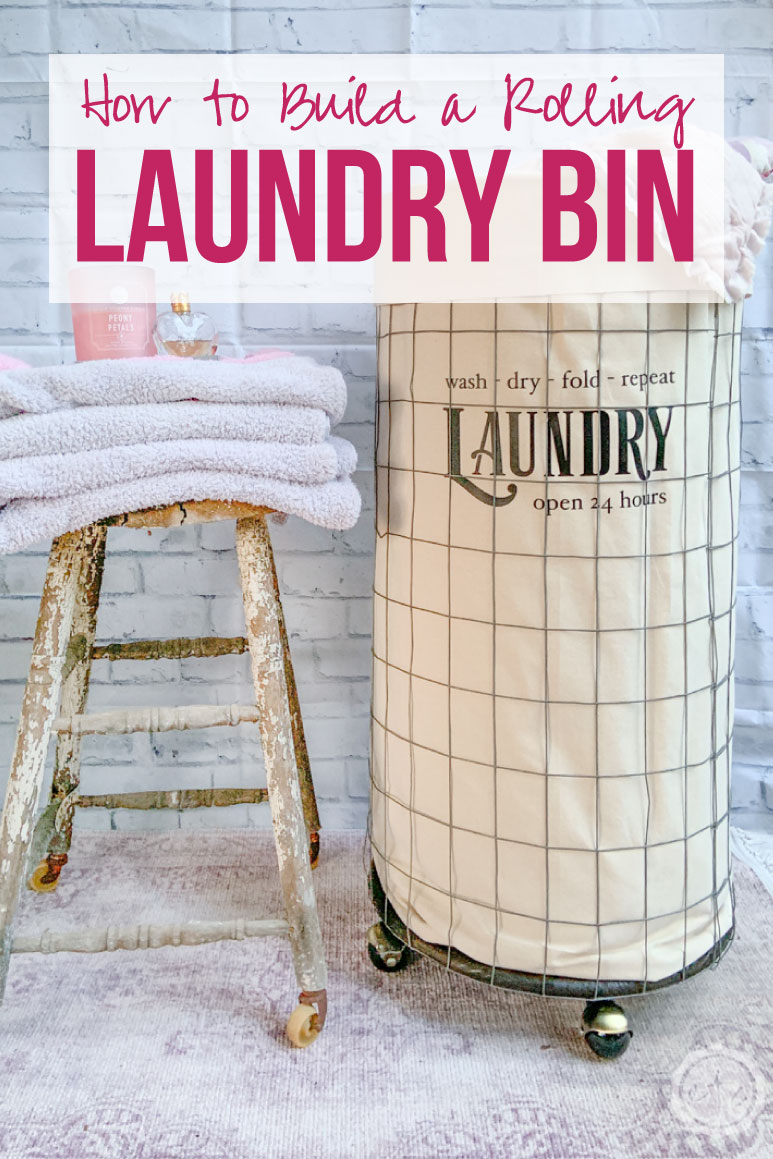
DIY Rolling Laundry Bin
Supplies:
- 2″ Wood Round
- Wire Fencing
- Wire Cutters
- Pliers
- Arrow T50 Staple Gun (and staples!)
- Antique Brass Casters w/ 2″ Rubber Ball
- Power Drill
- Dark Walnut Stain
- Rag or Paint Brush
- 2 Yards of Duck Canvas Material
- Sewing Machine
- Cricut Maker
- Fine-Point Cutting Blade
- Standard Cutting Mat (that’s the green one!)
- Cricut Easy Press 12 x 10
- Easy Press Mat
- Cricut SVG Files (for free at the bottom of this post!)
- Black Sportsflex Iron On

Prep Work: Okay y’all before we get started on all of the steps we need to do a little bit of prep work. Which is my fancy way of saying that if you want to stain (or paint) your wood round now is the time! I grabbed an old rag and stained my wood round with a dark walnut stain so that it would have a rustic warm wood feel!
Once you’ve stained (or painted) that wood round make sure to let it dry because you’ll need it in step one (and no body has time to be playing around with wet stain all over their hands).
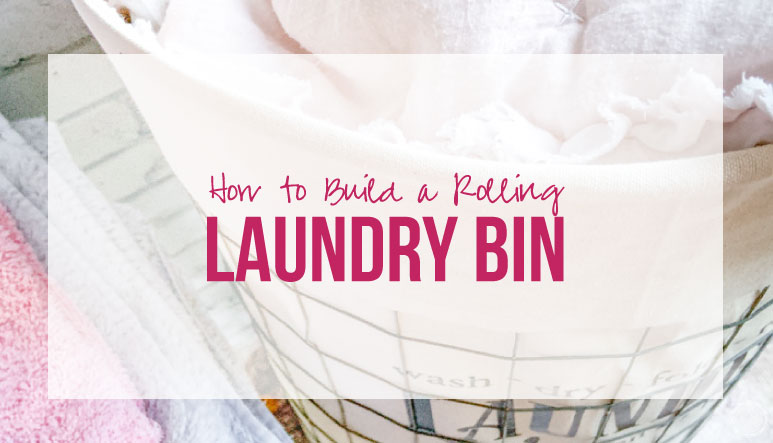
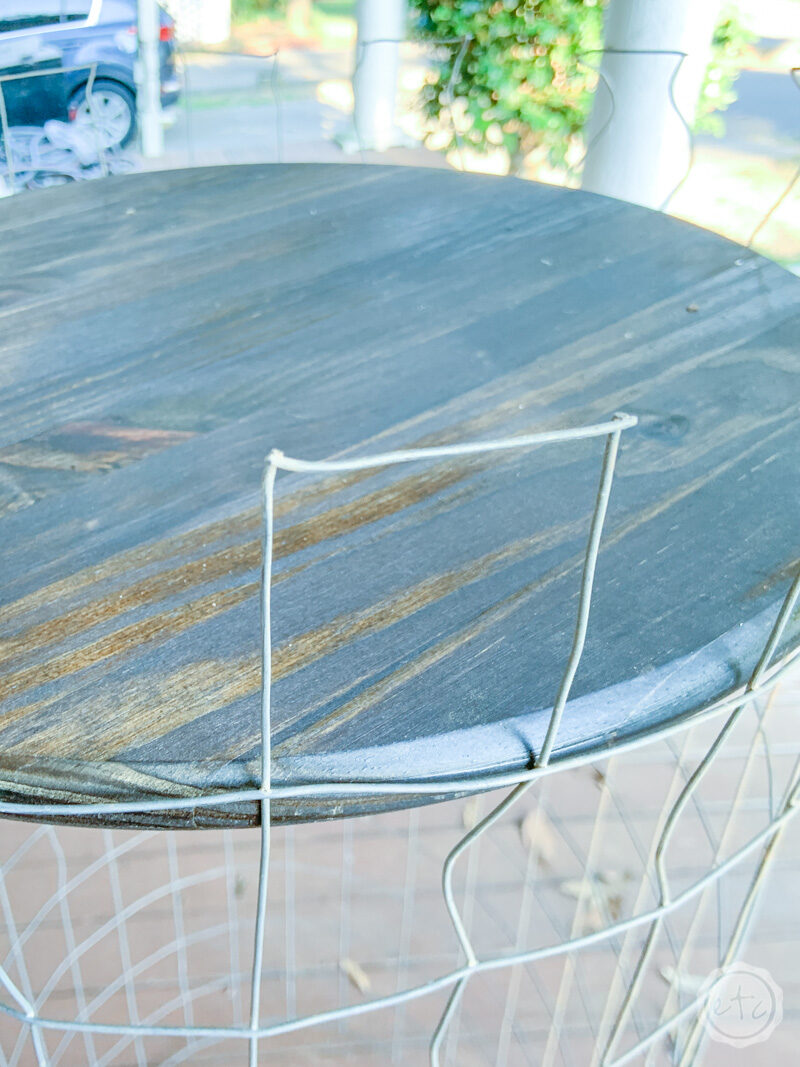
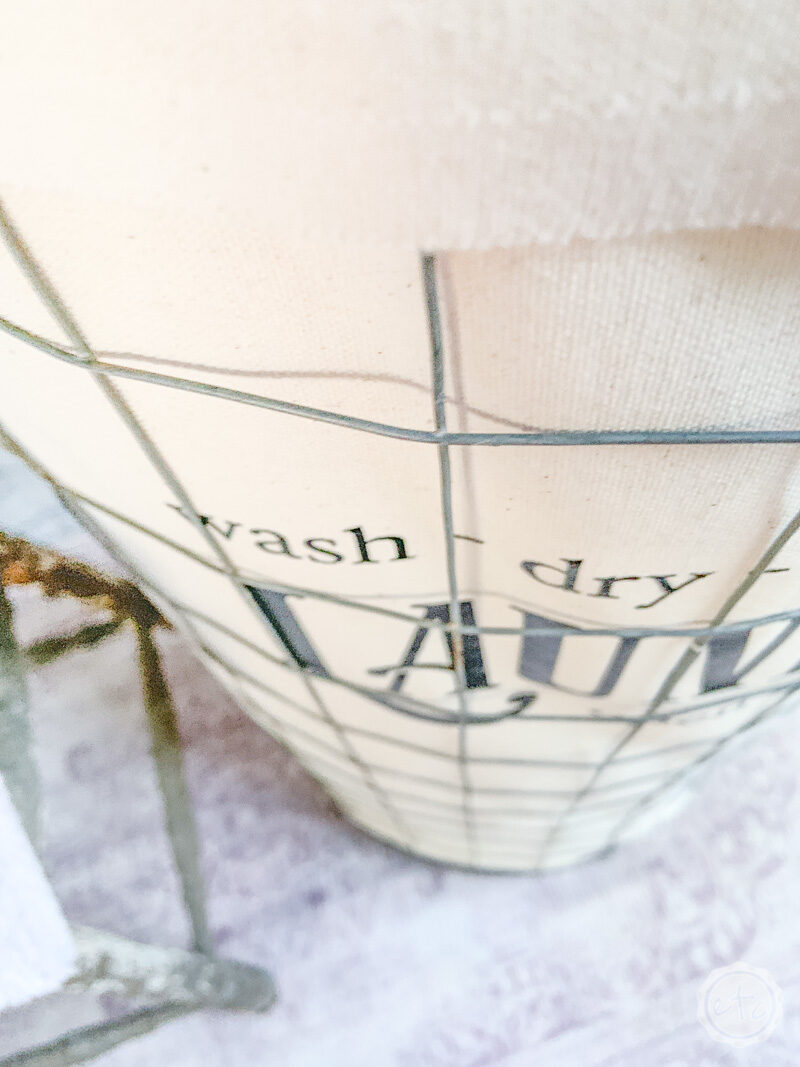
Step 1: Cut Your Wire Fencing
Ready to get started? Wrap your piece of wire fencing around the wood round so you know exactly where to cut. Make sure to over lap the ends just a bit since you’ll need a bit of that wire to fold over and make the seam.
It’s a little confusing to read but fairly straight forward in real life. Basically if you wrap the wire fencing all the way around the wood round you’ll reach a point where the fencing meets the end of the fencing. Go ahead and cut one square box past where the two ends meet.
See the picture below? I cut the wire just past where the two edges meet so I have a bit of wire left over.
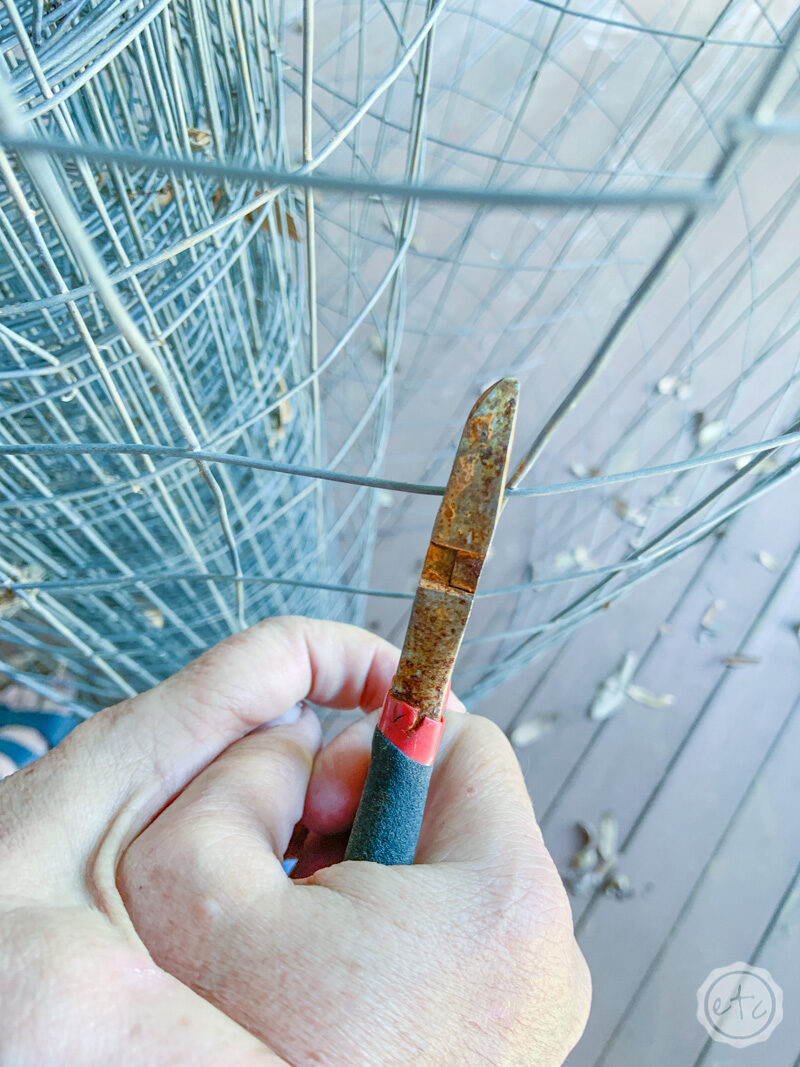
Now all you have to do is fold those little pieces of wire back on themselves to create a seam! Squeeze them tight with your pair of pliers and your seam should be pretty dang strong.
Go ahead and bend the wire over along the entire seam so that you have a round cage of wire fencing.

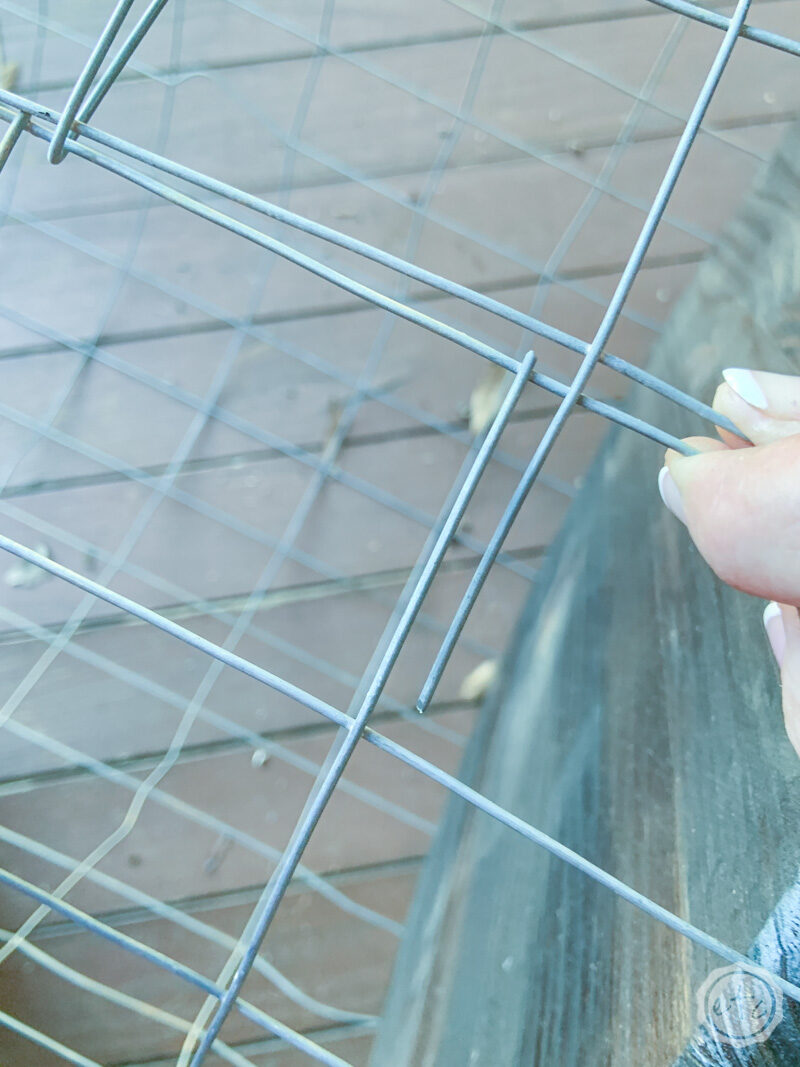
Now it’s time for the bottom! Go ahead and place your wooden round into the wire fence cage you’ve created… or is it more of a wire tube? Either way you get the picture. At this point you’re just checking to make sure that the wire cage is the right size for your wood round.
Now you’re going to start clipping the very bottom sections of your wire fencing. This particular wire fencing is made up of rectangles so what you want to do is clip out the bottom section of every other rectangle… around the entire wire cage. This will give you a row of free standing rectangles alllllll the way around the circle!

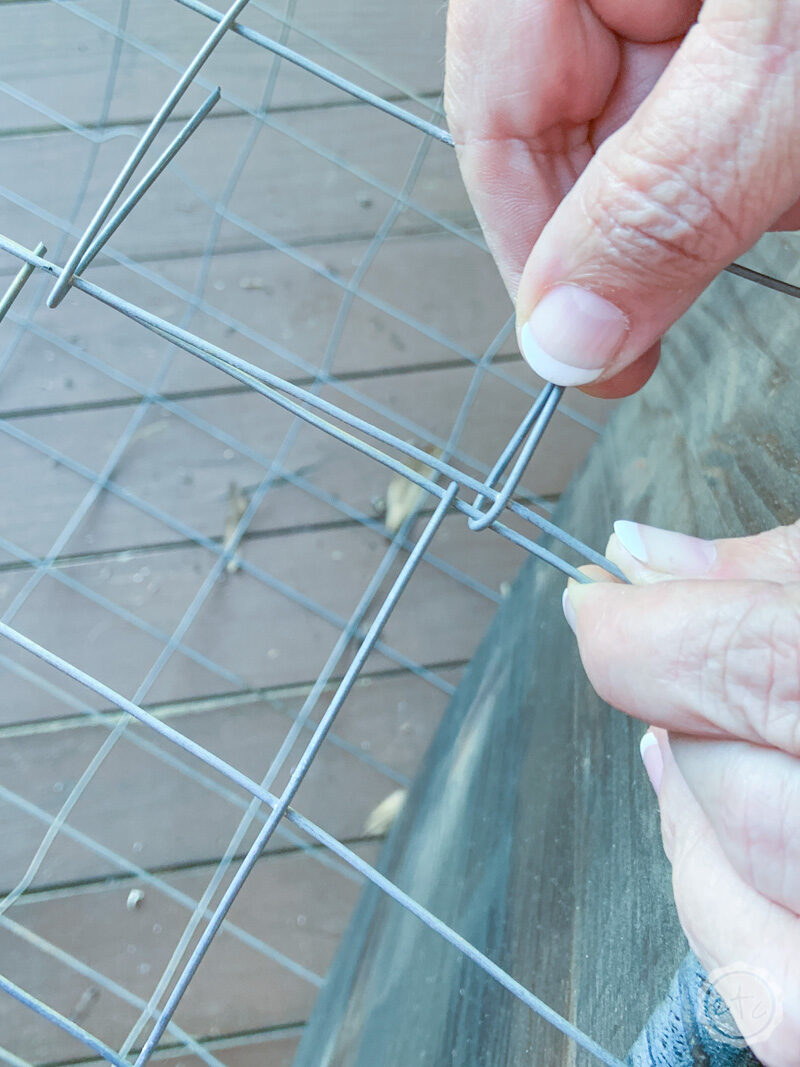
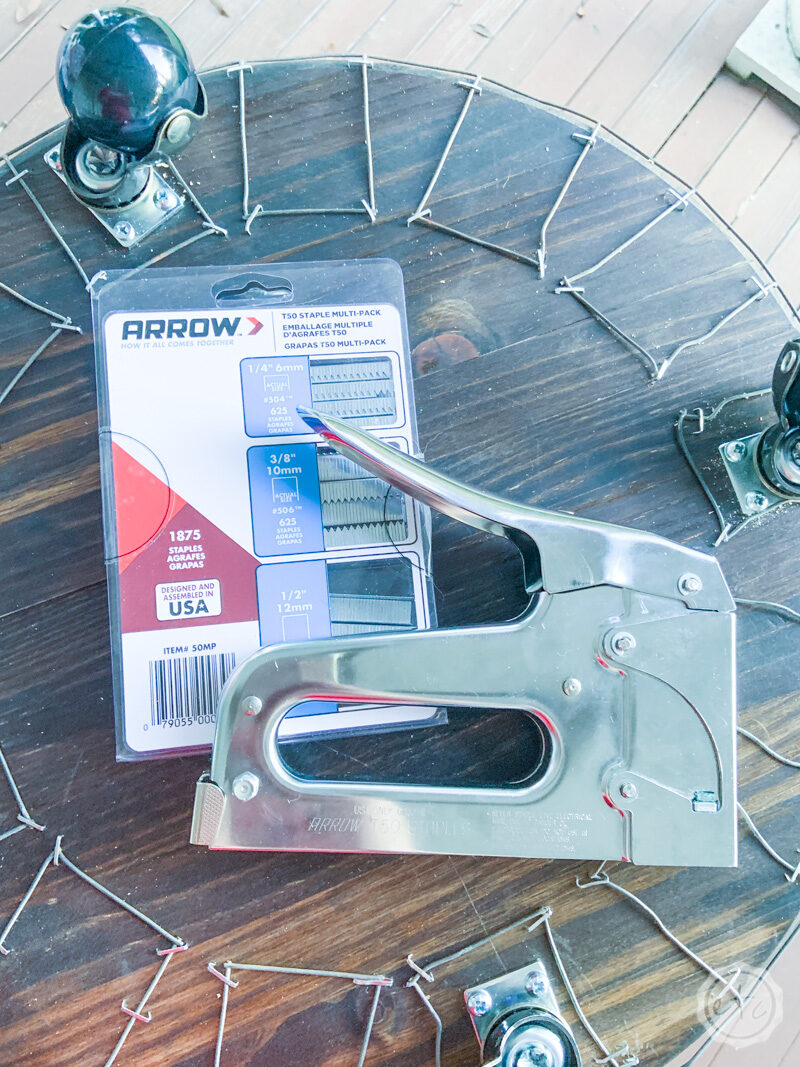
Step 2: Staple the Wire Frame to your Wood Round!
Now this is the fun part! Go ahead and fold all of those rectangles down so that they’re flush with the wood round. Then you can grab your staple gun (I decided on my T50 staple gun from Arrow for this project since it’s professional grade and will really hold everything in place).
Go ahead and give each rectangular box four staples: one in each of the bottom corners and one on each side near the edge of the wood round. This should make everything super sturdy… and hold the wood round perfectly in place.
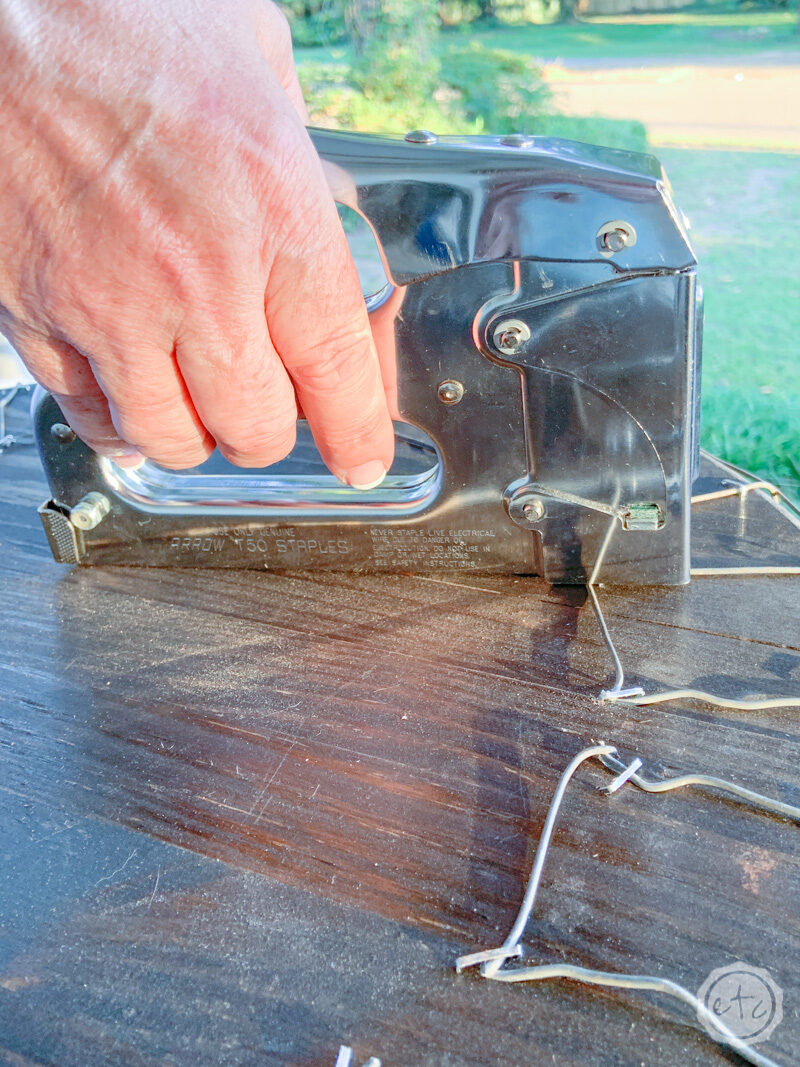
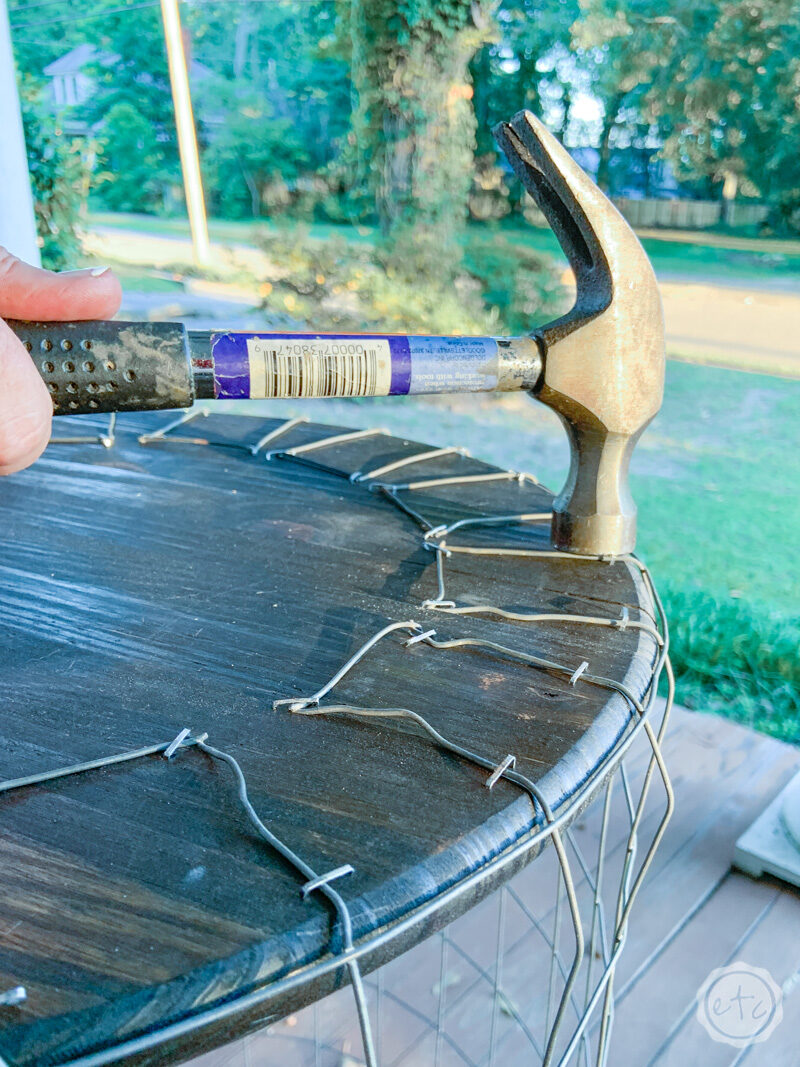
Bonus Tip: The T50 is a super sturdy staple gun but some of my staples had a hard time pushing the wire fencing allllll the way down to the wood round. That’s okay just take a hammer and gently tap those staples down until they’re flush with the rest of the wood round.
Just make sure that you put a hand under neath the wood round before you start hammering… the wire fencing will bend if you put too much pressure on it! PLUS you’ll want to gently tap with the hammer so that the staples don’t split your wood round apart. Apparently this wood round has seams where it was put together and a staple in a strategically placed joint will split your wood round right down the middle.
*cough cough* Don’t ask me how I know that.
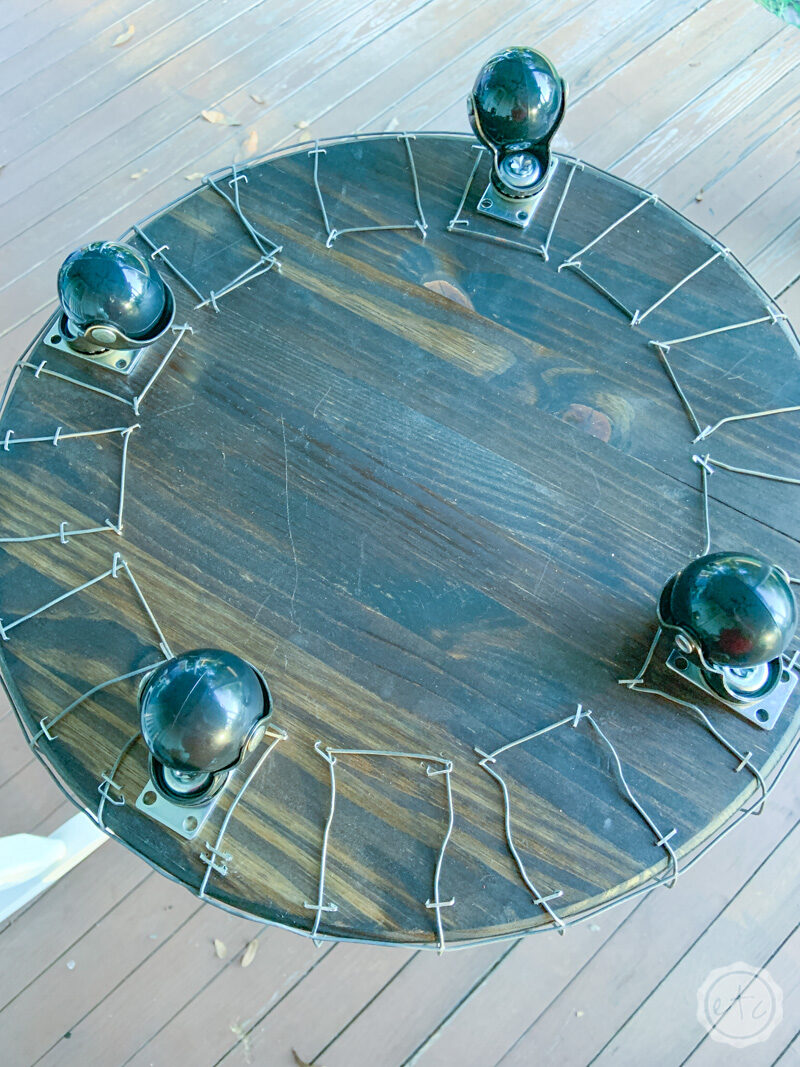
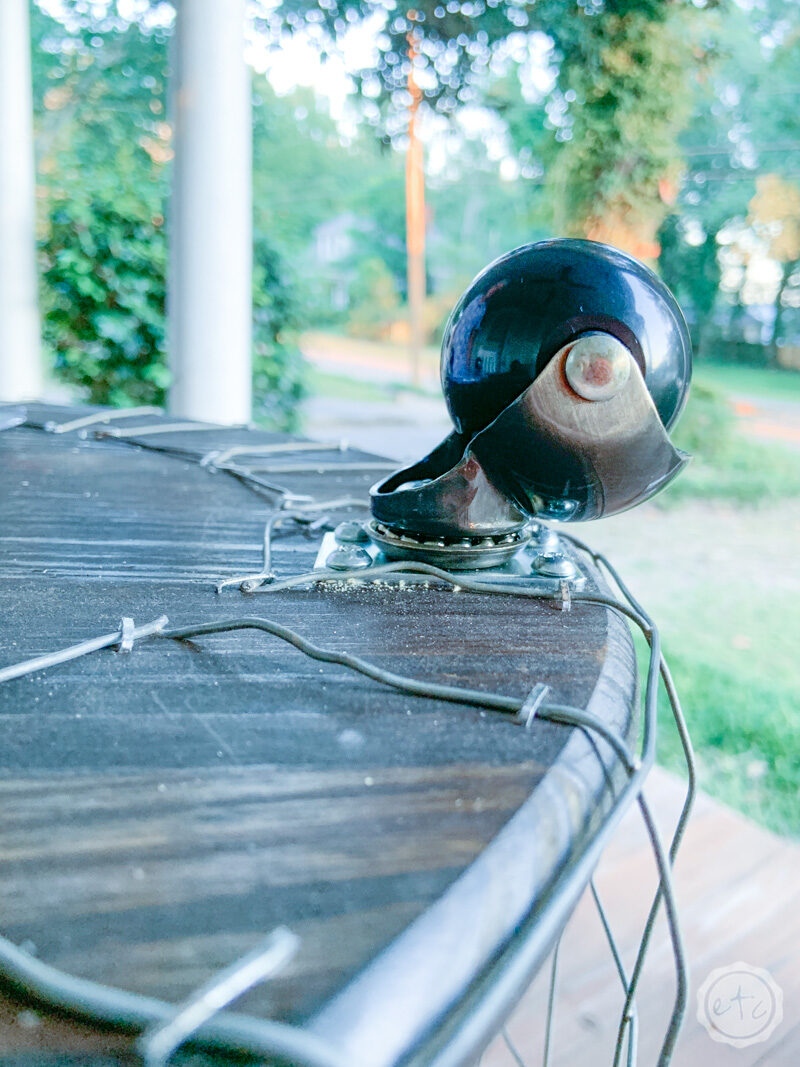
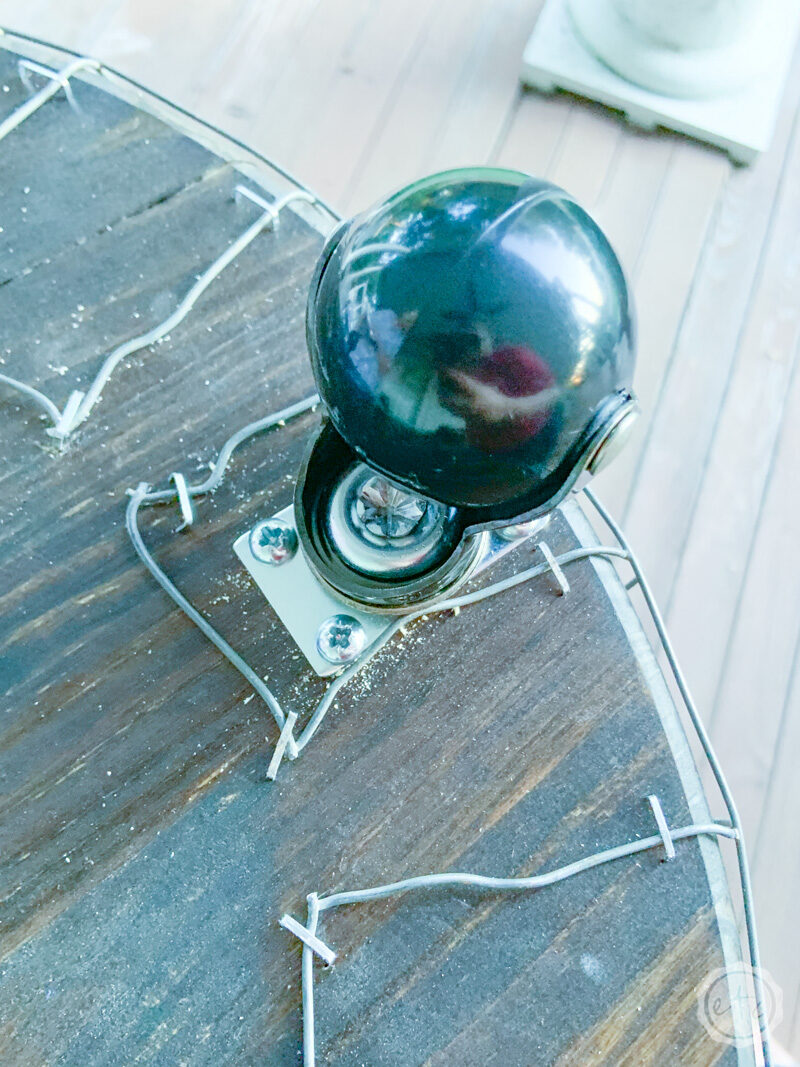
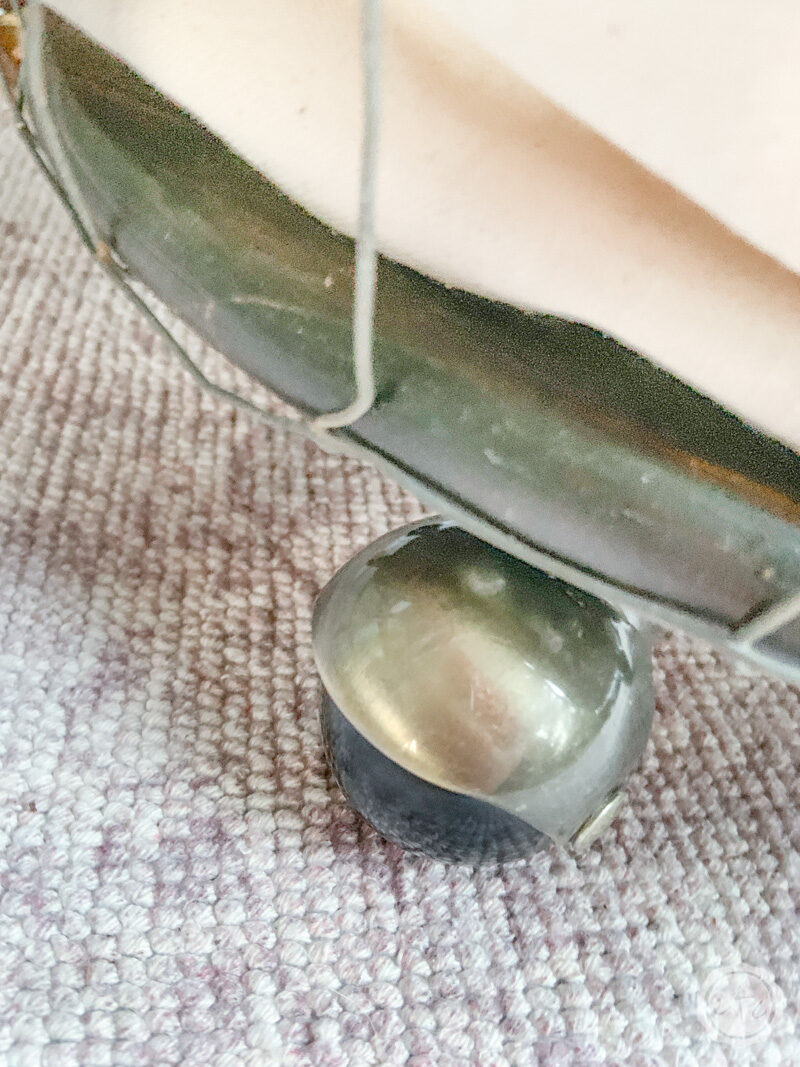
Step 3: Add the Wheels!
These brass wheels are pretty dang cute… I fell in love with them a couple of projects ago and ordered 4 sets so that I would have plenty for future projects. So when I planned out this little laundry hamper with wheels I knew the perfect set of wheels to try!
Luckily they’re pretty easy to put in… go ahead and put all four in place so that you can decide on the perfect spacing. Then go ahead and use your power drill to screw them in place.
Keep in mind that you want them close enough to the edge that the ball and brass will show when the laundry cart is fully assembled BUT not so close to the edge that the screws will peek through the wood round on the other side.
I found that placing them right behind the curved side of the wood round was the perfect compromise!
Bonus Tip: I noticed when stapling that certain parts of my wood round were really tough and the staples didn’t want to enter the wood. In order to prevent that from happening with my wheels I drilled pilot holes with a drill bit before adding the screws in!

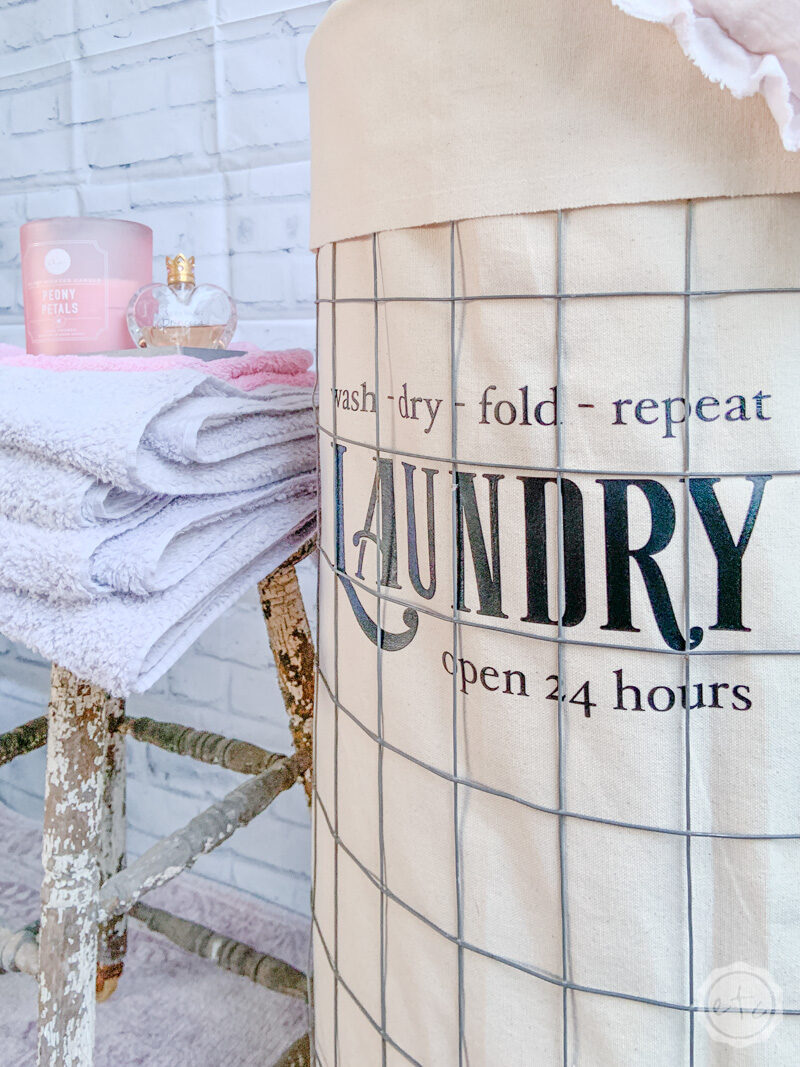
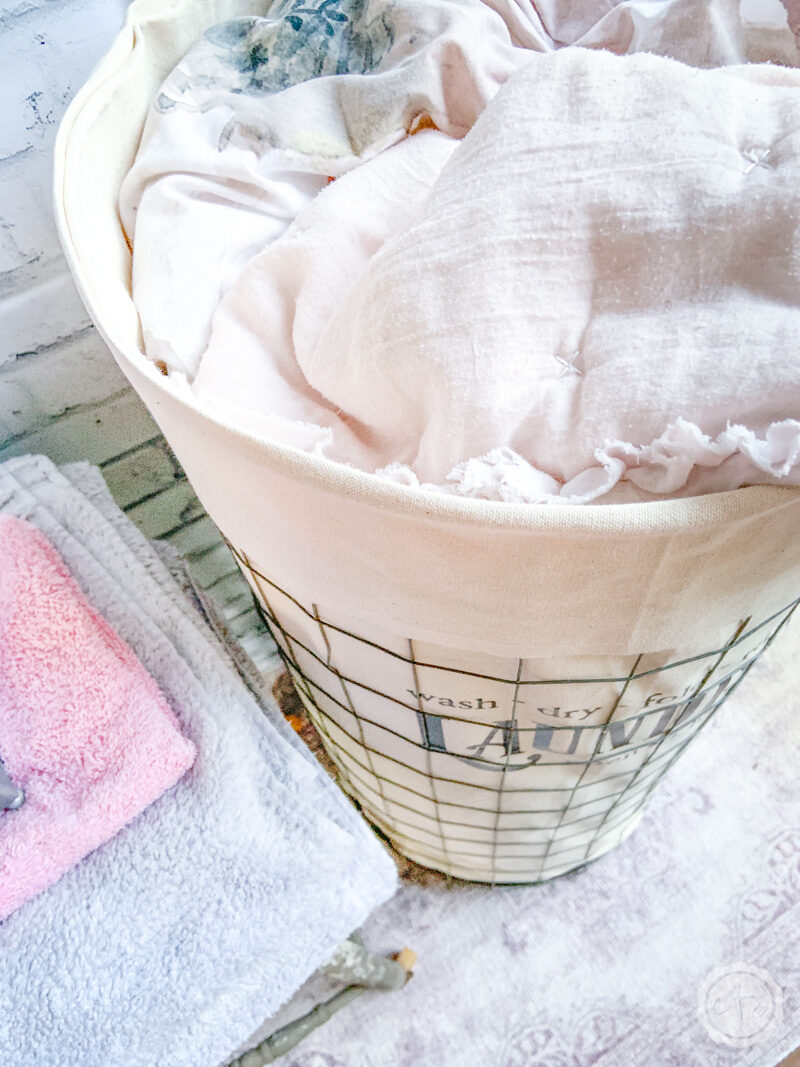
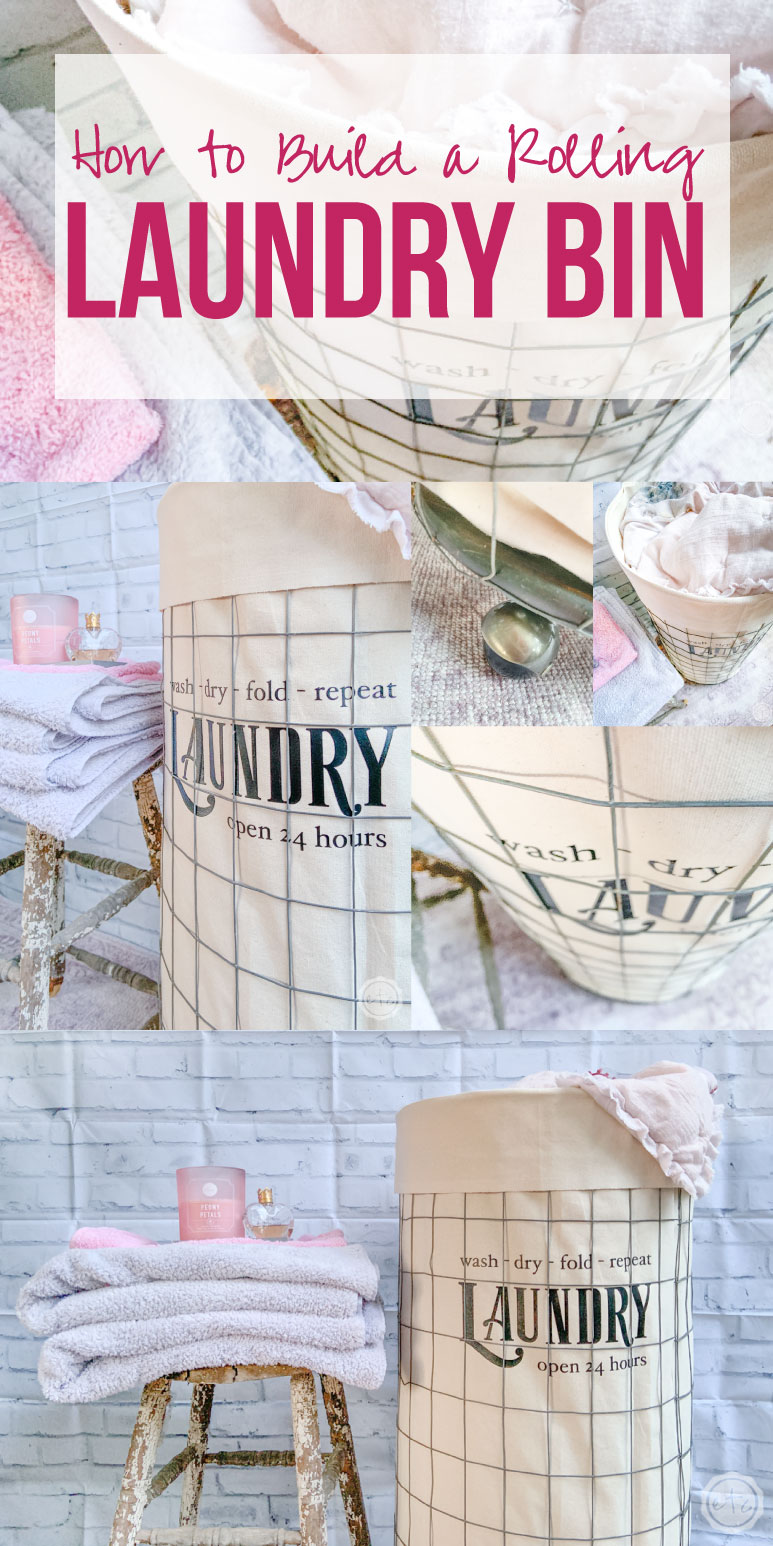
Step 4: The Laundry Bag!
Okay so now that our rolling laundry bin is pretty much finished we have one last step… adding a laundry bag!
I grabbed a bit of duck canvas (which is a lighter weight canvas than you would find in a drop cloth but still sturdy and machine washable) and whipped up a laundry bag. And by whipped up I mean my Mom whipped it up!
It’s a pretty easy pattern with a circle at the bottom an then a rectangular piece of fabric for the length of the bag. If you’d like a post on how to put the actual laundry bag together make sure to comment below and let me know!
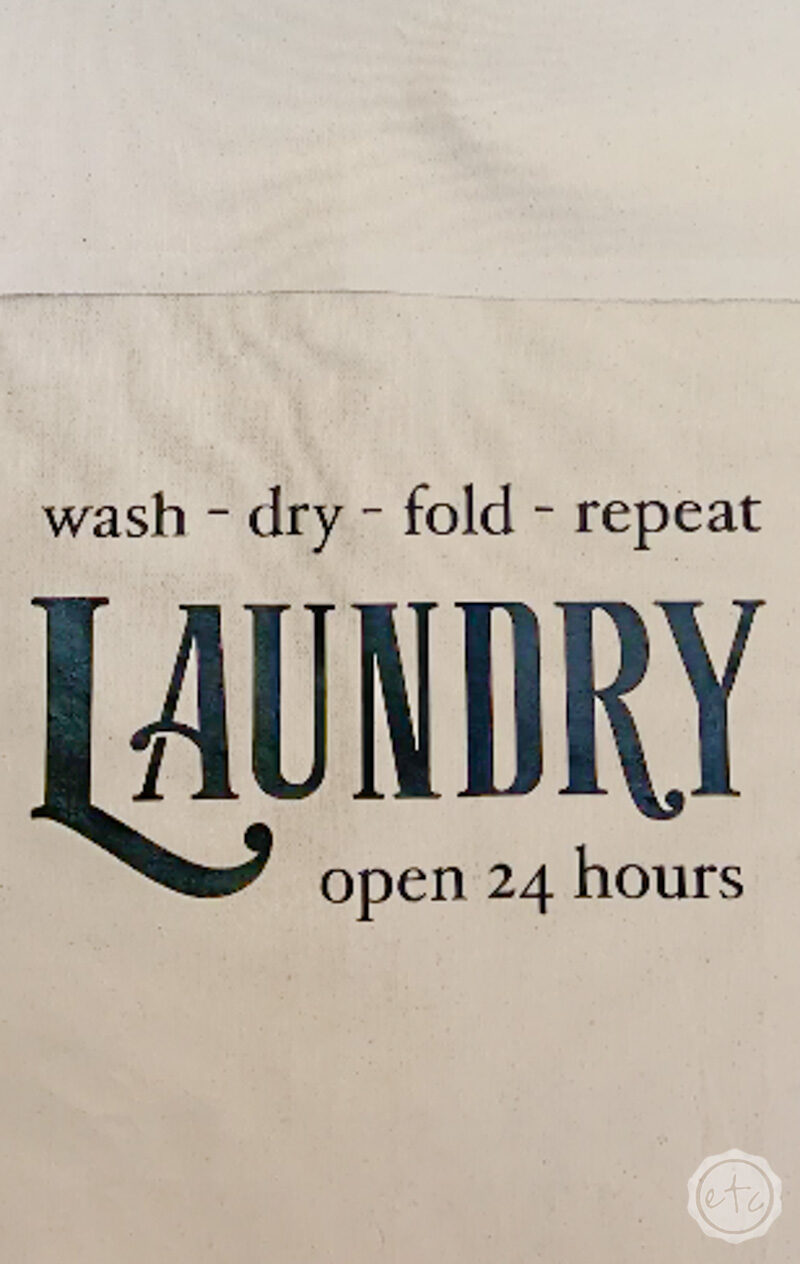
Of course, I couldn’t leave this little laundry bag blank so I whipped up a fun Laundry SVG file that could be added to the front! I’ve included those SVG files for FREE at the bottom of this post so go ahead and download them to add to your laundry bin!
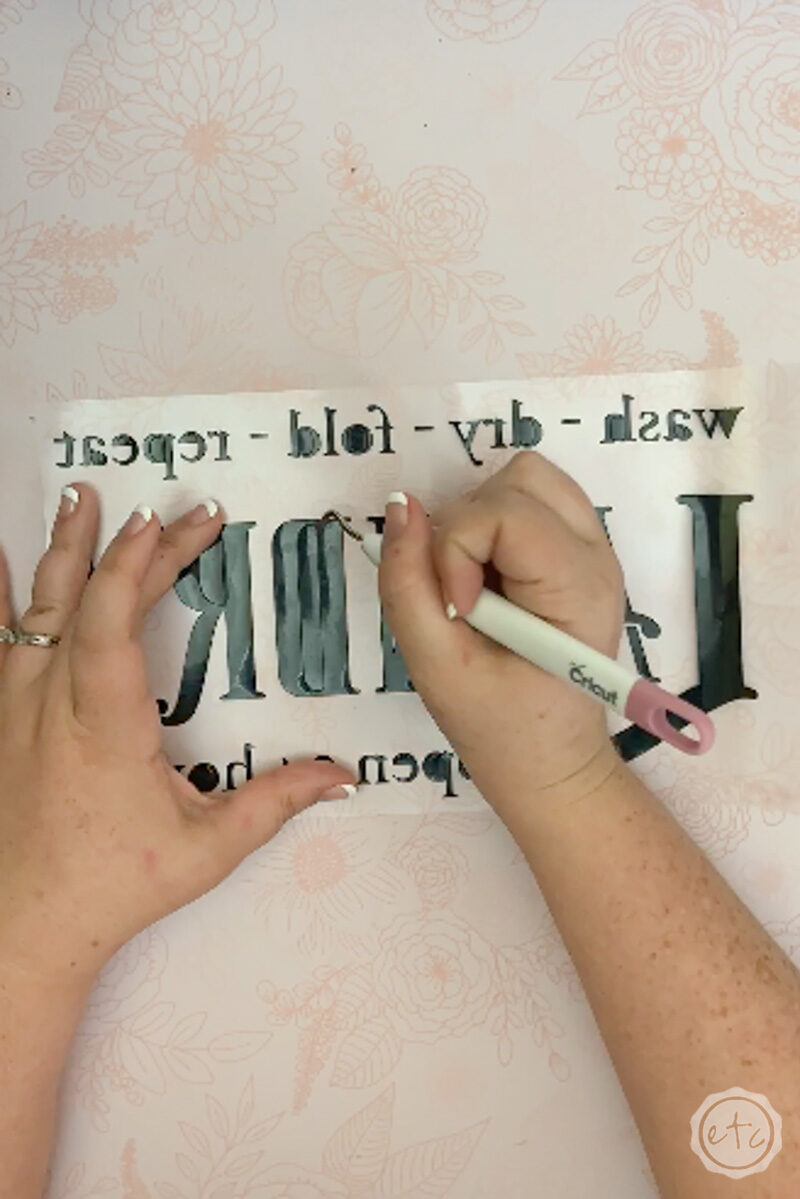
I used a simple black sportsflex iron-on to add the words to my laundry bag… go ahead and cut them out on your Cricut. As always with iron-on you’ll want to mirror your design and make sure to place your iron-on shiny side down on the cutting mat!
This design only takes a minute or two to cut and the letters are pretty easy to weed. Once your design is weeded it’s time to move onto the bag.
Since my duck canvas fabric was quite wrinkly from being in storage I actually used my easy press to iron it before adding the design… I absolutely love using my easy press to iron since it’s so big compared to my normal iron! It makes the whole process so much faster!
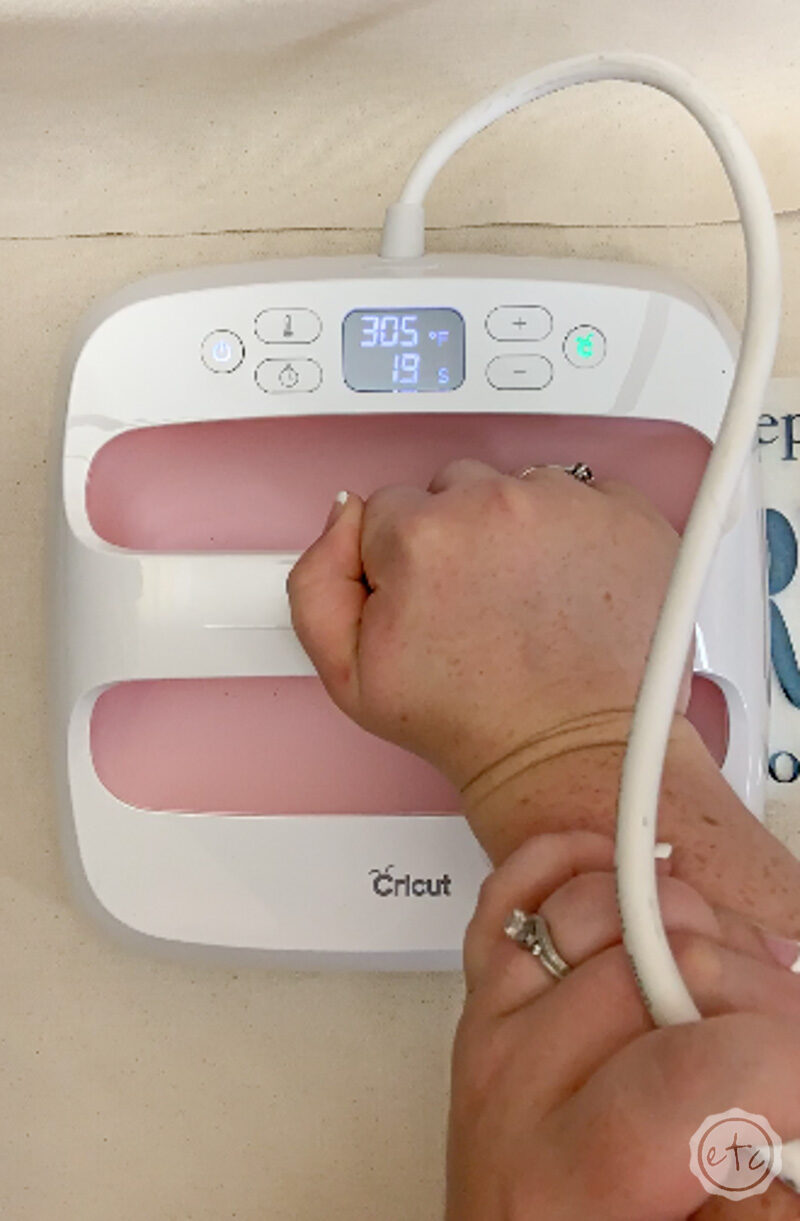
Go ahead and set your easy press to 305 and 30 seconds… then pre-heat the area you’re going to add your design to. Once the area is pre-heated you can add your design to the middle of your laundry bag and hit it with the easy press for the full 30 seconds.
Don’t forget to turn the entire bag over and heat the design from the back too! Then it’s time to peel off the clear protective layer and add your laundry bag to your laundry bin (I wonder how many times I say laundry in this post?).
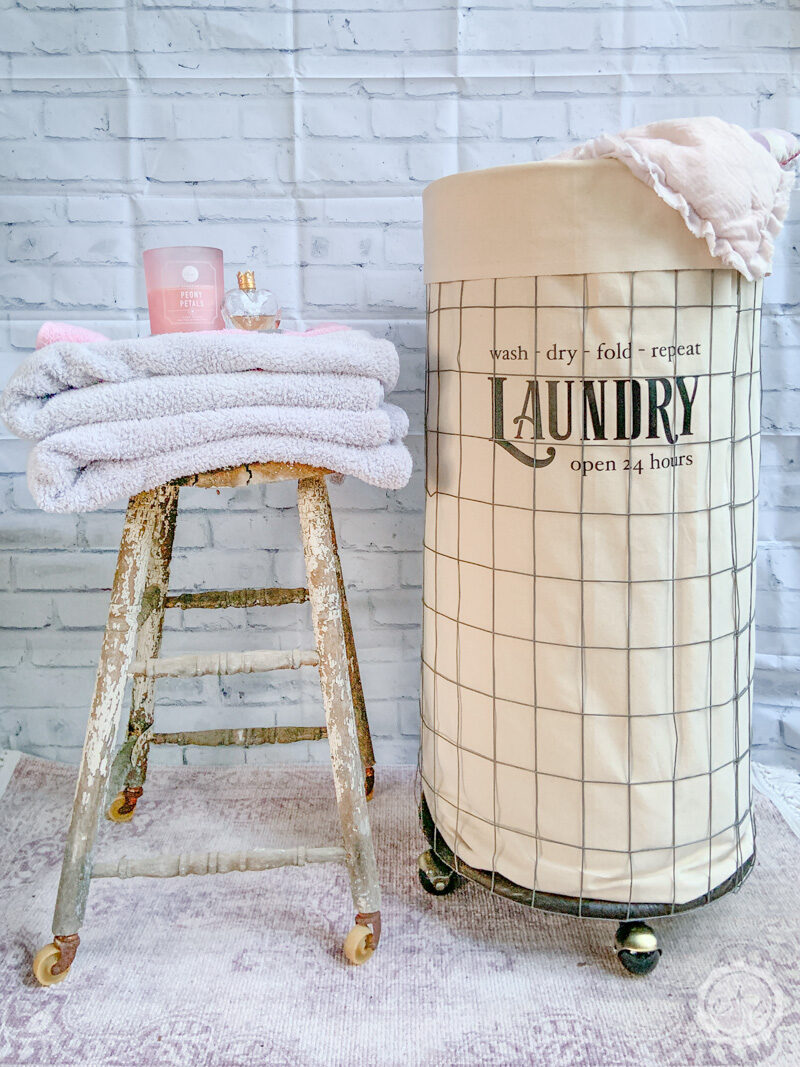
Now all your laundry bin needs is a bit of laundry and you’re ready to rock!
Check it out!


Looking for a few more quick and easy projects you can make for under $20?
I’ve got you covered! Here are a few of my favorite bloggers and their amazing under $20 projects that you can make for your own home. Enjoy!
Don’t Forget to Pin!


Oh my goodness!! That is wonderful!! I love everything about this rolling laundry bin!! It’s absolutely beautiful!
Betsy, this is just adorable, I LOVE it!!!