

I love decorating and there’s nothing better than walking into your home and completely loving the space you’re in. Of course creating a space that is well put together doesn’t happen over-night… in fact I firmly believe the best rooms are built over time!
That doesn’t mean we throw caution to the wind and spontaneously throw just anything in the space “this chair looks good, hope it works with the drapes!” We need a plan… for how the room is gong to look, how it’s going to function and what pieces are the most important to us.
People plan in all sorts of ways… but I absolutely adore a good mood board! (Not the hubby he thinks they take entirely too long to put together… bu then he wanted to paint the office stop light green… so let’s not take decorating advice from him!)
Of course whipping up a mood board isn’t always quick and easy… they usually take me a couple hours and a bit of thought! The first step is to lay out your fundamentals! Think about how you need the space to function… do you need your small back bedroom to become a nursery? Does that nursery need to include toy storage or is it simply a place for baby to rest her head? Then think about what you need to include in order to fill that function “we need a crib, a long dresser to act as a changing table and great toy storage that can grow with her!”
Once you know what you need think about what you already have “This couch my aunt Martha gave me isn’t gorgeous but it’s sturdy and we can’t afford to replace it right now” v.s. what you’ll be purchasing “Our mattress is literally on the floor! We need a bed frame!” If you’re including pieces that you already own start your mood board with those pieces. If they’re perfect and ready to go take a picture to use on your board… if they need a little work (an old bed frame that needs painting, a hand-me down couch that needs a slip-cover) try looking up pictures on Pinterest to find a picture similar to what you’re picturing for your finished product… or use Pinterest as an idea board! If all you know is that you have an old bed frame but you’re not sure what to do with it search for “painted bed frames” or “DIY headboards” sometimes I will find the perfect project that will complete my piece!
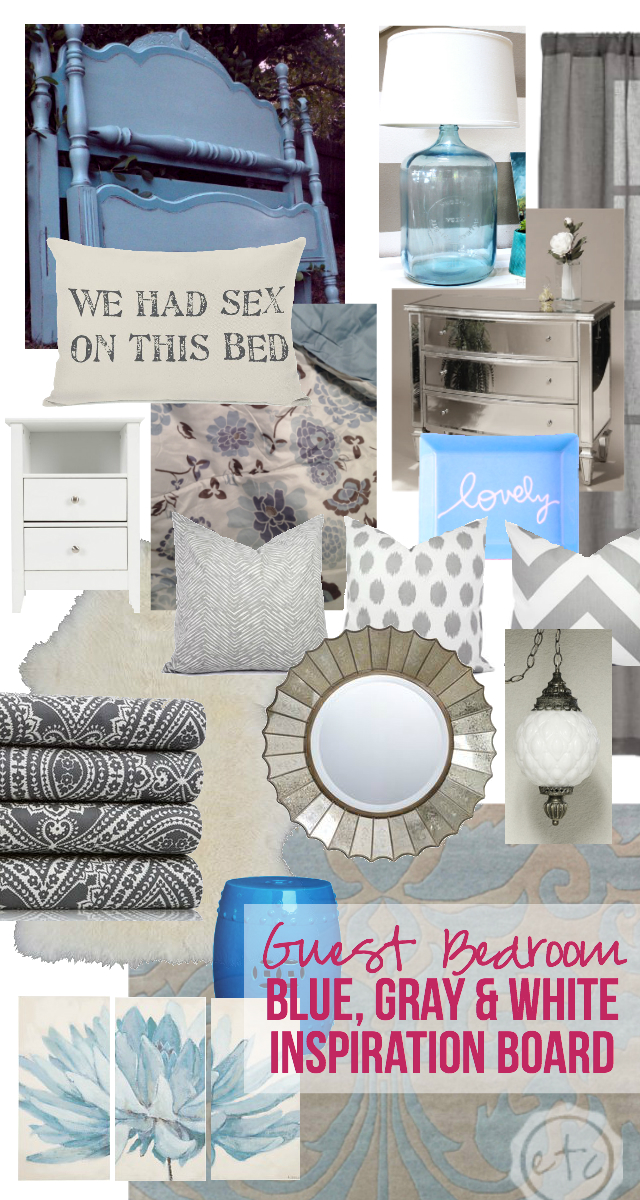
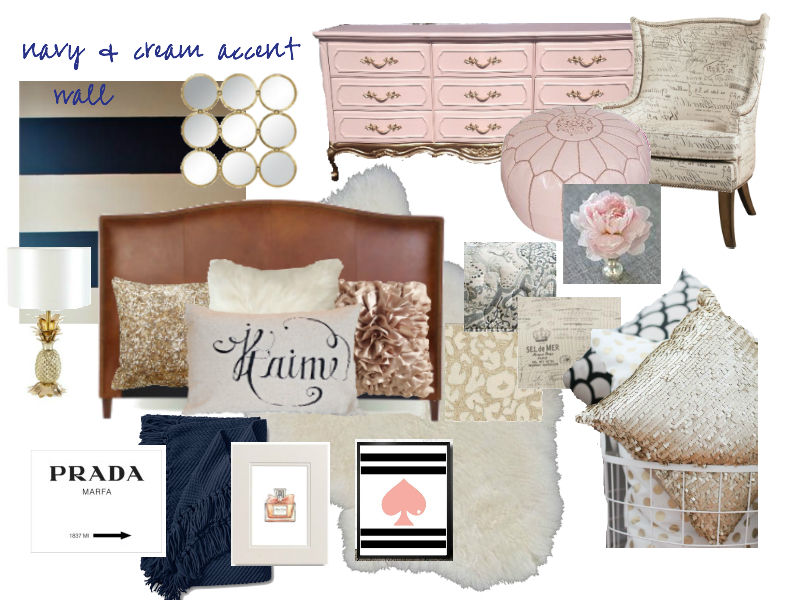
When I created a mood board for my guest bedroom I knew that I had my old childhood bed frame to contend with. It’s a gorgeous wooden four poster bed that’s in great shape… so there’s no reason to get rid of it (that I can think of… I really want a tufted piece so I’m working on it! Spontaneous house fire that only burns up the guest room bed? Totally believable, right?!) Since I have to keep the bed I searched Pinterest until I found a painted bed frame that was similar and that I LOVED! Now I have a bed frame I can include in a mood board… and an easy DIY update for my bed! I popped the picture into a new blank board and then added several other pieces I already owned… like the floral bedspread I got for a great price several months ago or the antique milk glass pendant lights I scooped up at an antique store.
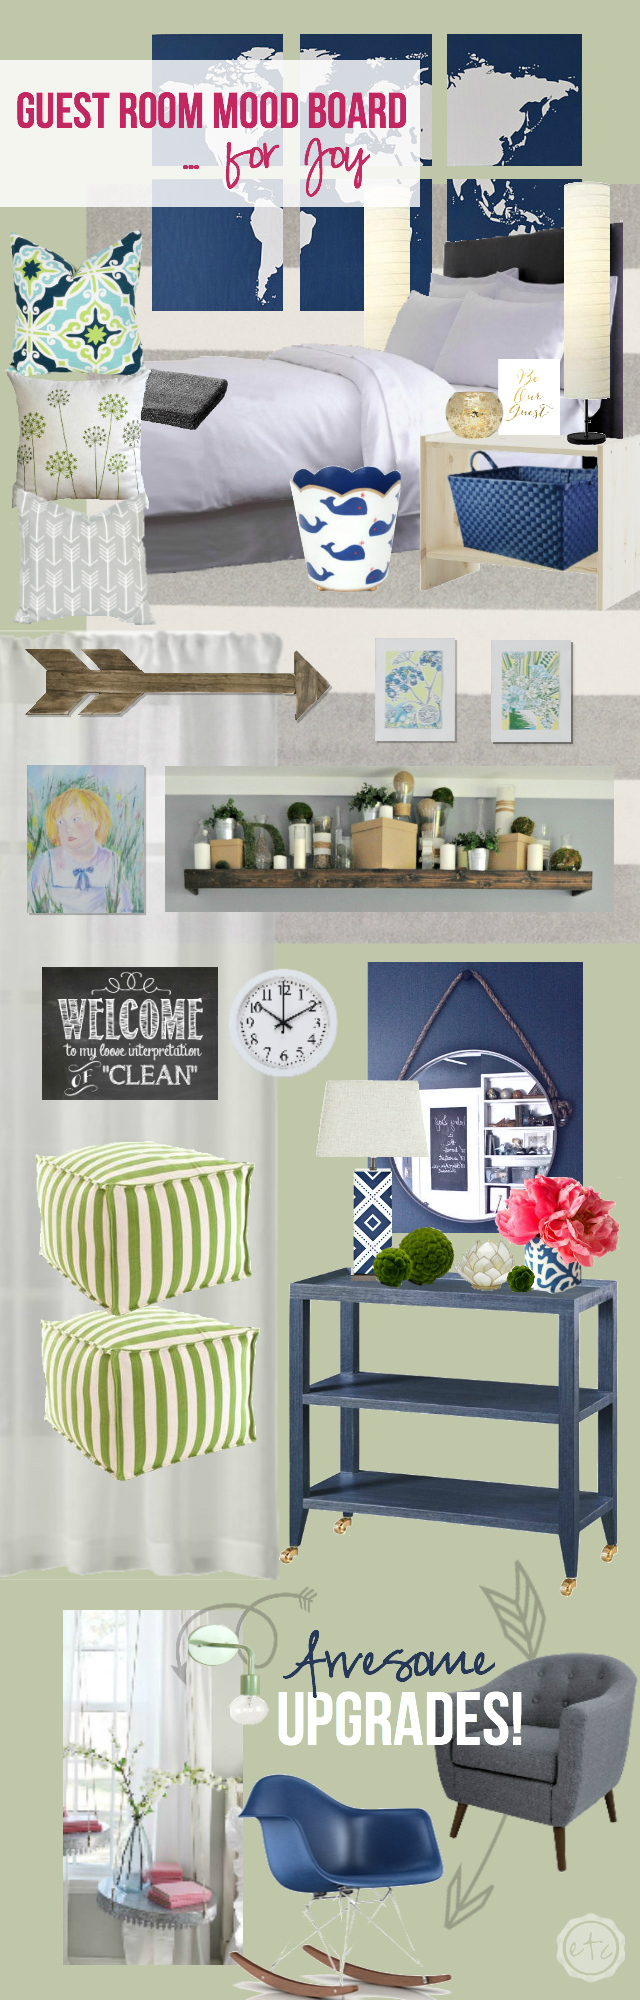
Okay so you have the pieces you already own in place… now what? Add in the pieces you decided on in step one… anything that the room needs to function. You’ve already added Aunt Martha’s couch… find a gorgeous coffee table to go with it. Don’t forget side chairs and a hutch for the TV. The point is to add in your biggest pieces first… search for pieces that are affordable and go with your rooms overall look. Don’t forget to search DIY’s! Recently I was working on a guest room mood board for Joy at the Accidental House Blog… she already had a gorgeous bed but she needed a vanity area for her gal friends to get ready at. I wanted a small console table to fit in the small space she had… but everything I found was waaaaay too expensive (the money tree I planted still hasn’t produced any money… just leaves!) but I was able to find an adorable DIY that would work great for her space… with a couple extra special touches like gold dipped feet and adorable antique casters.
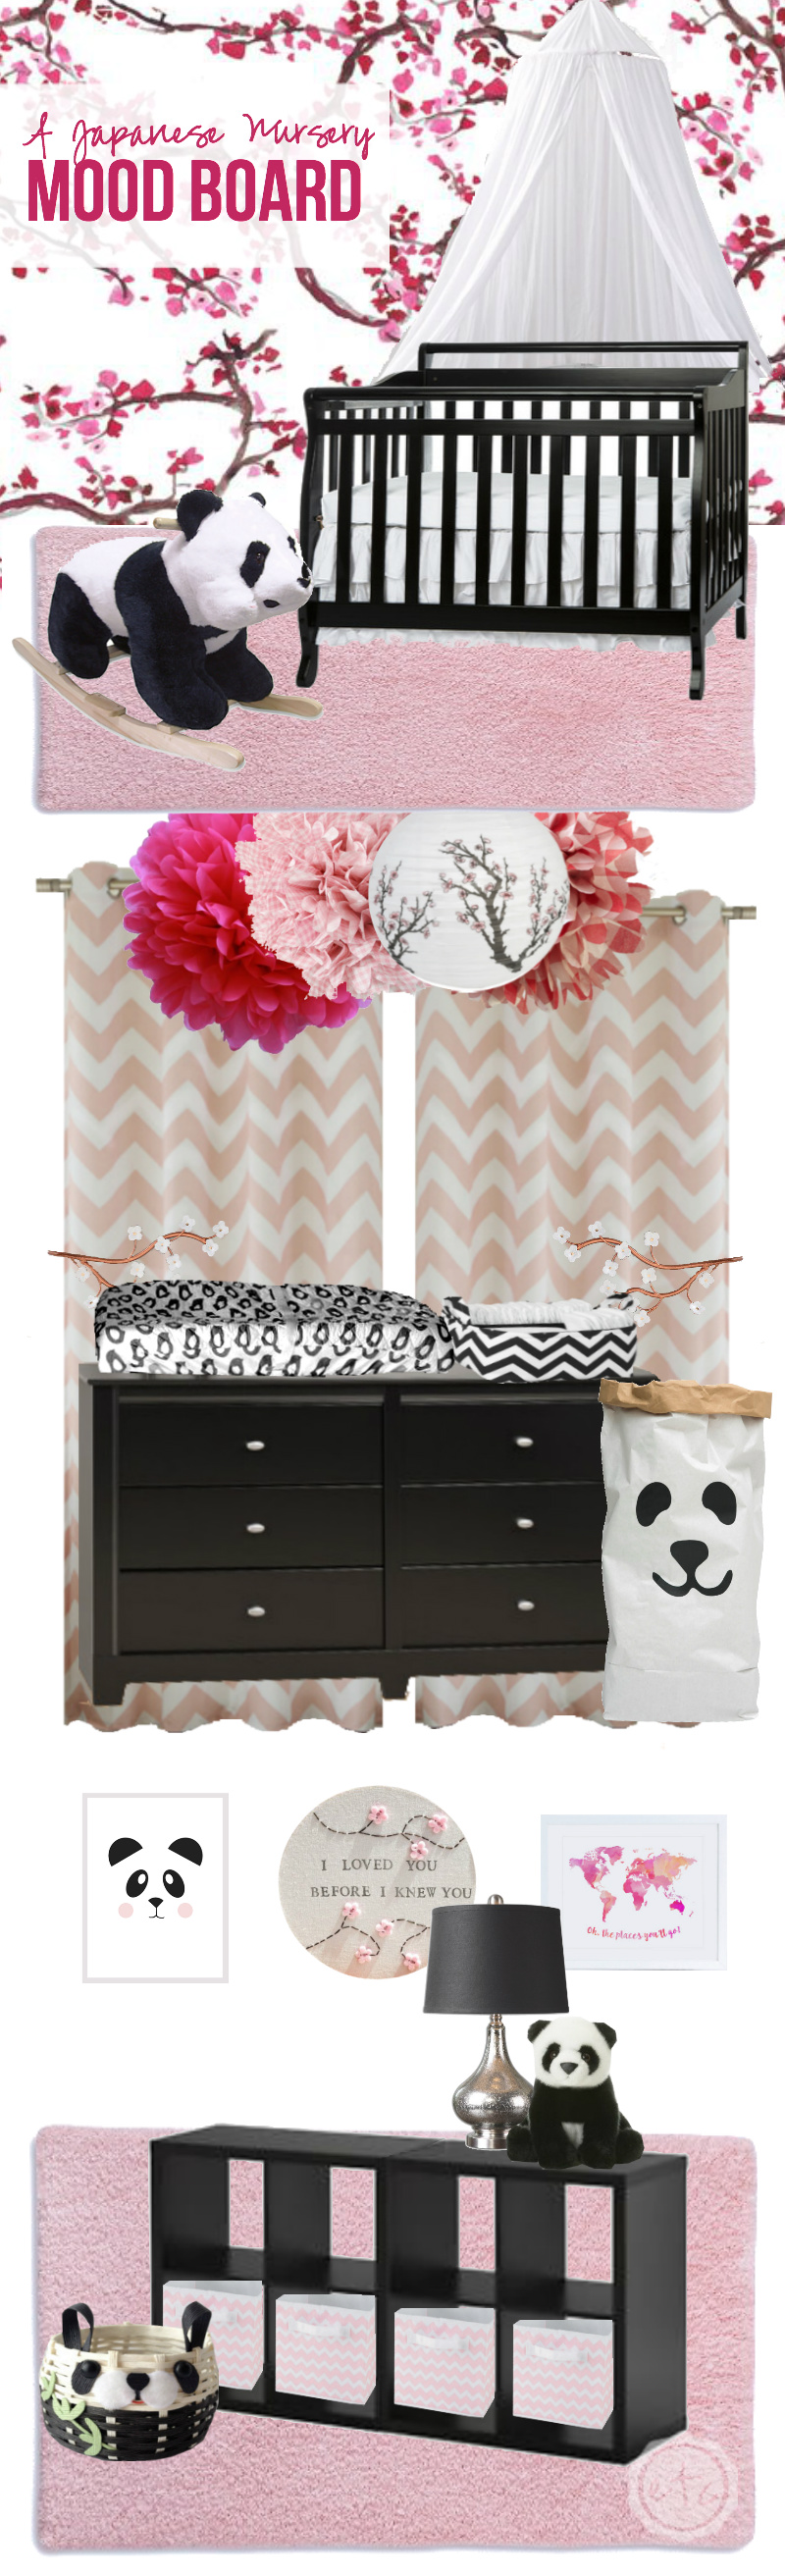
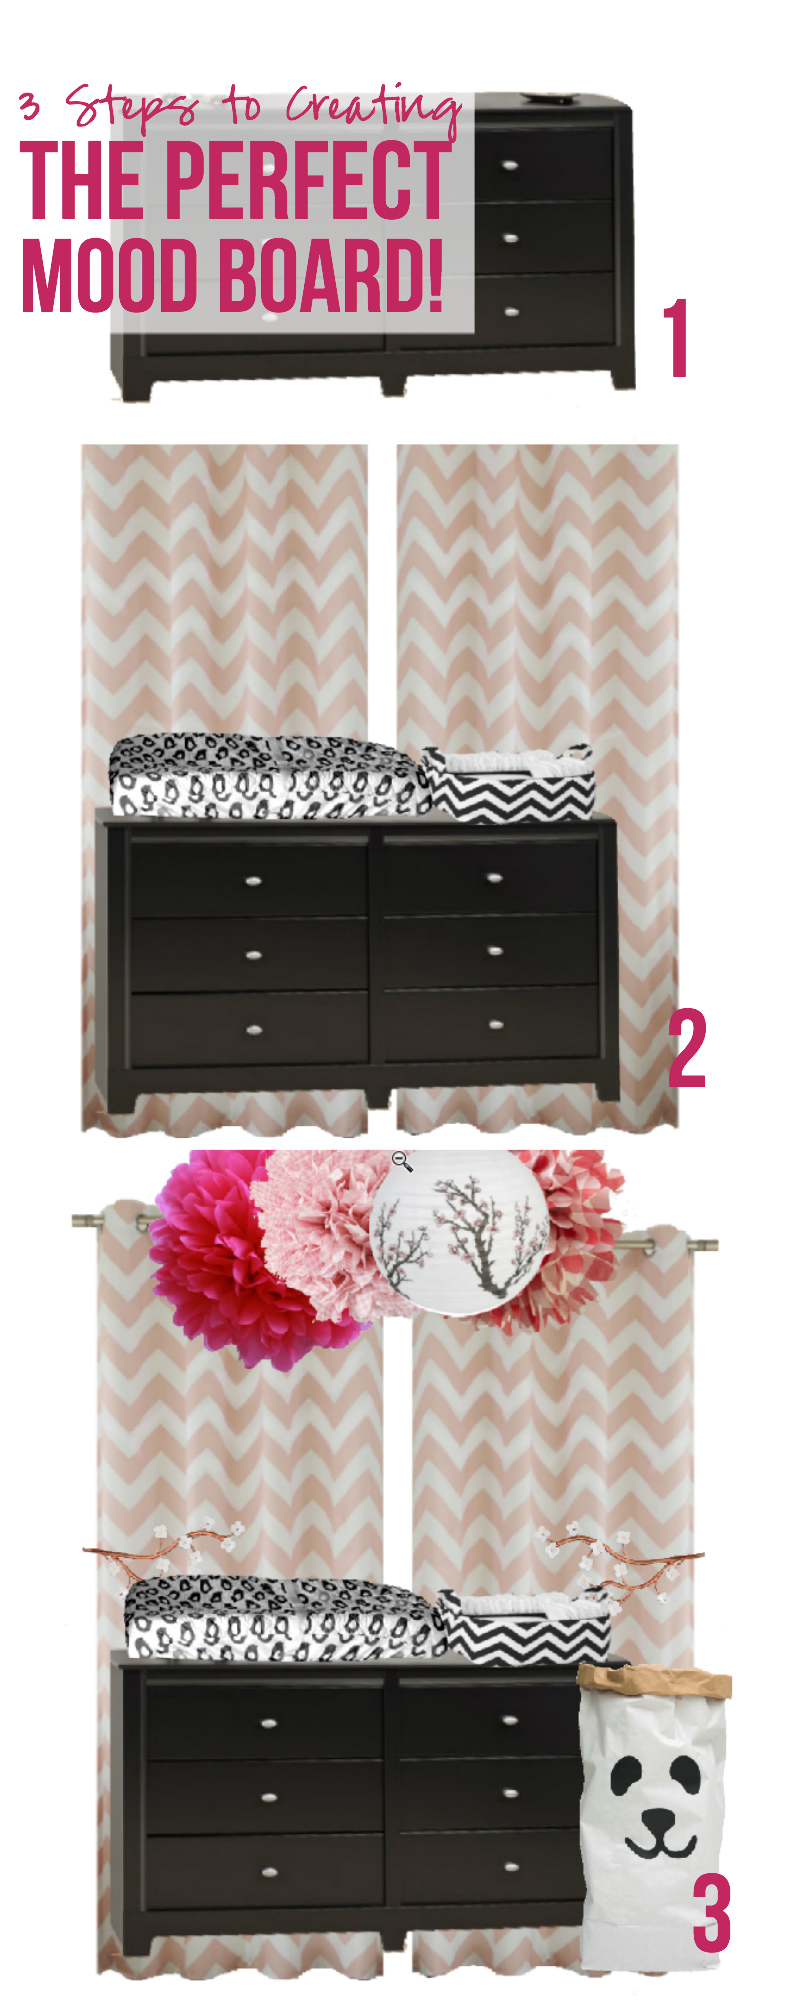
Once all of the big pieces are in place it’s time for my favorite part… the details! Start with the basics: a great rug to anchor the space and curtains to give the room pattern and privacy. Add some wall art… I usually try to pick at least one big statement piece and then add a wall gallery of smaller prints somewhere else in the room. Not sure how to go about finding wall prints or smaller accessories? I recently worked on a Japanese themed nursery for my friend Sam at DIY Just Cuz… her nursery is all about adorable pandas and sweet cherry blossoms. Try searching for your keywords on Pinterest… or Etsy. Etsy has adorable (usually one of a kind) printables that are adorable and oh so easy to print off and pop in a frame! Before my search on Pinterest I never knew there was such a think as a Panda rocking animal… now he’s the star of the nursery!
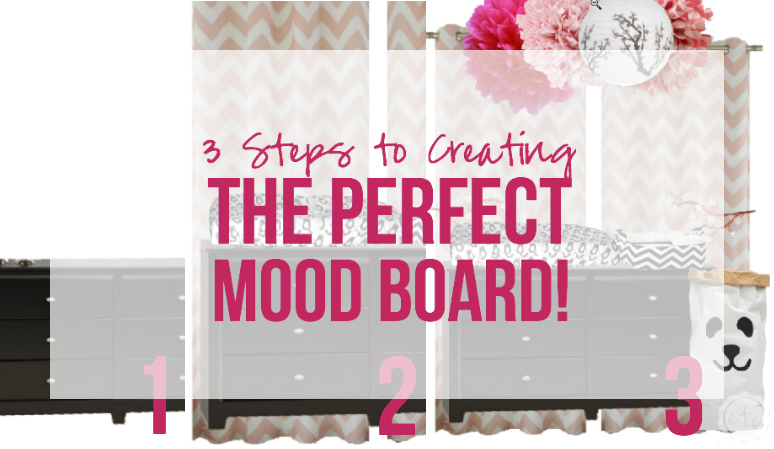
So that’s it! The three steps to creating the perfect mood board!
- Start with the fundamentals: Decide how your room needs to function and what pieces are critical to making it function like you need!
- Think about what you already have vs What you need to buy! Add all the big pieces to your mood board first!
- Once your big pieces are in place add in the details!
Not sure which software to use? Anything that will allow you to add pictures and move them around will work just fine… think Photoshop, PicMonkey or Pixlr. Of course you could always go old school and use a bulletin board with actual push pins… then you can include scraps of fabric or 3-d items with your pictures! Fancy!
If you’ve never created a mood board before don’t worry… they’re so much fun and since you’re working on your own space there really isn’t a wrong way to do it! Include the things you love and you’ll come out smelling like roses! Or whatever flower it is you like… if for some reason you don’t like roses. Anywho… if you’re working on a space and would like a mood board feel free to email me at happilyeverafteretc.com… I love love love putting these together and would love to work on one for you!


[…] 3 Steps to Creating the Perfect Mood Board I love decorating and there’s nothing better than walking into your home and completely loving the space you’re in. Of course creating a space that is well put together doesn’t happen over-night… in fact I firmly believe the best rooms are built over time! That doesn’t mean we throw caution to the wind and spontaneously throw just anything in the space “this chair looks good, hope it works with the drapes!” We need a plan …read more! […]