

King of Christmas did gift this tree to me… all opinions are 100% my own!

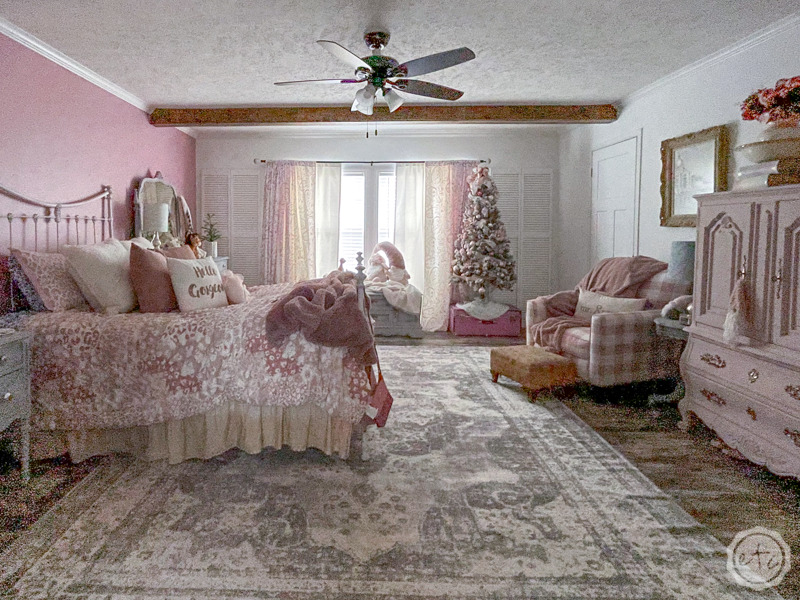
Every once in a while there are wonderful moments where you are able to upgrade something in your life. In this case… I’m upgrading the flocked Christmas tree in my bedroom! I loved this little tree for a long time but at 5.5 feet tall it was a small tree (even when placing it on a trunk for extra height) AND it wasn’t pre-lit.
Which means I had to wind strings of lights up the branches… which is completely doable but not nearly as pretty. Or convenient.
I mean just take a look… it’s a very pretty little tree! And while something bigger isn’t necessary I would like something more functional.
So when King of Christmas reached out to see if I wanted to upgrade my small tree to a big, pretty, flocked, pre-lit one with a remote? I was like… yes, please! Sign me up!
They sent a lovely 7.5′ Rushmore Flock Artificial Christmas Tree… this thing is GORGEOUS. PLUS it’s huge. It’s two feet taller and several feet wider than my old tree. Which is fabulous but means we have a lot more space to fill and so far we have the same garland and ornaments from our smaller tree to work with.
Of course, we could go out and purchase ornaments and fluffy Christmas tree picks… the whole shebang. But I’d rather collect things as we go so let’s start with what we have and add a new diy garland to help fill up some of that space!
Let’s start by putting up the tree!


Step 1: Start with Ribbon
Alright y’all let’s start with the basics: ribbon! I have one roll of large wired ribbon and two rolls of small ribbon for this tree.
Which was almost overwhelming on the small tree but is not nearly enough for a large tree like this. Just look how wide the branches are!
One roll or large ribbon won’t come close to covering the entire tree… but in an effort to NOT go buy lots of ribbon I’m going to do what I can with what I have. So instead of wrapping the ribbon around the trees in long streamers I’m going to cut it into 3 sections and drape them across the front.
This way they’re more spaced out!
Then we can add our skinnier ribbon across the entire tree.
It definitely helps the ribbon to go further but with a neutral ribbon (white on a flocked tree is pretty darn neutral!) it doesn’t give us a big impact… and leaves us with a lot of space to fill.


Step 2: Add your Garland
Now that our ribbon is on the tree let’s add our garland. The original garland on this tree is fairly skinny and looks super cute up close but (once again) isn’t super impactful on the tree.
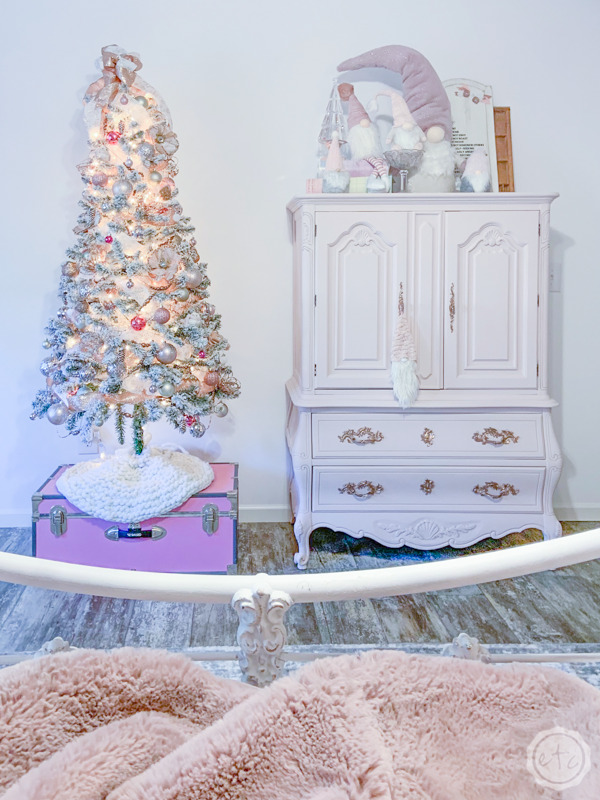
So I decided to go crazy and make a brand new felt garland with my Cricut to take up a bit of space. They turned out super cute and since each little icon is 4.5 inches they definitely help to flll in the gaps between the branches.
You can check out the tutorial for the entire felt garland here but I absolutely love how it fills in the tree. It was about $25 for 8 garlands (with 6 little Christmas icons on each) and they’re really visible on the tree.
They’re the only new thing I added to the tree so everything else was moved over from our smaller 5.5 foot tree… these babies really helped tie everything together!
Plus you can make the entire garland in colors that fit your tree and decor… if pink and cream don’t fit your idea of Christmas!
You’ll want one garland for every foot of tree so for our 7.5 foot tree I made 8 new felt garlands!


Step 3: Ornaments
Now that the base of the tree is finished let’s add our ornaments! In the future I’d like to add more large scale ornaments into the tree but for now these larger glass orbs work nicely.
As with any tree I started with the larger ornaments on the inside of the tree and then worked my way out to adding smaller ornaments perched on the tips of the branches.
I love little birds and butterflies that can sit on top of the branches… and pine cones that look like they’re naturally nestled into the branches.


And there we have it! An upgrade that works! I love this new tree and how the garland and ornaments work spread out on the branches.
It’s a beautiful tree and I am so spoiled with the new remote control. I can’t wait to add new pieces to it over the years.
This baby may just have to switch to the living room! It definitely has main tree energy.


Leave a Reply