


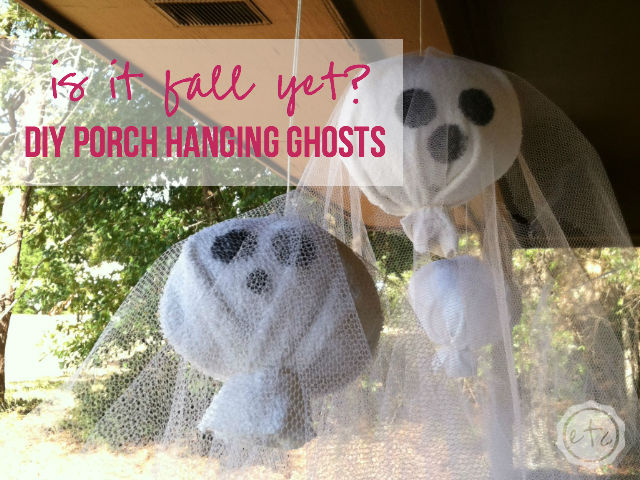
Although we haven’t entered the month of October yet, it is definitely Fall! And you know what that means…. Fall decorating! Now I typically don’t decorate for Halloween (besides a pumpkin or two) but this year I finally have a house. Not to mention I saw the cutest little hanging ghosts on Pinterest the other day, and just couldn’t resist making a set of my own!

The hubby and I hit Wal-Mart last night to buy fabric for these little ghosty’s… he really is a saint since I decided we HAD to go at 12:31 in the morning! Hey when a girl wants to create… 🙂
We bought four yards of netting![]() at $0.97, so about $4 total. Then we moved on to Styrofoam balls, unfortunately they were too expensive (about $20 for a set of three). So I decided to do what any typical girl would… make her own!
at $0.97, so about $4 total. Then we moved on to Styrofoam balls, unfortunately they were too expensive (about $20 for a set of three). So I decided to do what any typical girl would… make her own!
I already had stuffing![]() at home so I bought three white hand towels
at home so I bought three white hand towels![]() for $0.99 each. That means I spent a grand total of $7 to make a set of three ghosty’s, totally worth it!
for $0.99 each. That means I spent a grand total of $7 to make a set of three ghosty’s, totally worth it!

Supplies:
4 yards betting/tuelle/cheesecloth![]() white see through fabric
white see through fabric
3 white hand towels![]()
STUFFING![]() (I think a boatload of plastic bags would also work for stuffing if you want to get really crafty 😉 )
(I think a boatload of plastic bags would also work for stuffing if you want to get really crafty 😉 )
Twine
Stapler
Sharpie
Scissors

Step 1:
Go ahead and spread the netting out and cut three pieces. I made sure to leave one slightly longer than other two so that the largest ghosty had a decent amount of netting.

Step 2:
Next fill the white bags with stuffing![]() … you want enough so that when the bag squishes he still looks full. Remember stuffing is fluffy! Then I cut the handles off the plastic bag (so that they wouldn’t hang down like the tail of a kite) and used twine to tie the bottom off.
… you want enough so that when the bag squishes he still looks full. Remember stuffing is fluffy! Then I cut the handles off the plastic bag (so that they wouldn’t hang down like the tail of a kite) and used twine to tie the bottom off.
After a little finessing the first ghosty looked more round and less like a plastic bag stuffed with stuffing!


Step 3:
Now go ahead and wrap the hand-towel around the ghosty’s entire head, I wanted a distinctive round shape so I was very careful to lay the fabric just right.
I was afraid that the fabric might shift in the process (but I didn’t want to get out a needle and thread) so I stapled him shut! Now all you have to do is wrap the sides like a present (I stapled these for added strength) and tie the whole thing off at the bottom.
When you’re done you should have a distinctive round shape.

Step 4:
Alright ladies (and gents) at this point you can get creative! I decided I wanted a traditional round shape for my ghosty’s eyes and mouth, but you could get a little whacky with the shapes here… whatever floats your boat!
I simply grabbed a sharpie and drew his face on! Easy peasy lemon squeezy! Next I secured a string to the top of his head (again with a staple!) so that I had a way to hang him on my front deck.

Step 5:
The final step is to thread your string through the center of your netting![]() . Once it drapes properly you’re done! You can either leave him be or add some rips and tears in the netting for a “spooky” feel. I decided to tear mine up, I mean really these little ghosty’s are quite spooky!
. Once it drapes properly you’re done! You can either leave him be or add some rips and tears in the netting for a “spooky” feel. I decided to tear mine up, I mean really these little ghosty’s are quite spooky!


This post contains affiliate links to helpful products to complete this project!
I just love how they look on the front porch, twisting and swaying in the wind! I still need to add some pumpkins but I think these guys are going to steal the show! And to think it only took $7 dollars and about half an hour!


I’m going to try these, however, using fishing line to hang…maybe it will really look like they are suspended in air! Thanks for the tutorial!