• House Tour
    • Reveals
  • About
    • Smith Life
    • Disclosure and Privacy Policy
      • Terms and Conditions
      • Store Affiliates
  • Contact Me
    • Want a Button?
  • Shop
    • Floral Printable Planners
    • Paint eBooks and Packages
    • Wedding Binders & Extra Printables!
    • Planner Bundles
    • Planner Accessories
    • Home Decor Printables!
    • Cart
    • Bloglovin
    • Facebook
    • Instagram
    • Pinterest
    • Twitter
    • YouTube

Happily Ever After, Etc.

Creating Our Own Fairytale

  • Happily Ever After, Etc.
  • Home
  • Home Decor
    • My Home
    • Paint
    • Before and After
    • Tablescapes
    • Mood Boards
    • Furniture
  • DIY & Crafts
    • New to Cricut – Start Here
    • Cricut Projects
    • Resin
    • Scrapbooking
  • Organization & Planning
    • Cricut
    • Organization
    • Planner
  • Wedding
    • Cricut Wedding Projects
    • Free Wedding Binder
    • Bride Bag- The Ultimate Wedding Planner

How to Add Frosted Privacy Window Film to your Front Door

This is a sponsored post for Wagner but all opinions are 100% mine!

Hey y'all,

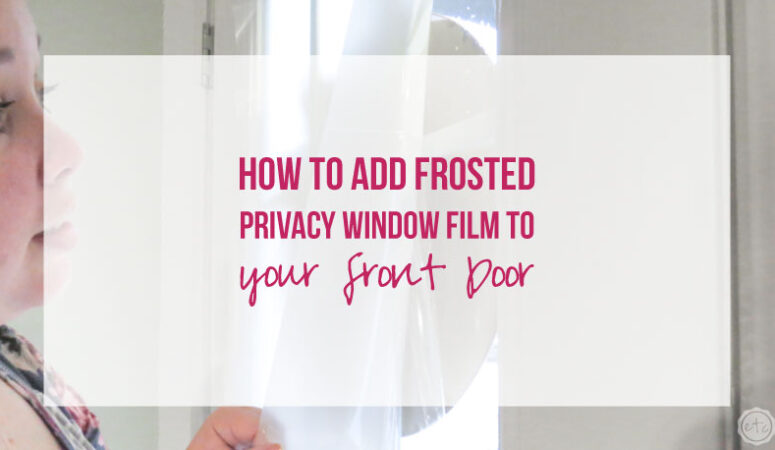
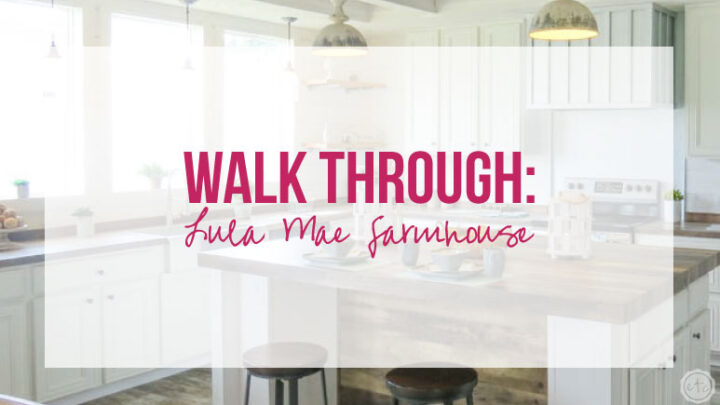
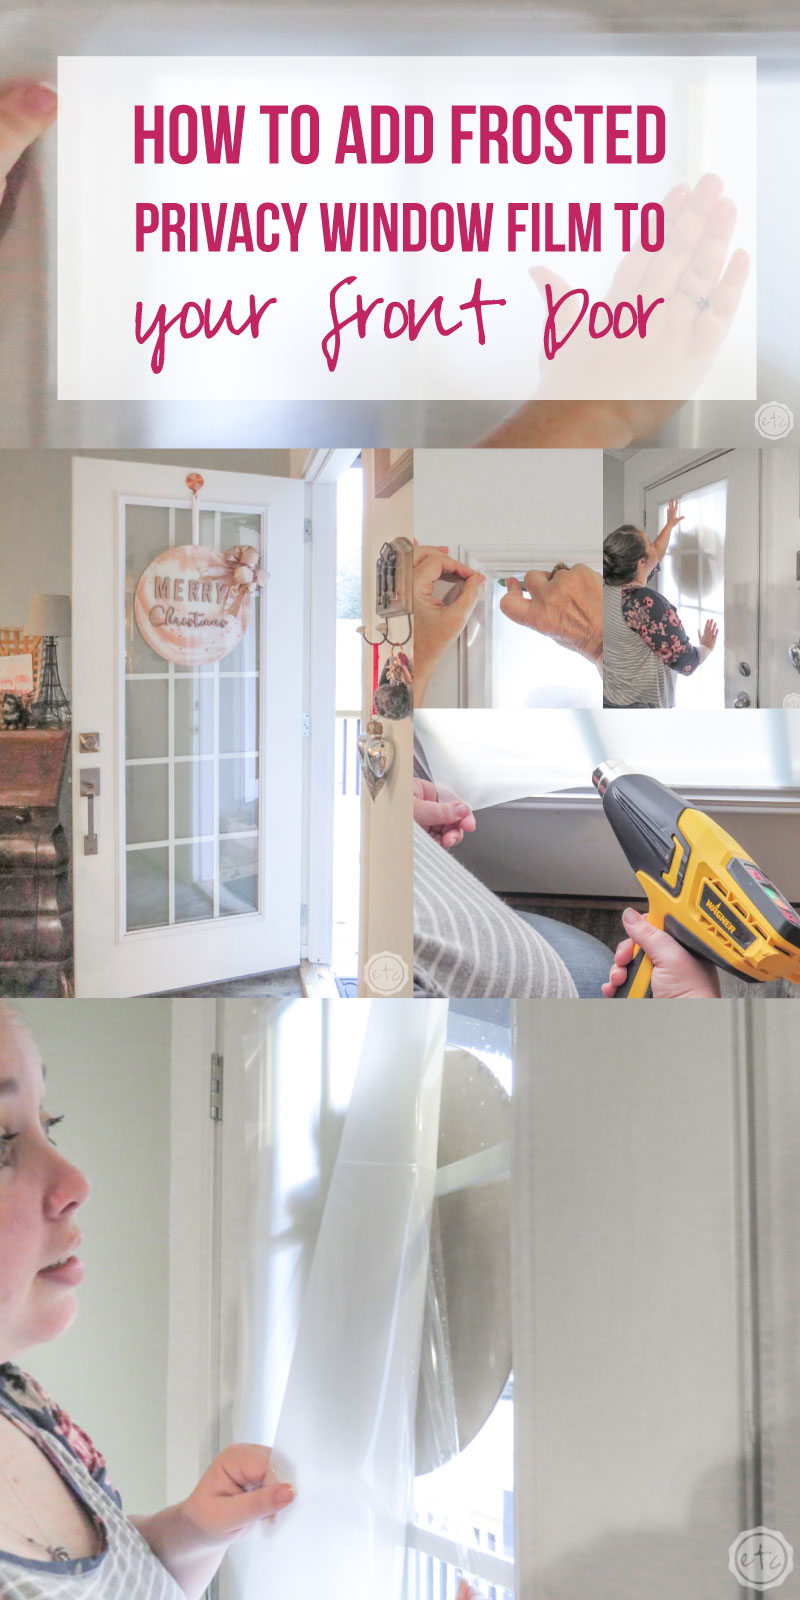
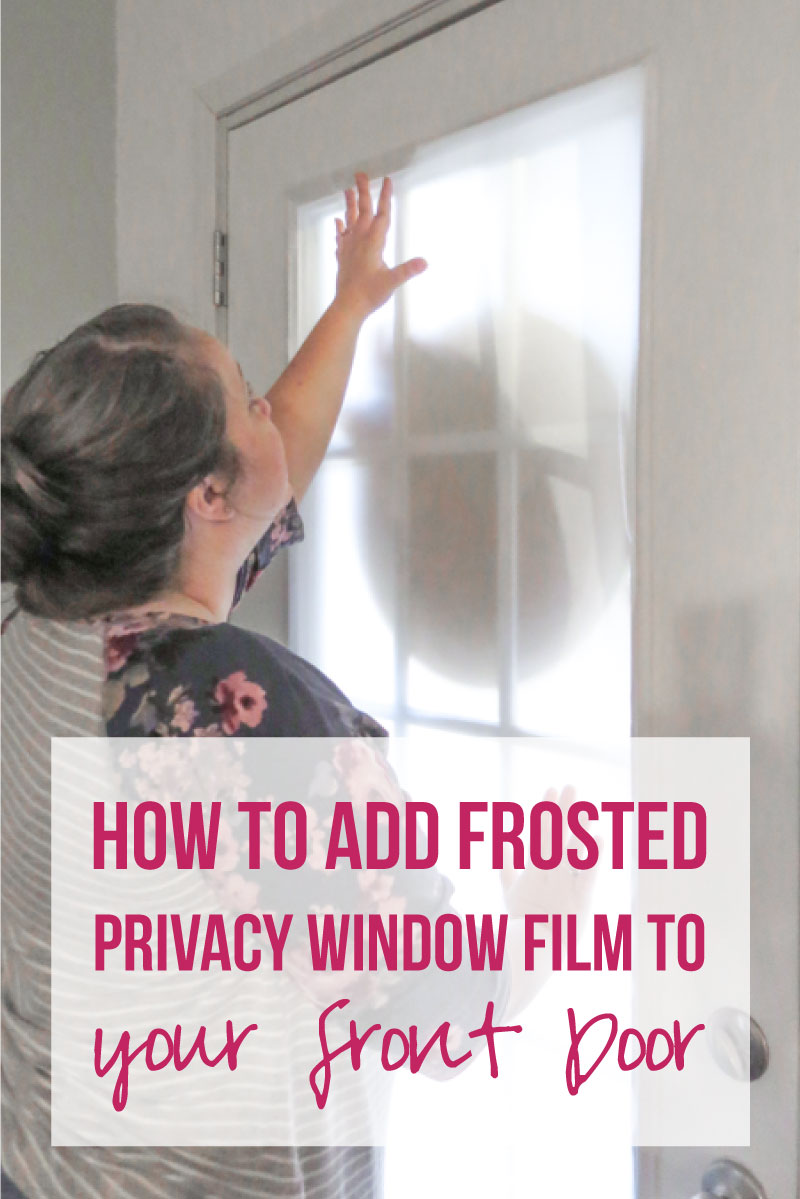
Ready for a quick and easy project? When I moved into my new house (my little Lula Mae Farmhouse) I switched the standard half window doors for beautiful 15 panel front doors… and I love them. They let in so much light and are elegant while still going with the farmhouse details on my house BUT with all the pretty light comes all the pretty glass.

Which means people can look directly into my house via the front door. Which isn’t great when I’m sitting on my couch and someone comes to the front door. Especially late at night.

So I decided to use a bit of window film so that light can still stream in through the doors but no one can look directly inside.

Which is the goal!

Of course, even if you don’t have brand new doors this privacy film will work (just make sure to give your current door a cleaning first!). You can add this film to windows too… really any glass that you want to frost.

But if your doors are new (like mine!) you’ll need to remove those pesky stickers first… don’t worry I’ll show you how.

And the best part? The film is 100% removable… so it’s renter friendly. I’ll even walk you through the easiest way to remove this film from your doors (and share with you my secret tip to taking the film off the quick and easy way.)

Let’s get started.

Supplies:

  • Furno Heat Gun
  • Frosted Privacy Window Film
  • Window Film Application Kit
  • Window Cleaner
  • Paper Towels
  • Scissors

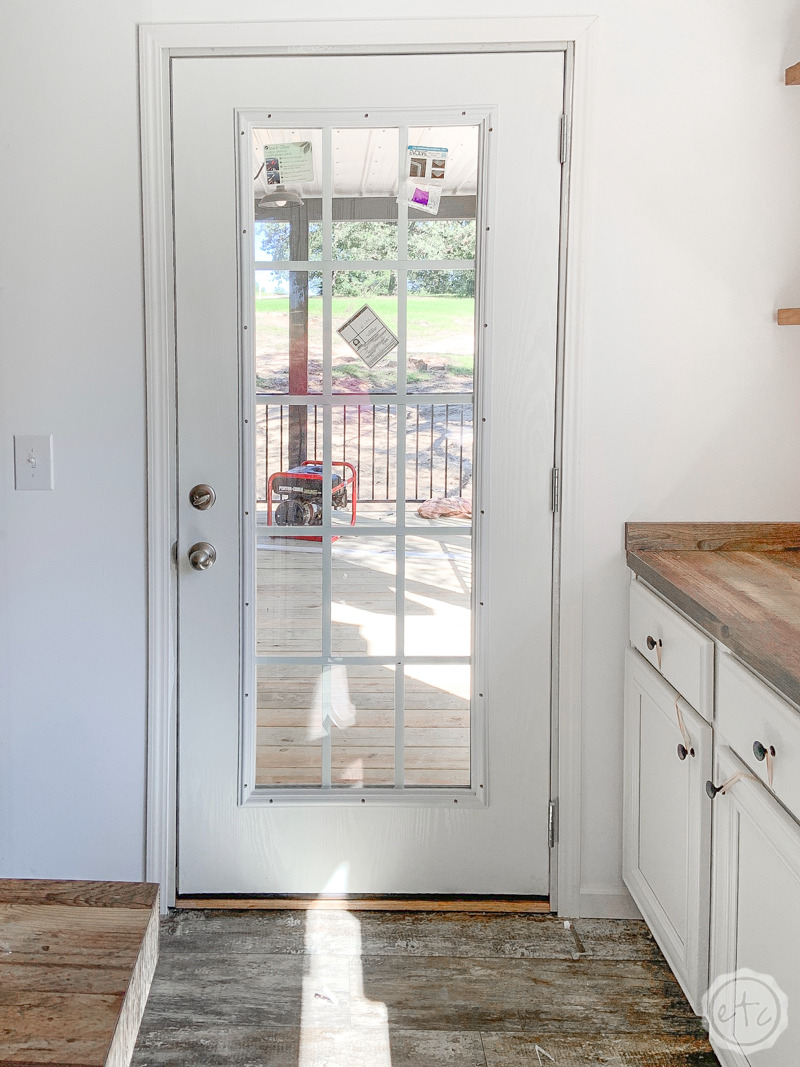
Step 1: Remove Any Stickers

Alright y’all… before we can get started adding any window film we need to take alllll the stickers off and clean the glass. Luckily it’s a pretty easy process.

My new house had 1-2 stickers on each and every window… and about 3-4 on the doors. So I had quite a few stickers to remove!

Some of those stickers removed easily… just came off clean, no residue. Angel stickers.

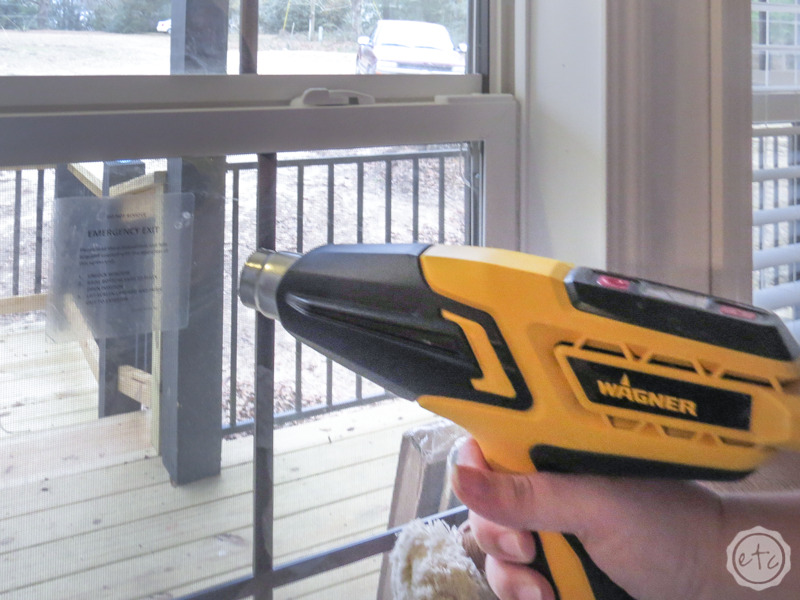
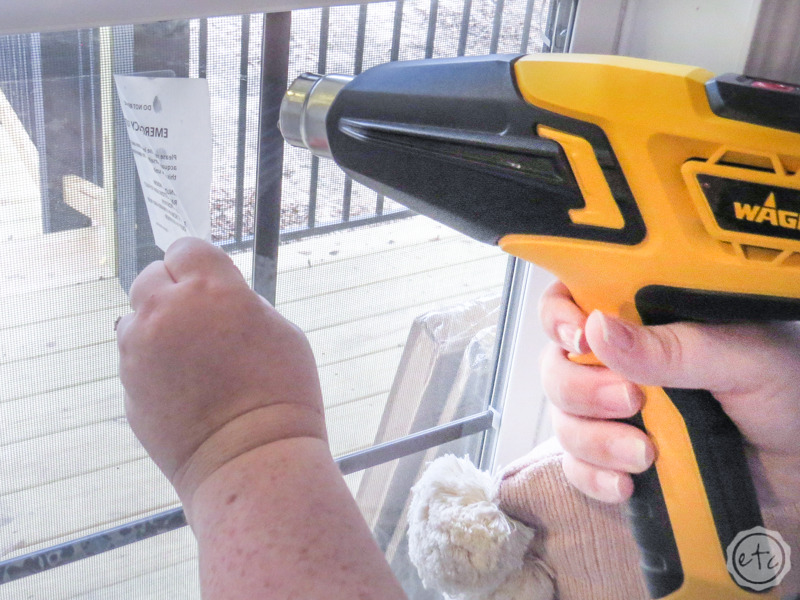
We like those… but most of our stickers were not angel stickers… they were devil stickers. They tried sticking to the glass long after we wanted them too. In this case you have a few options: goo be gone or a heat gun. Unfortunately goo be gone likes to run down the glass so it’s not ideal here… but a heat gun is perfect!

It heats up the adhesive enough that you can pull the stickers off easily and it doesn’t leave any stickiness behind! Score!

I have a few heat guns but I like to use my Wagner furno heat gun for home projects since it’s bigger and can cover more surface area at one time. Plus it has easy to use heat settings on top so if it starts getting toooo hot I can easily turn it town and not crack a window.

Just make sure to heat up the sticker with slow, circular motions and don’t hold the heat gun in one place for too long so you don’t hurt your window. I like to angle my heat gun so the heat goes over the sticker but isn’t aimed directly at the window… too much heat on your glass for a long time can definitely crack the glass.

Which is dangerous.

And expensive.

Don’t be scared though, the heat gun is easy to use and the stickers come off quickly so that you’re no where near the long exposure time of cracking the glass.

Once all the stickers are off we can move on!

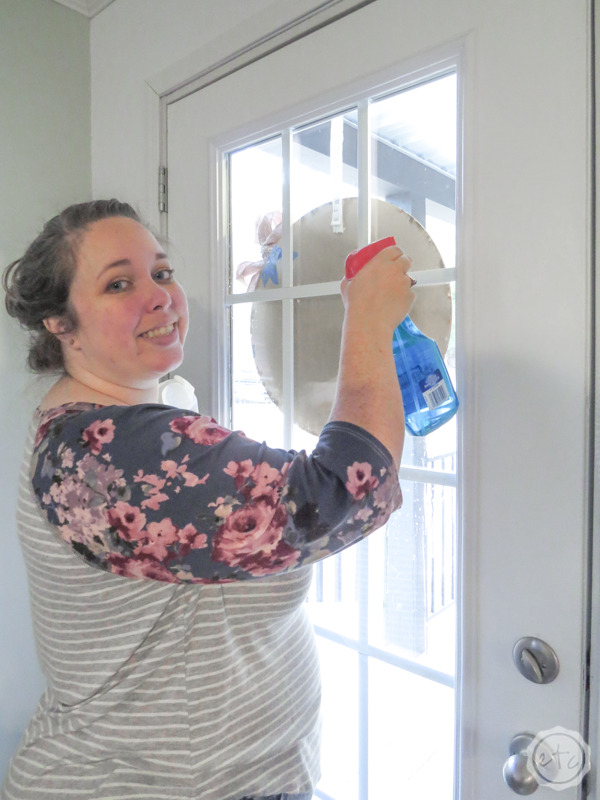
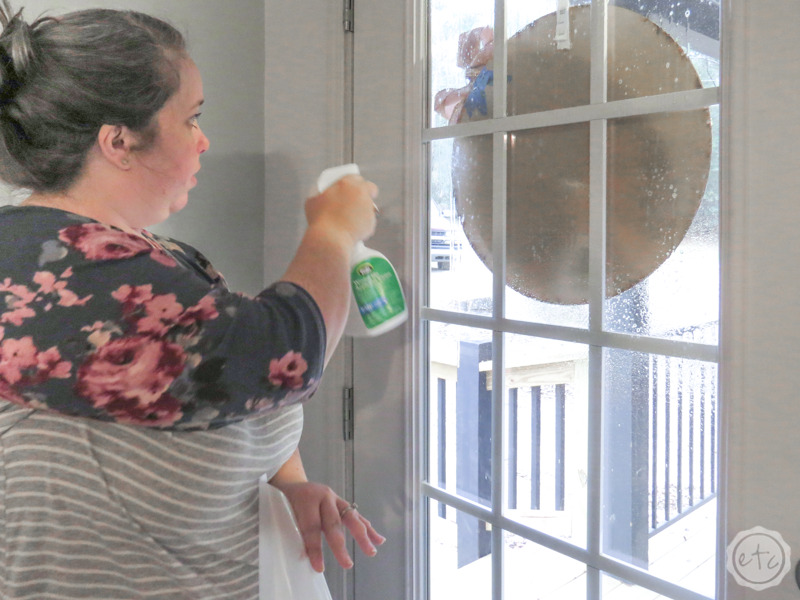
Step 2: Clean the Glass

Now that our door/window is sticker free it’s time to clean that bad boy! Any lint or adhesive that is left on the glass will be visible after you apply the window film (so maybe put fluffy and fido outside for a minute… since dog hair turned out to be the number one problem in my house).

Make sure to wipe down the entire door with a bit of glass cleaner and inspect every inch to make sure there aren’t any smudges or bits of gunk left. Once you’re sure you have all (most) of the yuck we’ll move on to the next step.

Step 3: Cut Your Window Film

Now it’s time for the film!

Go ahead and break that bad boy out of the box and measure it out! This doesn’t have to be a super accurate step since it’s easier to use the cutting tool to cut the film to size once it’s applied to the window.

Instead hold the film up to the window and then cut it with about an inch of film on either side of the glass. In my case I tried to cut it about even with the molding around the glass… that way I didn’t have too much wasted material but I had enough that it wasn’t difficult to work with.

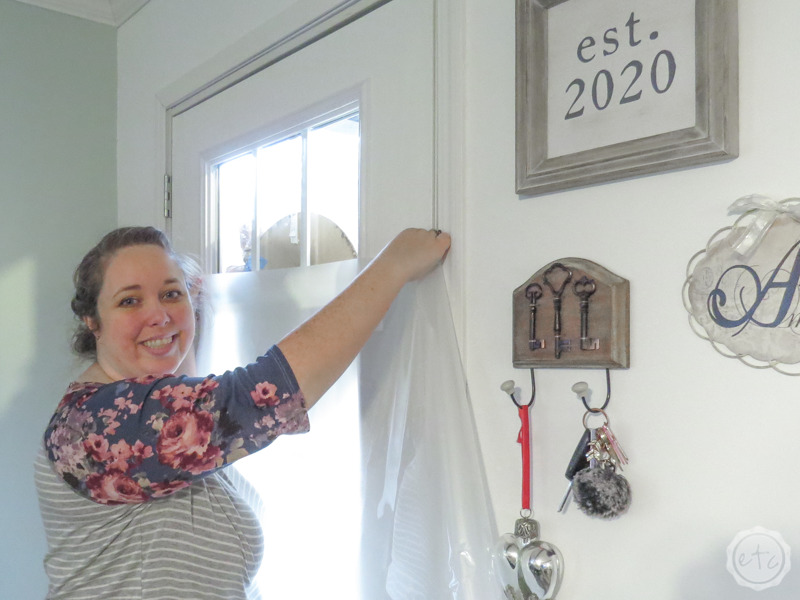
Step 4: Apply the Window Film

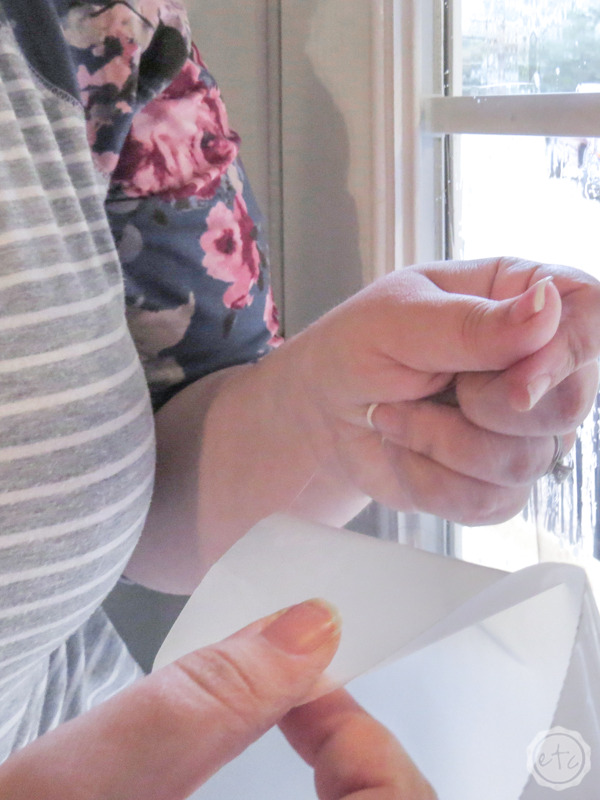
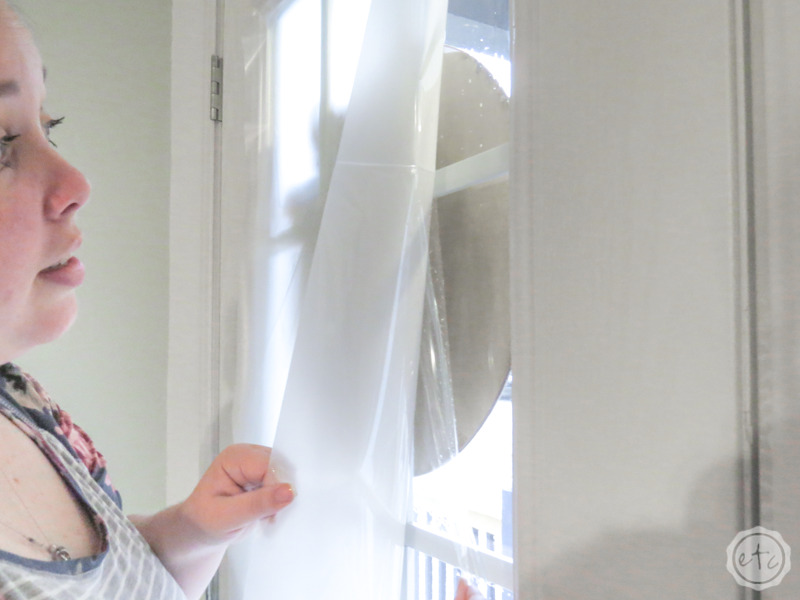
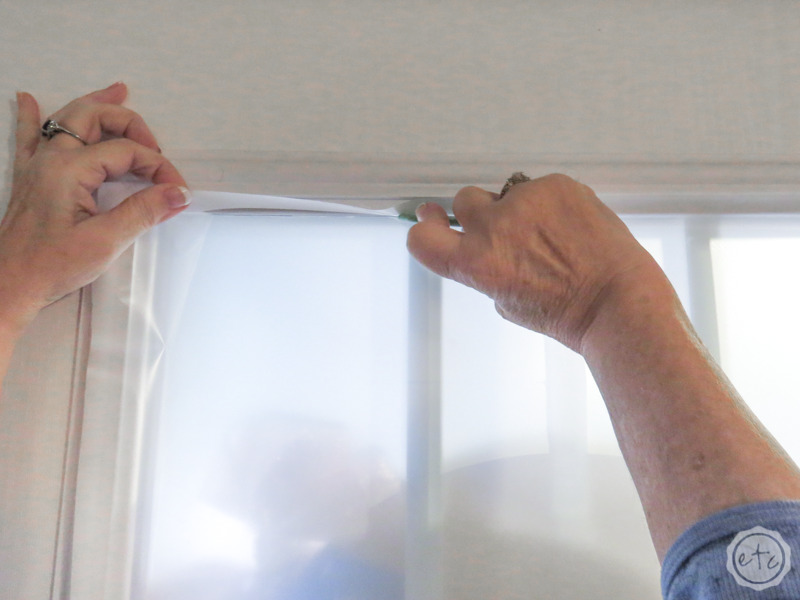
Now it’s time for the fun stuff… applying the window film. Start by peeling back a bit of the clear plastic that’s covering the adhesive on your window film.

Peeling back the corner of this darn film is the hardest part of the entire project… if you can accomplish this step you’re good to go. The rest is downhill from here.

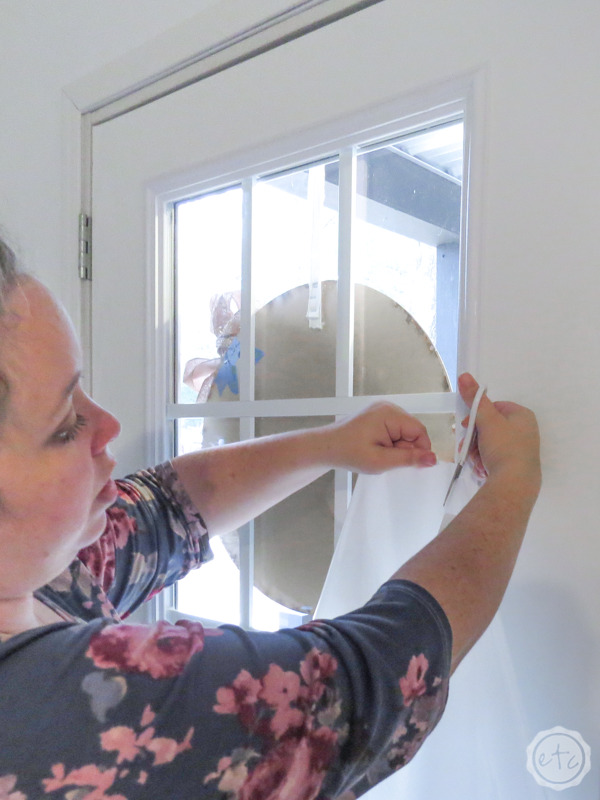
Once you have a corner free go ahead and grab your application spray solution bottle from the kit and spray the entire piece of glass… liberally…. with the spray solution.

Then peel down the first foot of clear plastic from the adhesive film and place the adhesive film on the window. You want the adhesive (sticky side) on the glass with the solution.

So you should have a sandwich of glass, solution, adhesive side of the film.

Got it?

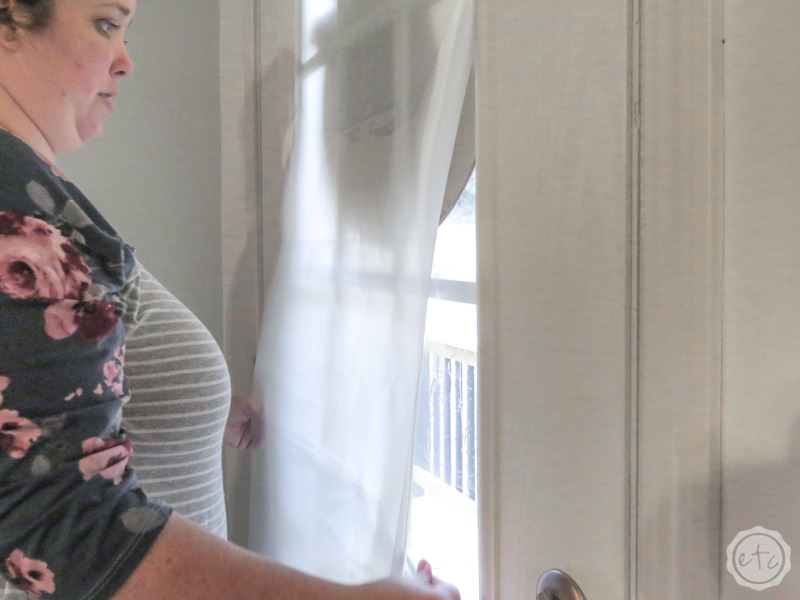
Place the film on the door so that it looks centered with enough overhang on both sides and the top. Now put your hand in the middle of the film and smooth out the film all the way to the right and all the way to the left.

We’ll come back with the scraper in the next step and smooth out the bubbles so don’t worry about getting it perfect… just smooth it onto the door for now.

Once the top is smoothed into place go ahead and work your way down the door… pull another foot of the clear plastic off the back of the film and then smooth the film into place.

Then do another foot!

Once you’ve reached the bottom and have all of the clear plastic off the film we’ll move on to the next step.

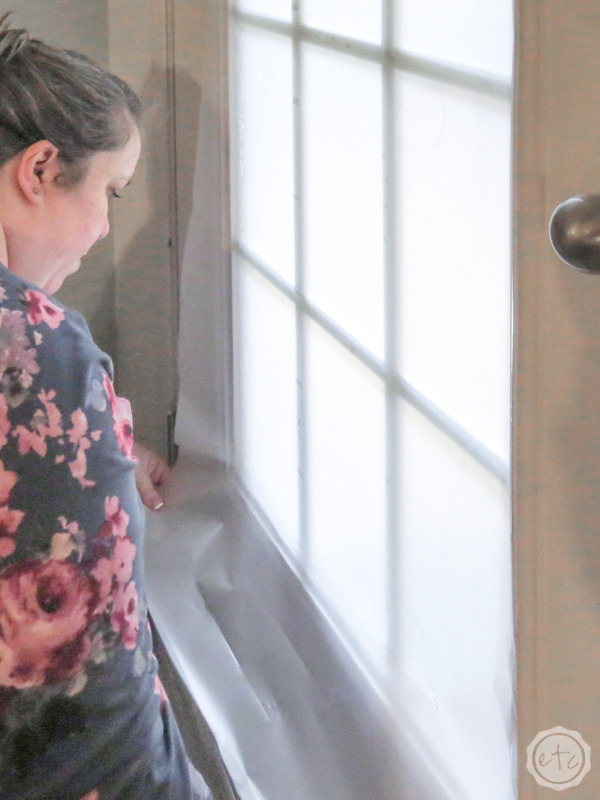
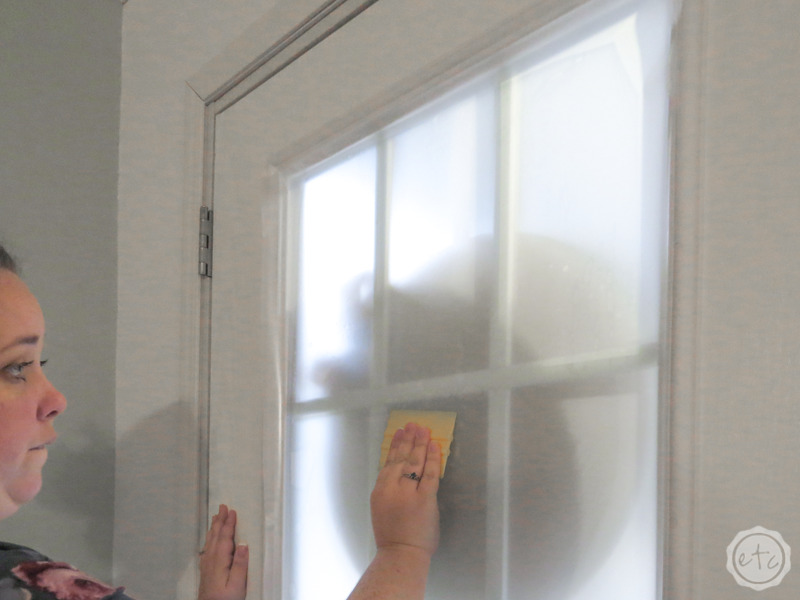
Step 5: Scrape all the Bubbles Out!

Ready for the fun part? Scraping! Take the little yellow scraper and push the film onto the door.

As you scrape you’ll notice alllll the bubbles being smoothed out. That’s good! Keep scraping them off the sides and down to the bottom of the window.

The more you scrape the more you’ll notice the solution you sprayed on the door coming out the sides of the film and down at the bottom. As far as I can tell this won’t hurt the floor but I put down an old towel to catch the run off just in case.

Go ahead and scrape the whole door corner to corner.

If you come to a spot that has too many bubbles or just won’t smooth out you can peel back the film a bit, add more solution and smooth it out again. BUT this trick works less and less as time moves on so only do it if you need to.

Done scraping? Let’s cut this baby to size.

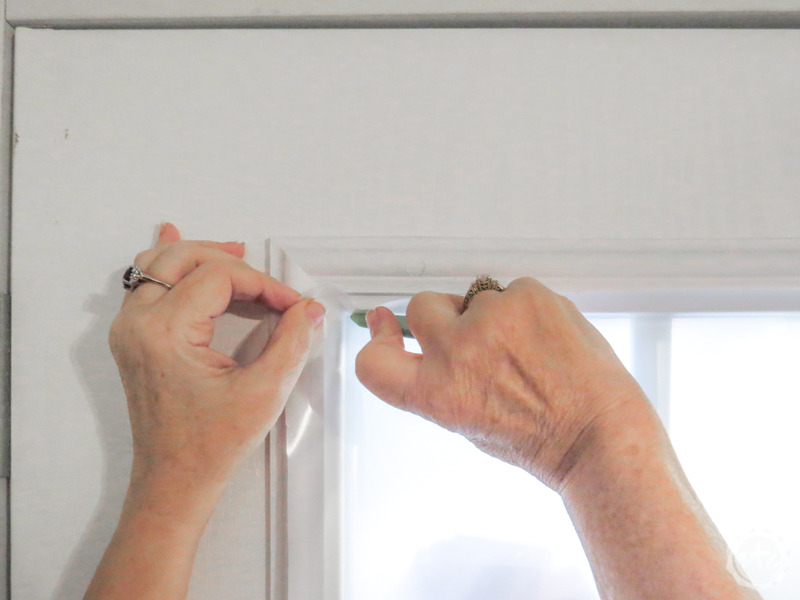
Step 6: Cut the Window Film

We’re finally going to cut the film to size!

Grab the little green cutting tool and carefully start in one corner… then slice right along the edge all the way to the next corner.

Work your way alllllll the way around the frame making sure to push the film into the corners and keep the film straight as you go.

Perfect darling.

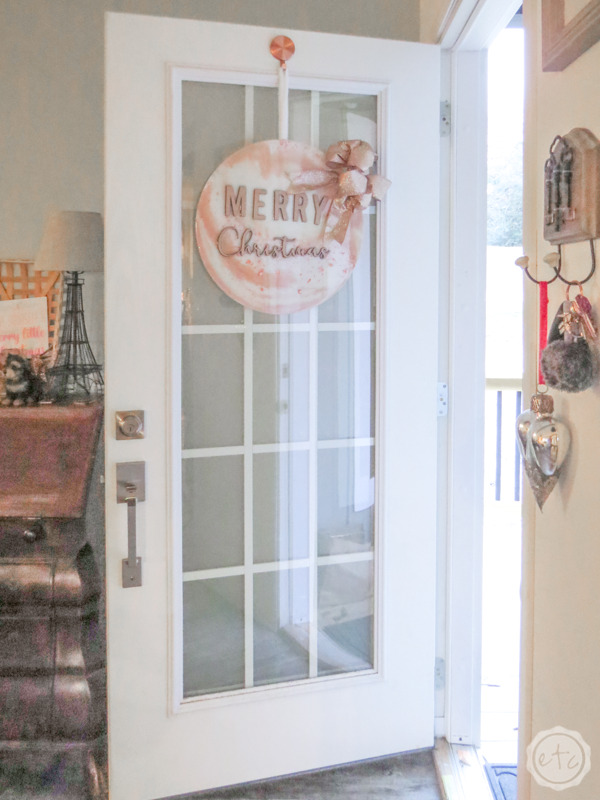
Now you’re done! You can hang out inside with alllll the light and none of your neighbors peering in the windows! This film is pretty good at keeping the eyeballs out… Mom and I did a test and neither one of us could see inside from the porch.

Success.

Get Your FREE Wedding Binder

Trying to plan your perfect wedding?

Here's 42 FREE printables to help you get organized!

Success! Now check your email to confirm your subscription.

There was an error submitting your subscription. Please try again.

Powered by ConvertKit
You made it through the entire post? That means you're one of my new favorite people! I'd love to be friends and see what else you would like to read about! Leave me a comment and then sign up for your very own FREE paint planner.... so that you can keep track of every single paint color with ease!
Welcome back! I'd love to be friends and see what else you would like to read about! Leave me a comment and then sign up for your very own FREE paint planner.... so that you can keep track of every single paint color with ease!

Show me some LOVE y'all:

  • Facebook
  • Pinterest
  • Twitter
  • Email

Related

«
»

DIY & Crafts 0

Leave a Reply Cancel reply

Your email address will not be published. Required fields are marked *

sidebar betsy I'm Betsy, Home Decor Enthusiast, Yorkie Mama, Crafter, Blogger, Picky Eater, Chief Mess Maker, Antique Hoarder and Graphic Designer. You can generally find me working on (attacking with a paintbrush) the 3 bed, 2 bath home we are currently renting! Our home might not be perfect but it is ours & if you hang out long enough you'll see that what we lack in know-how we make up for in passion!
Shop My Craft Room

Shop My Home

Featured Articles

15 Fabulous Ideas to Organize your Laundry Room
25 FREE Printables For Your Home!
What to do with EXTRA Paint with Happily Ever After Etc
10 Ways to Make Your Bed EXTRA Comfy with Happily Ever After Etc.
Ready to Pick your Perfect Paint Color? We'll help you with our 6 Day FREE E-Course

Hey y’all,

Profile

I'm Betsy, Home Decor Enthusiast, Yorkie Mama, Picky Eater, Chief Mess Maker, & Graphic Designer...

A Little Note!

Many of the links on Happily Ever After, Etc. are affiliate links. If you purchase a product after clicking an affiliate link, I receive a small percentage of the sale for referring you, at zero cost to you! How awesome is that? Purchasing through affiliate links is an easy, painless way to help out your favorite bloggers. Thank you so much for your continued love and support! Read the full disclosure here!

Instagram

The number one question people ask when they watch The number one question people ask when they watch my new home tour on YouTube? Why is there so much clutter... um excuse me I like stuff! The second question? How did you frost the doors? Don’t worry... I wrote out the whole process, check out the step by step tutorial on the blog!
With Christmas fast approaching I’m having secon With Christmas fast approaching I’m having second thoughts... about taking down my holiday decorations! I absolutely love all the blush and rose gold this year and think I might have to add more pink to my every day decor. Until then maybe it will just stay Christmas at the Smith house! Tutorials for both the “Merry Christmas” resin sign and the “Dear Santa” Cricut sign are in my profile! #pinkchristmas #pinkchristmastree #pinkchristmasdecor
Well y’all Christmas is coming up quick... which Well y’all Christmas is coming up quick... which means I need to get a move on with all that wrapping! I got a jump start this morning after whipping up a few little resin light bulbs! Check out the full tutorial over on the blog if you’d like to wrap your presents with a few resin goodies this year... and tell me in the comments below. Are you finished wrapping or (like me) are you still getting started? #pinkchristmas #pinkchristmasdecor #resinchristmas #giftwrappingideas
Ready for another fun and easy resin project? Thes Ready for another fun and easy resin project? These little Christmas trees are the perfect beginner level project so if you’ve never done resin before don’t let it intimidate you!! Grab your heat gun and jump in... I’ll walk you through it! Check out the full blog post for these little guys on the blog (link in profile!)
If you haven’t joined Michelle at @weekendcraft If you haven’t joined Michelle at @weekendcraft SVG membership then WHAT ARE YOU WAITING FOR?! I am obsessed with all the cute svg’s and y’all she is doing a live craft night every month to walk you through making one of her designs... and the first craft night is tomorrow! She’ll be making this “Merry everything and Happy always” SVG and it’s so cute! You don’t want to miss it! See you there! 

(Also who noticed the sneak peek at my new kitchen?!)

#cricutsvgfiles #christmassvg #cricutsled
Well y’all I’m getting this close to unpacked Well y’all I’m getting this close to unpacked in my new house!! And since I’m a blogger Christmas is going up! So here’s the question... do you want a 1 month house update or do you want to wait for the Christmas tour? #lulamaefarmhouse #rosegoldchristmastree #newhouse
Well it’s still a work in progress but I finally Well it’s still a work in progress but I finally have a house!! They have to put it together and do all the detailing before I get keys... but we’re in the end game now! Check out my stories for a sneak peek at the moving process... full YouTube video coming soon!
#ad how amazing did these little fall coasters tur #ad how amazing did these little fall coasters turn out?! Plus I absolutely love the matching tray! The best part? This is such a quick and easy resin project... a silicone mold, a little resin and your trusty heat gun and I promise you can make this baby!! Link in profile for the tutorial!! #fallresin #resinforbeginners #cheetahprint
Okay... is it bad if you just want to make coaster Okay... is it bad if you just want to make coasters in the same mold with the same technique but different colors?? They turn out soo differently! Just a sneak peek of my fall coasters and the blush ones I made last year!
Happy #nationaldogday to the fur babies that are ( Happy #nationaldogday to the fur babies that are (literally) behind (beside... or underneath!) all Of my projects! These sweet little cuddle muffins make everything better 😊🐶😘
GIVEAWAY CLOSED Our winner is @kamikvega Check you GIVEAWAY CLOSED
Our winner is @kamikvega Check your inbox girl, this little machine is headed your way! Thanks to everyone who participated... I can’t wait to see where we go from here!

🥳📦🥳 GIVEAWAY🥳📦🥳
If you have loved all of the Cricut projects I make here is your chance to win a Cricut Joy of your very own! If you’re ready for a little craftiness (maybe a little time to relax) then this giveaway is for you! I’m teaming up with a few of my cavities crafty bloggers so that one of you can win your very own mini crafting machine. Good Luck!!!!

TO ENTER GIVEAWAY:
1.) Follow
@creativeramblings 
@weekendcraft 
@craftylumberjacks 
@this.is.tisa 
@justcallmehomegirl 
@happilyeverafteretc
@lovebird_heartworks 
2.) Like this post
3.) Tag a friend in the comments.
.
.
.
Hurry! Giveaway ends Saturday 8/29/20 at 11:59PM PST. Winner will be notified via Direct Message. Share or tag a friend who'd love to win a Cricut. .
.
.
This contest is in no way affiliated with or sponsored by Instagram or Cricut. To enter you must have a U.S shipping address.
A little peek into the fun summery Tablescape I pu A little peek into the fun summery Tablescape I put together for a little garden party! Want to check out the full table? Wondering where to find all the pieces... click the link in my profile for all the details!
#ad Did you know you can put infusible ink onto al #ad Did you know you can put infusible ink onto aluminum? It's sooooo simple... honestly it's one of the easiest projects I've ever done. Even if you've never used your Cricut before you. can. do. this. I'll show you how every step of the way! Follow along with the full tutorial video over on YouTube! The best part? These little aluminum signs look amazing as part of a larger project! Check out how I added mine to a larger resin wave project on the last slide! @officialcricut #cricutcreated https://lnk2.io/wvMllZf
Okay so It’s no secret that I’ve been obsessed Okay so It’s no secret that I’ve been obsessed with resin for a while now but this week I’ve been playing around with resin waves! Including this tiny resin sea shell! Check out the link in my profile for the full tutorial!
After a lot of struggle, loss and frustration I am After a lot of struggle, loss and frustration I am finally dotting the i’s and crossing the t’s on my next chapter. Yesterday I went and signed the million and one papers to close on my new house! I cannot wait to share the moving (and decorating) process with all of you... next step: keys! #firsttimehomebuyer #newhouse
Load More... Follow on Instagram

Copyright © 2021 · Darling theme by Restored 316

Copyright © 2021 · Darling Theme on Genesis Framework · WordPress · Log in · Privacy Policy

loading Cancel
Post was not sent - check your email addresses!
Email check failed, please try again
Sorry, your blog cannot share posts by email.